Installation
To install the AutoCC MIDI FX Script, unzip the downloaded package and move the file named 441K AutoCC.pst to the following folder. You will have to create the Scripter folder if it doesn’t already exist.
~/Music/Audio Music Apps/Plug-In Settings/Scripter
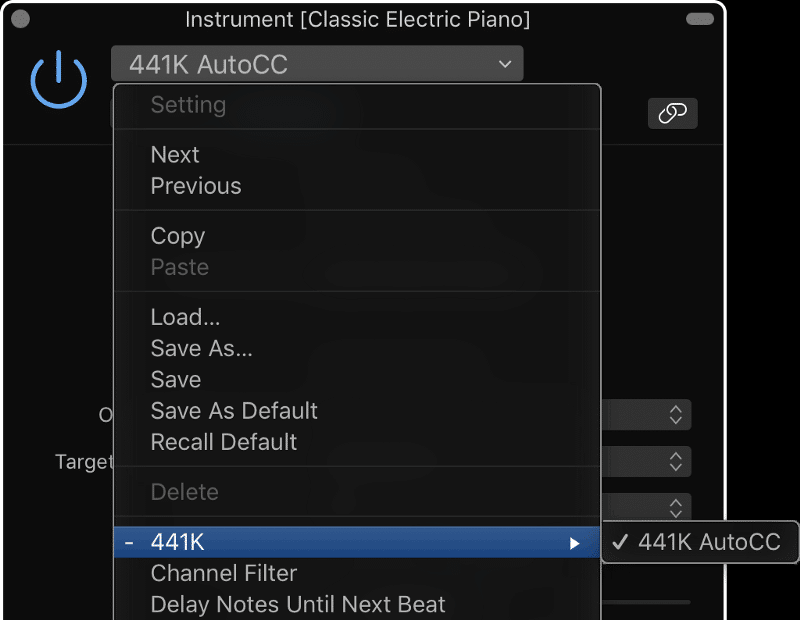
After installation, AutoCC can be found in MainStage 3’s Scripter MIDI FX plugin dropdown menu.
Usage
Before AutoCC can be used in MainStage 3, a virtual MIDI port must be created with MacOS’ MIDI IAC driver. To create a virtual MIDI port, navigate to ~/Applications/Utilities/Audio MIDI Setup, and press Cmd-6 to bring up the MIDI Studio window.
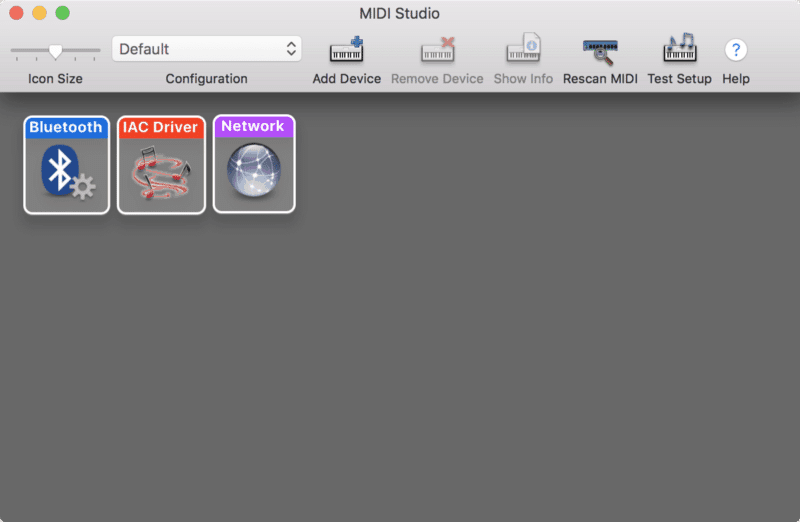
Click on the IAC Driver icon to bring up the IAC Driver Properties window.
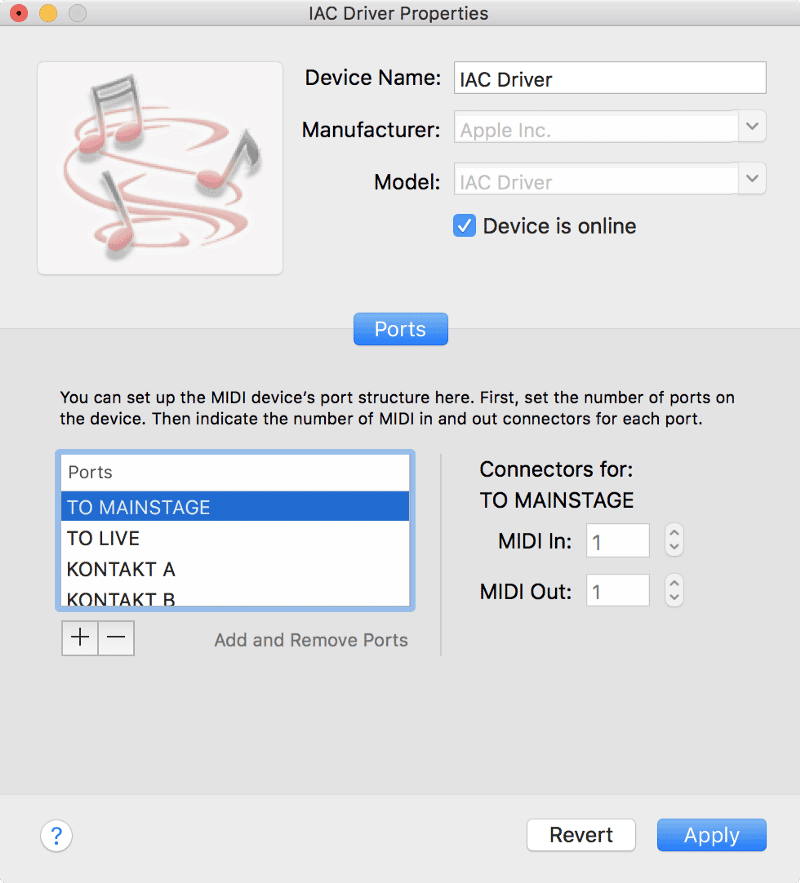
Click on the + button to the left of “Add and Remove Ports,” and give the MIDI port a name. I’ve named my port “TO MAINSTAGE” because I plan to use it to send MIDI data to MainStage 3. Lastly, ensure the box to the left of “Device is online” is checked.
AutoCC is designed to be used with an external instrument channel strip. Set the MIDI output to the virtual MIDI port you created earlier. I recommend using MIDI Channel 1 for best compatibility.
AutoCC has a number of customizable parameters.
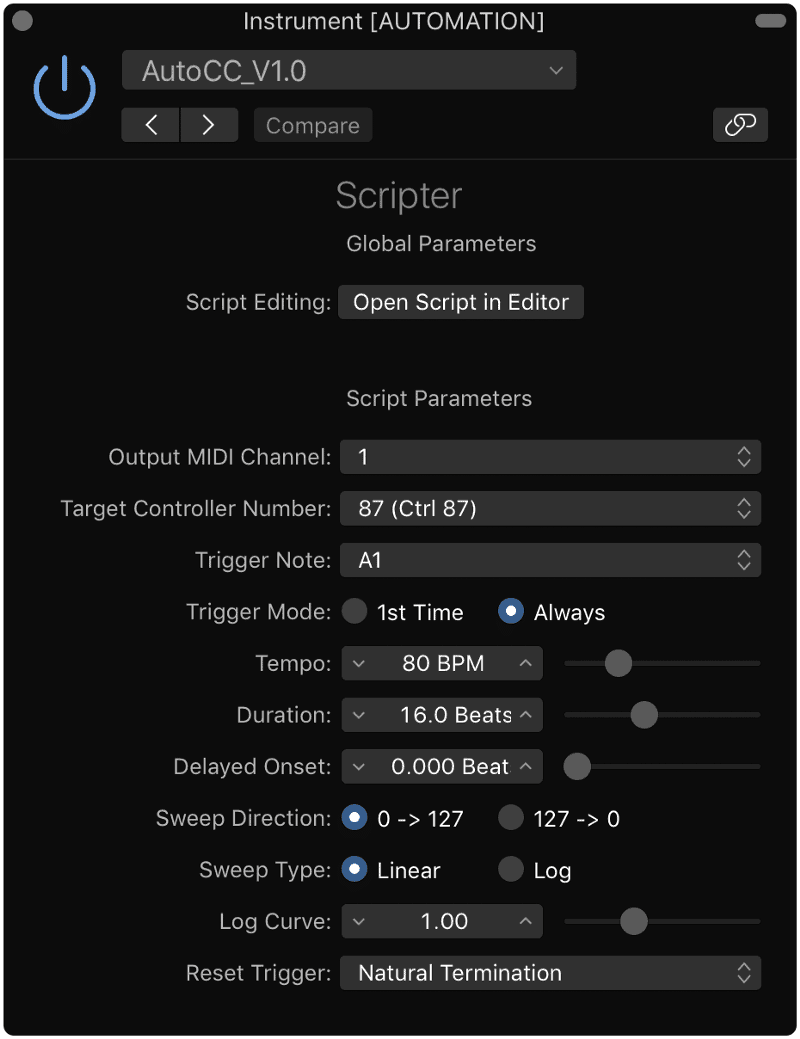
- Output MIDI Channel refers to the MIDI channel that script will send MIDI data over. The default value is MIDI Channel 1, and I recommend not changing this setting.
- Target Controller Number refers to the MIDI control change number that the script will send MIDI data over. This setting should correspond with whatever you’re automating. If you want to automation modulation, choose CC#1. If you want to automate expression, choose CC#11. If you’re looking to automate other plugin parameters, choose a general unused control change number like CC#87.
- Trigger Note refers to the MIDI note that will trigger the script.
- Trigger Mode lets you choose between “1st Time” and “Always,” If you choose “1st Time,” AutoCC will only activate the first time you press the trigger note. Choosing “Always” will activate the script every time you hit the trigger note. In “1st Time” mode, AutoCC script can be reset by changing the patch.
- Tempo and** Duration** let you set the amount of time the script takes to sweep from 0 to 127.
- Delayed Onset refers to the number of beats between pressing the trigger note and the virtual controller’s first movement. If you set the tempo to 120BPM and the delayed onset to four beats, the virtual controller will start sweeping two seconds (four beats at 120BPM) after the trigger note is pressed.
- Sweep Direction refers to the direction of the virtual controller sweep.
- Sweep Type refers to the curve of the sweep. You can choose between linear and logarithmic curves. If you choose the logarithmic option, you can change the shape of the curve with the** Log Curve** option.
- Reset Trigger lets you specify how AutoCC will be reset. “Natural Termination” will reset the script when the sweep is finished. “Trigger Note NoteOff” will reset the script when the trigger note is let go.
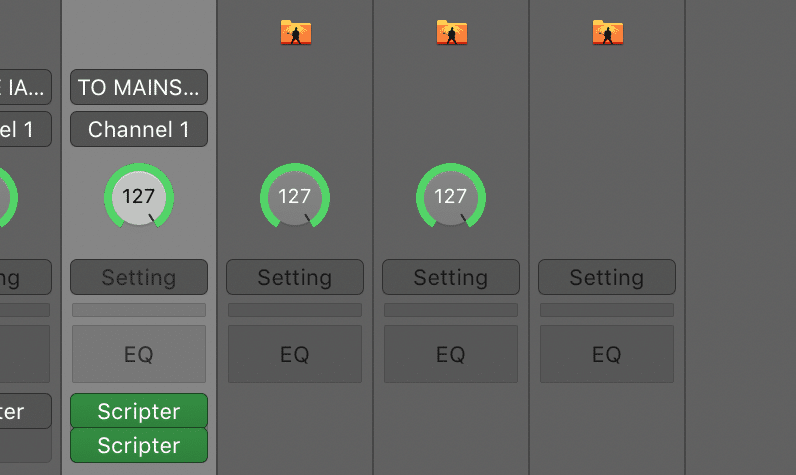
Finally, go to Assignments and Mappings, and map your selected virtual MIDI port and control change number to any plugin parameter.
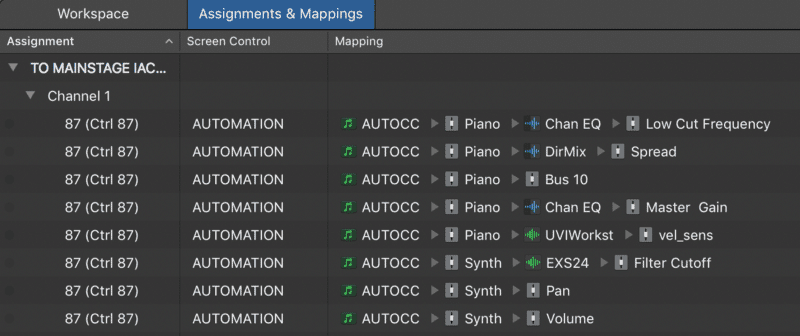
In the screenshot above, I’ve mapped “TO MAINSTAGE”’s CC#87 to a number of plugin parameters including low cut frequency, filter cutoff, pan, stereo spread, and volume.