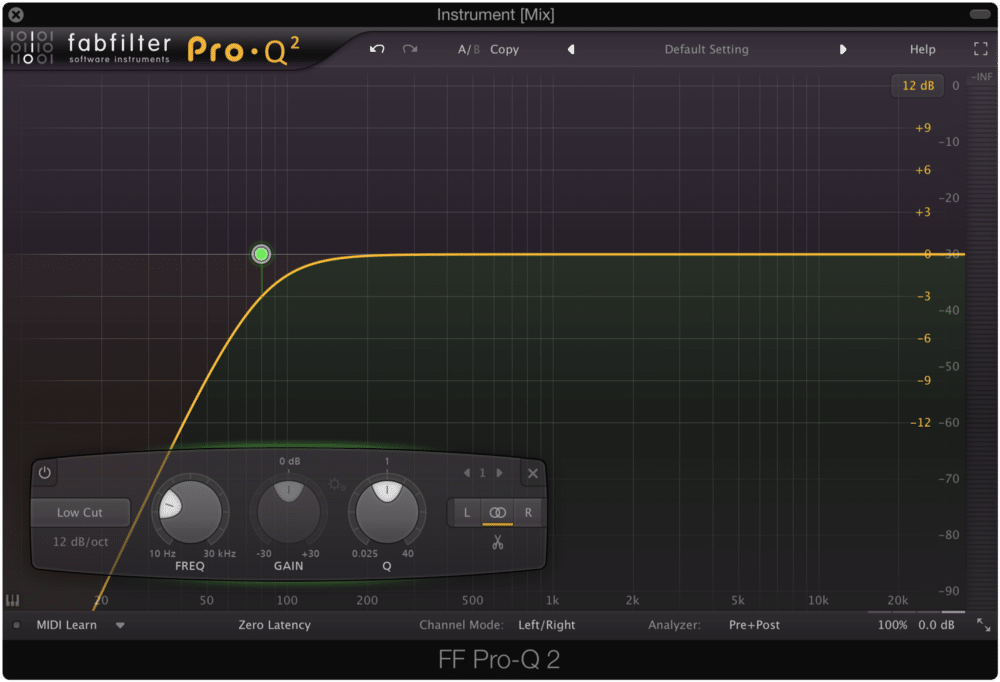
Use High-Pass and Low-Pass Filters

For example, the important frequencies of a vocal track usually start around 100 Hz and everything under that is low frequency rumble. Using a high-pass filter with the cutoff frequency set at 100 Hz will enable you to get rid of that rumble. Many EQ plugins like FabFilter’s Pro-Q offer visual analysis modes which make it easier to determine where the best cutoff frequency is.
The important thing to keep in mind is to use your ears and not your eyes when EQing. Make sure you’re always attentive when using HPFs and LPFs. A common mistake is rolling off too many mid frequencies resulting in a low energy mix. When used correctly, high-pass and low-pass filters will result in a cleaner sounding mix.
Context is EVERYTHING!
Soloing tracks to EQ is another common mistake. Sound works in strange ways, and a track that sounds amazing soloed might sound awful in the context of the full mix. A piano is an instrument that occupies a pretty wide frequency range. In the context of a solo classical recording, all those frequencies should be preserved.
In the context of a pop recording, it’s common for everything under 200 – 250Hz to be rolled off to make space for the bass and kick drum. If you EQed the piano to sound good by itself, you might end up completely missing the fact that the low frequencies will interfere with other instruments in the arrangement. Once again, context is everything.
Okay, so that doesn’t mean you should never solo and EQ. Hearing a track on its own is important when fixing problem spots in the sound, particularly resonant frequencies. So here’s the rule of thumb to follow — solo when fixing specific frequencies and un-solo when shaping the sound to fit the context of the mix.
EQ Before and After Compression
As you gain more mixing experience, you might learn to prefer the sound of certain EQ plugins and it’s totally okay to use more than one. What I typically like to do is insert an EQ both before and after a compressor. The first EQ is a HPF or LPF if needed, and resonant frequency fixes. The second EQ, following the compressor, is an EQ for color.
The idea here is to feed a “clean” signal to the compressor before coloring the compressed signal with another EQ. My favorite plugin for surgical EQ is FabFilter’s Pro-Q, and I love the API 550 series for color.
Boosting Isn’t the Only Option
When something is too soft, our first instinct is to turn it up. This isn’t always the best practice when dealing with EQ. Think about it this way — cutting involves taking away something already there and boosting involves adding something that isn’t there.
Secondly, extensive boosting on many tracks will quickly eat up your available headroom. With that said, it’s not always bad to boost when EQing and sometimes the desired sound can’t be achieved by cutting. Just keep in mind that if you find yourself boosting frequencies a lot, there’s probably something wrong in the workflow.
Magic Frequencies Don’t Exist
- Boosting at 200 Hz will give your snare more impact.
- A slight boost at 10 kHz will give your vocal sound a little more “air,”
- Boosting at 100 Hz will make your kick thump.
- A slight boost at 1 kHz will give more presence to your guitar sound.
How many times have you seen these guidelines on the Internet? Probably a lot. Just make sure to remember that these figures are only approximate suggestions, and they might not end up working in the context of your mix. Secondly, what if the particular guitar amp you recorded with already has a presence boost at 1 KHz?
Perhaps an EQ cut in another instrument might achieve even better results. While these “magic frequencies” serve as great guidelines to let you know where the important frequencies of a sound are, always remember to use your ears when you mix.