Whether you're a music producer, podcast editor, or filmmaker, learning how to automate effects in your DAW can add a unique and creative touch to your work. For example, automating a saturation plugin that gets harsher over time can bump up your horror movie's creepiness factor. Similarly, automating a rising low cut filter on an EQ plugin can produce a feeling of drifting away. In this tutorial, you'll learn how to automate effects in Logic Pro X.
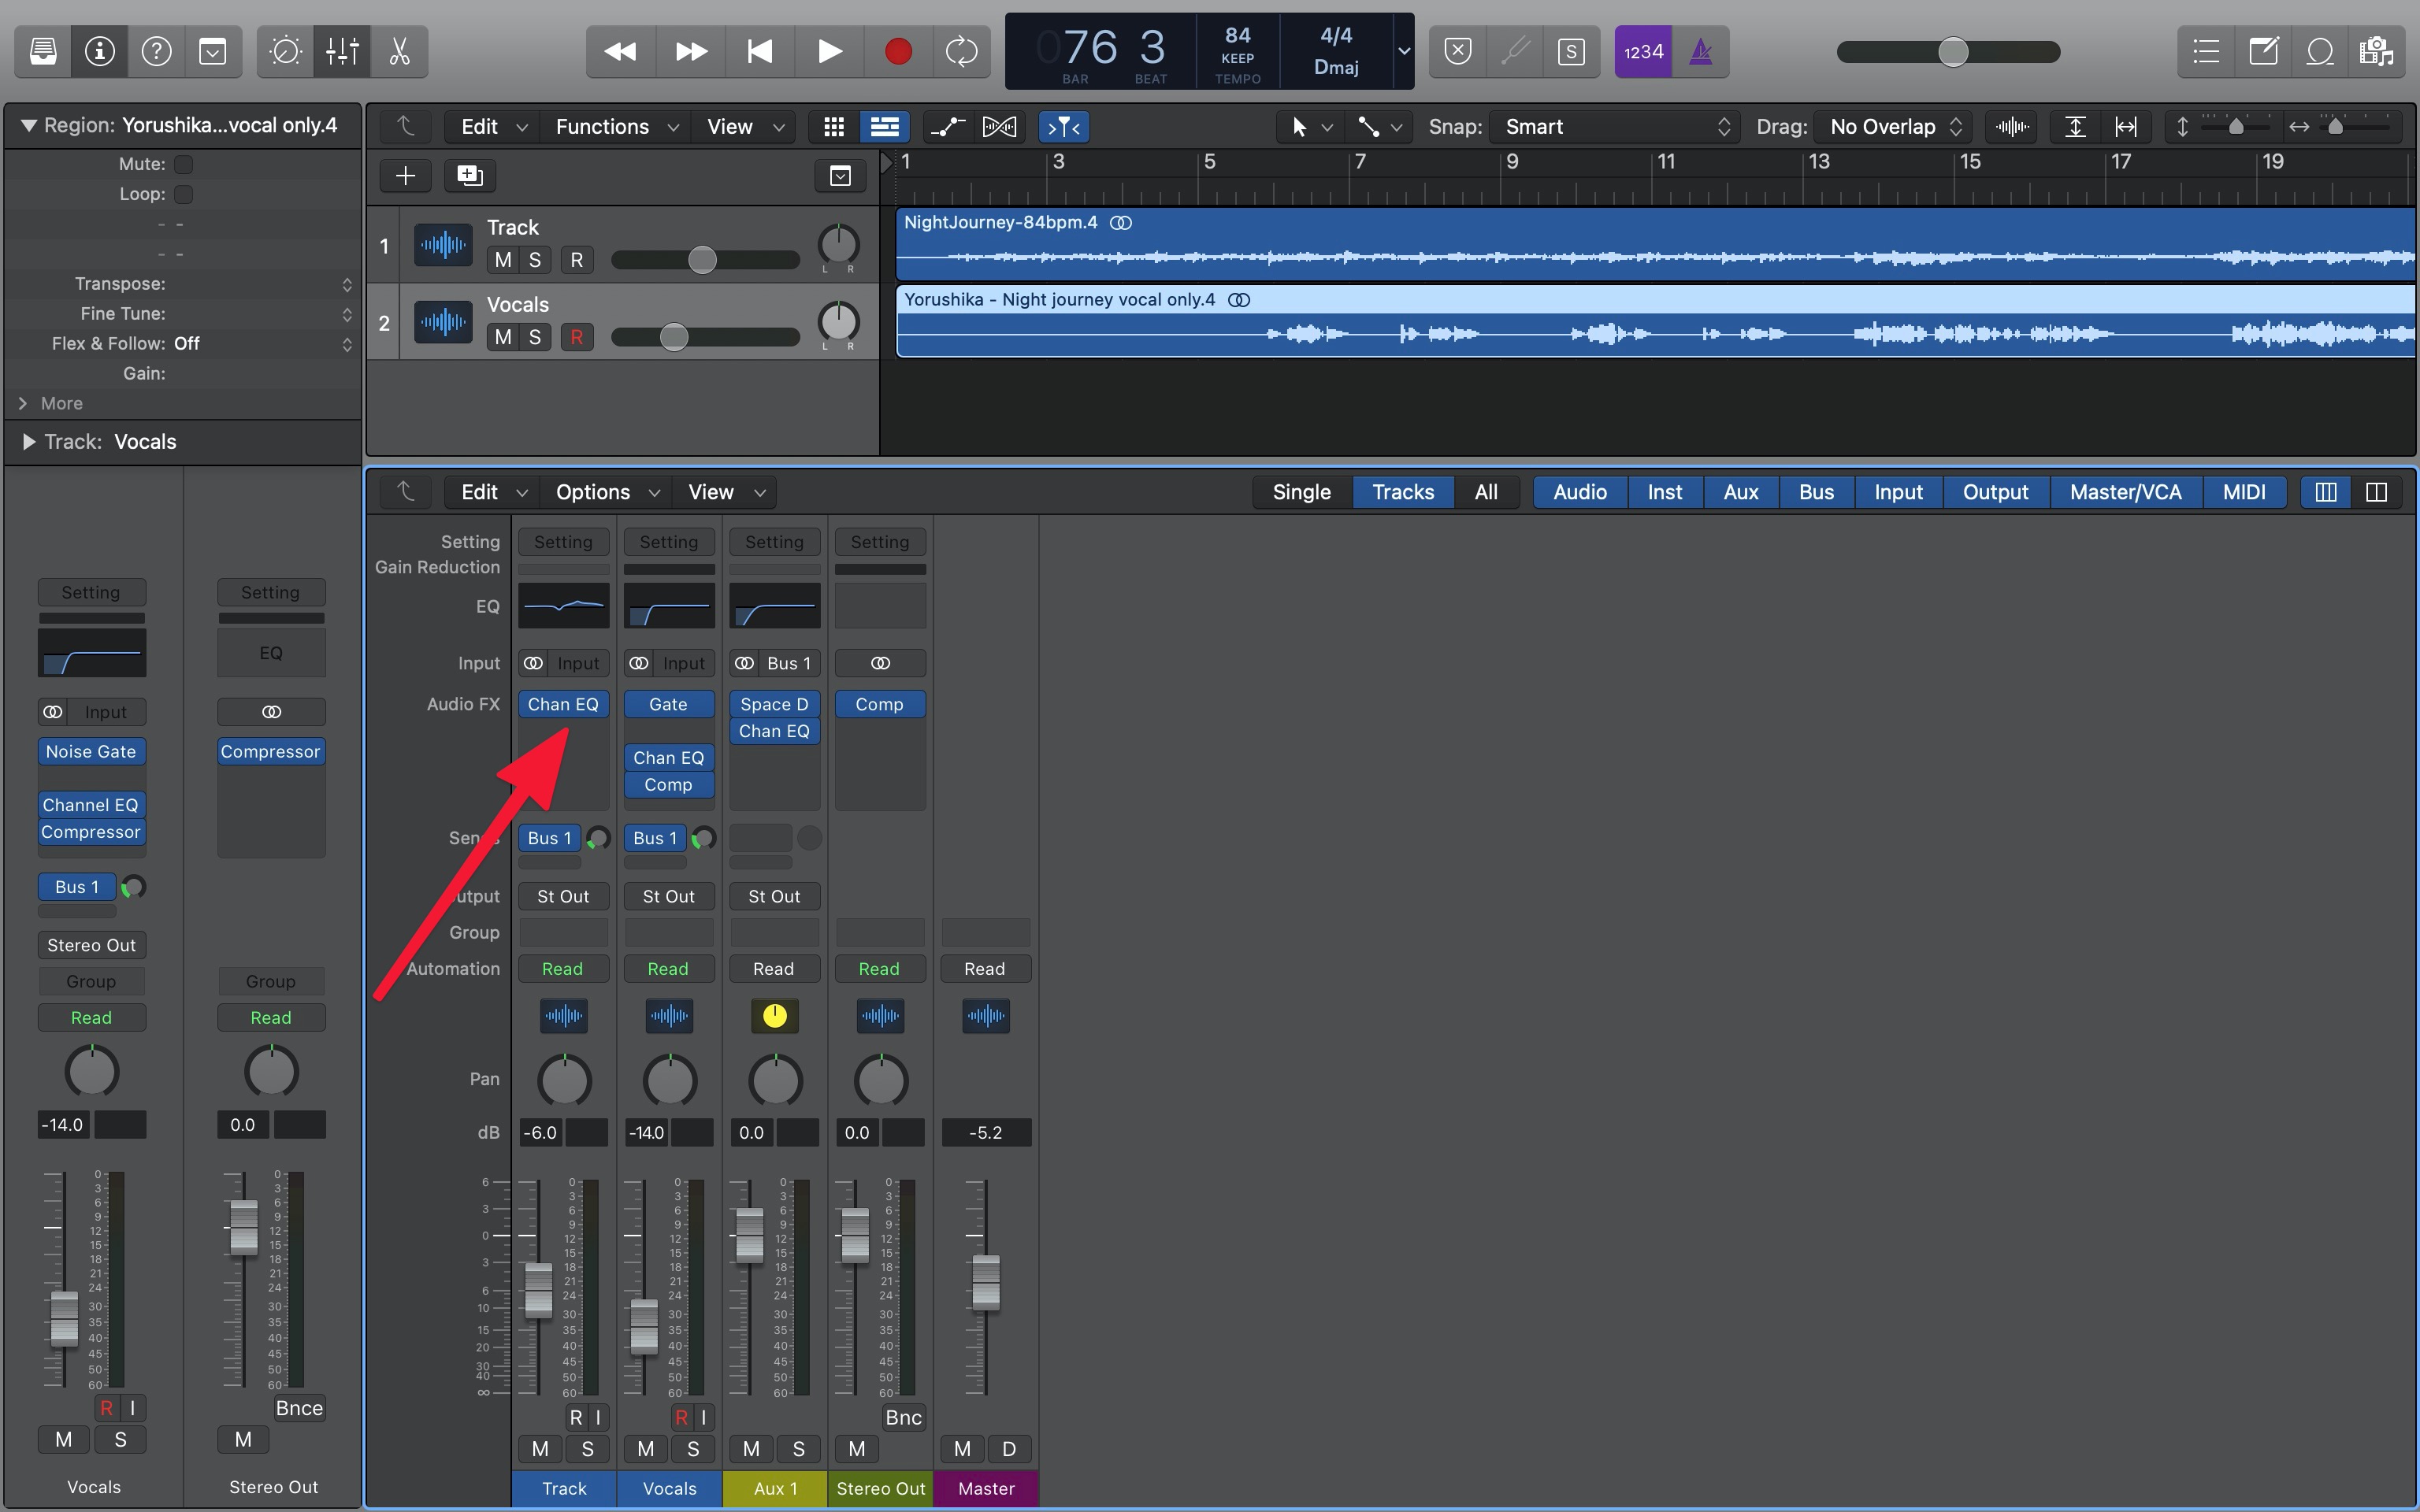
For the purposes of this tutorial, we'll be automating the low cut filter in Logic Pro X's Channel EQ plugin. As you can see in the screenshot below, there is an instance of Channel EQ to the track named "Track" – sorry about that. 😅
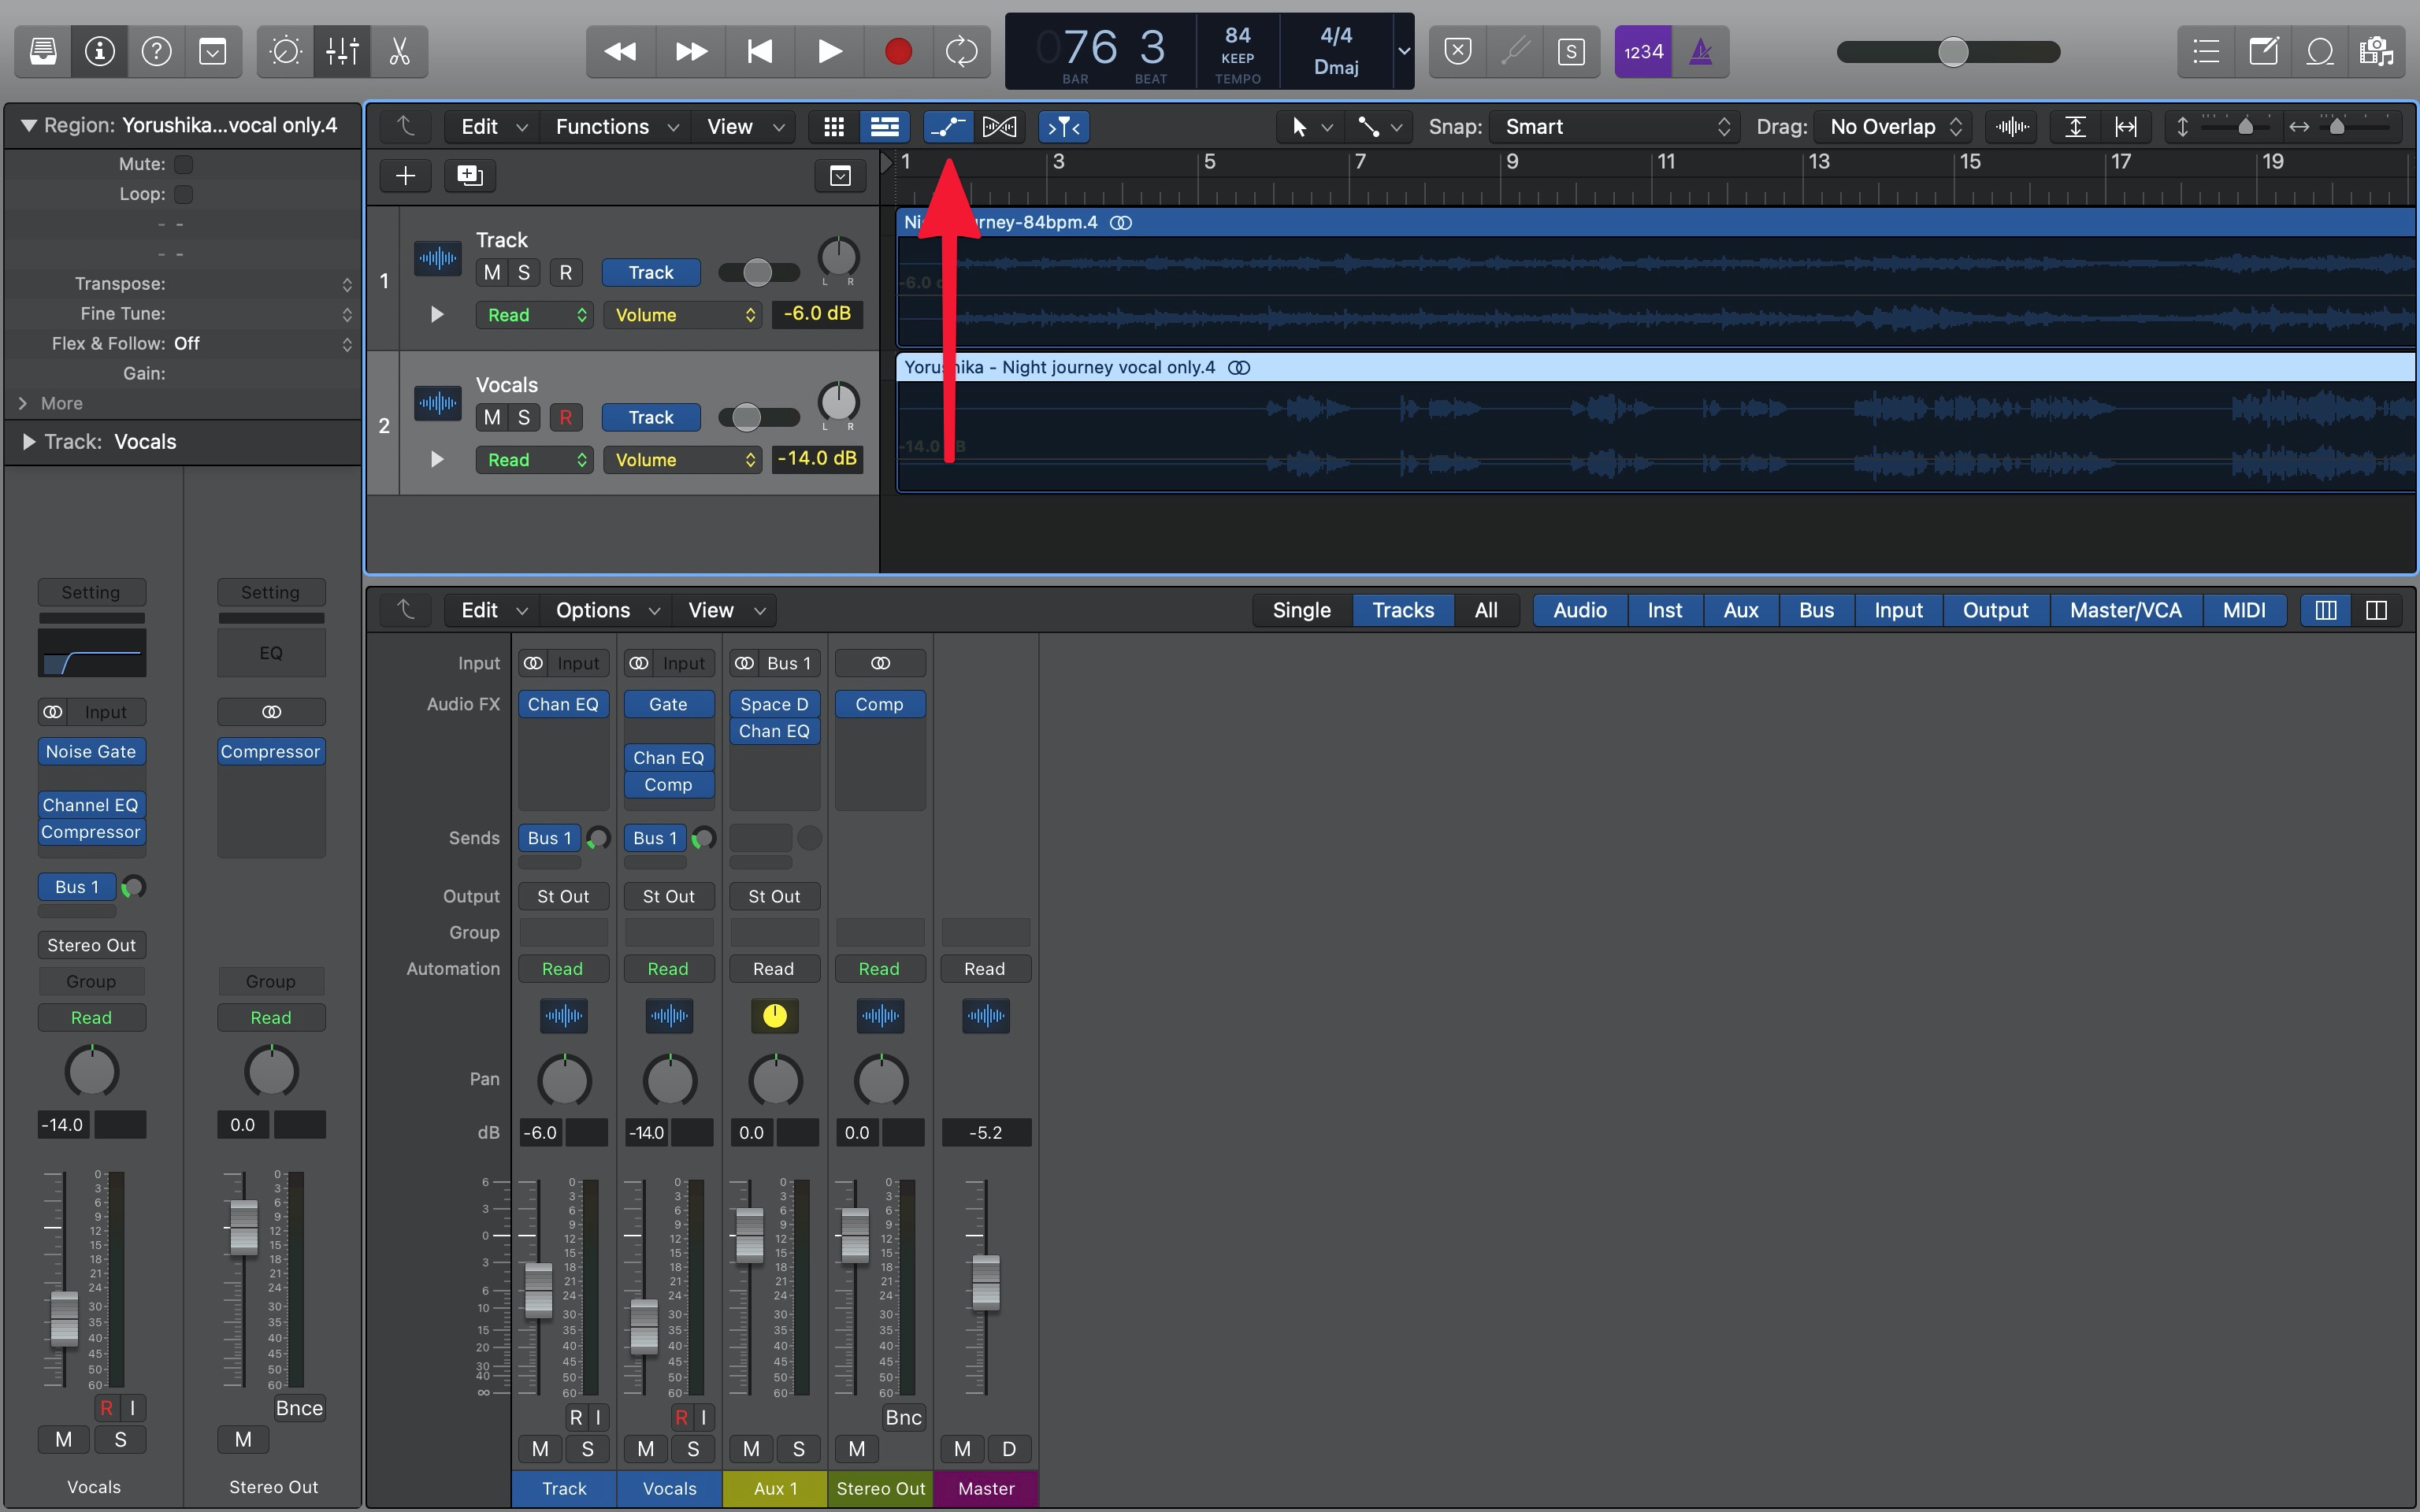
The first step is to enable the Automation Toggle in Logic Pro X's menu bar. After clicking the Automation Toggle, the background of your tracks will become more opaque, and you'll also see a horizontal automation line appear in the middle of each track. In each track's info section, you'll see additional dropdown like "Read" and "Volume" as well.
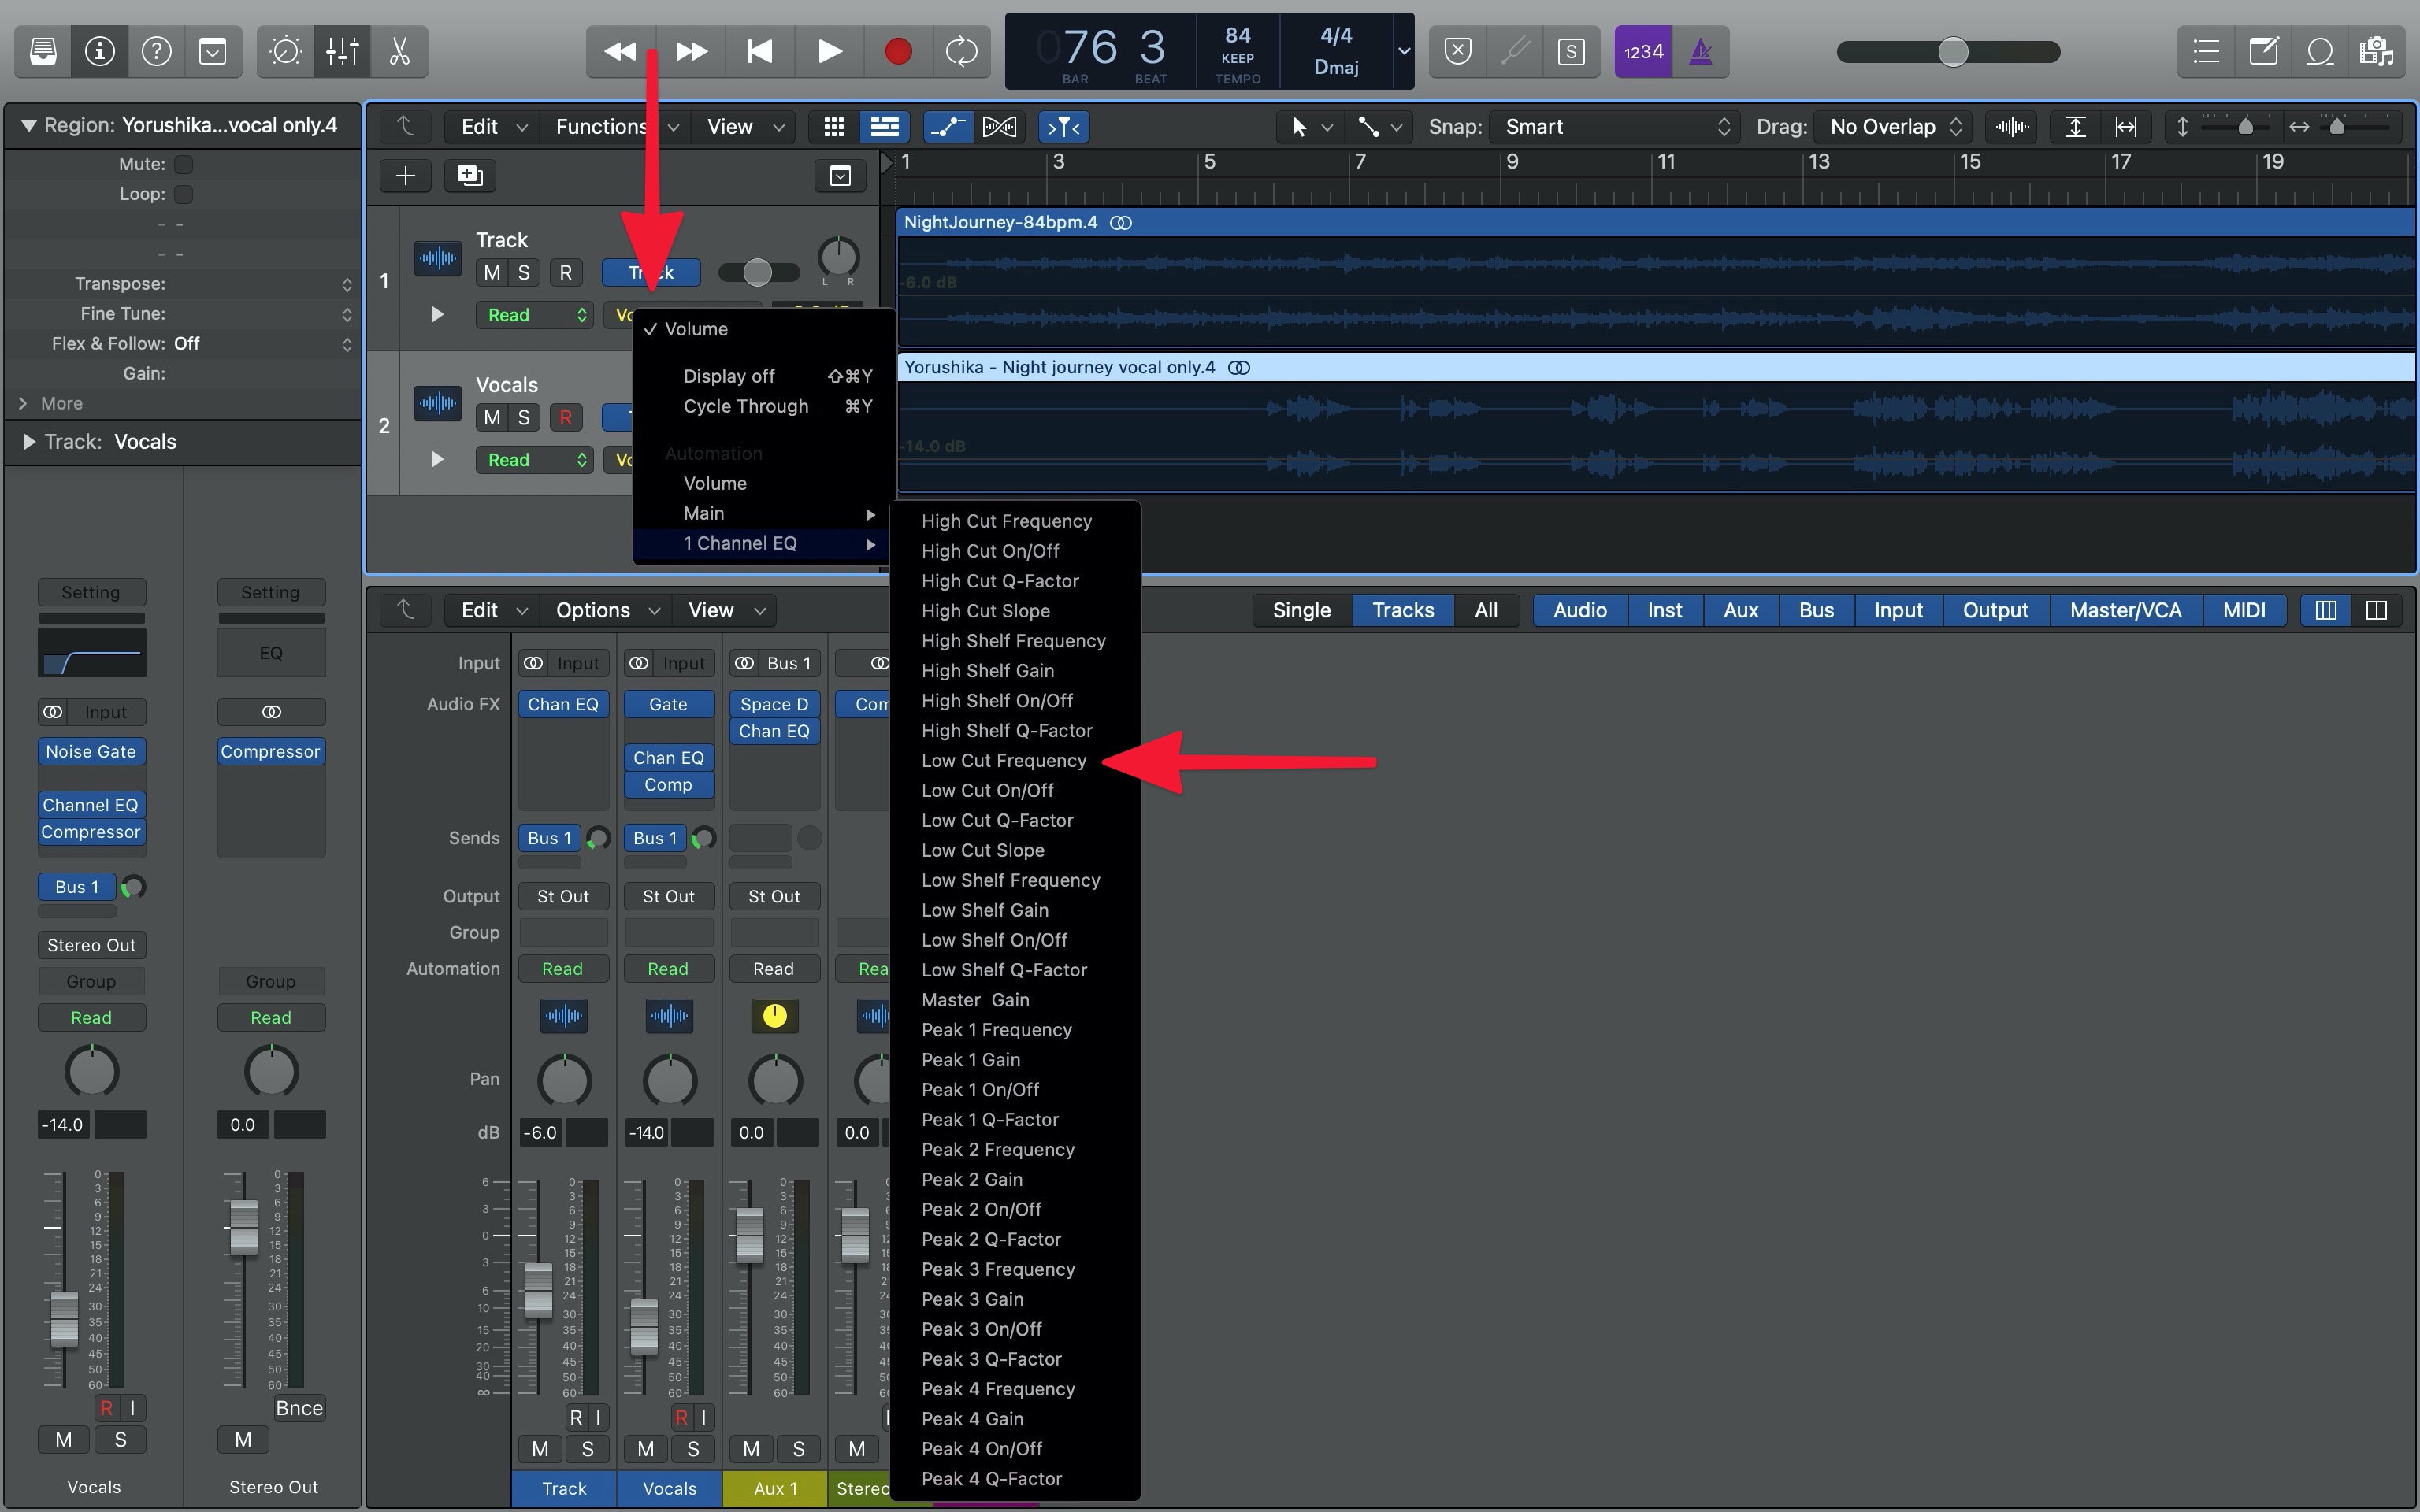
Click on the dropdown that says "Volume", and you'll notice it's a menu that lets you select a parameter to automate. In addition to volume and global effects under "Main", you'll also see submenus for the selected track's effects plugins as well. As stated earlier, we'll be automating Channel EQ's low cut filter, so let's click on "Low Cut Frequency" in the "1 Channel EQ" submenu.
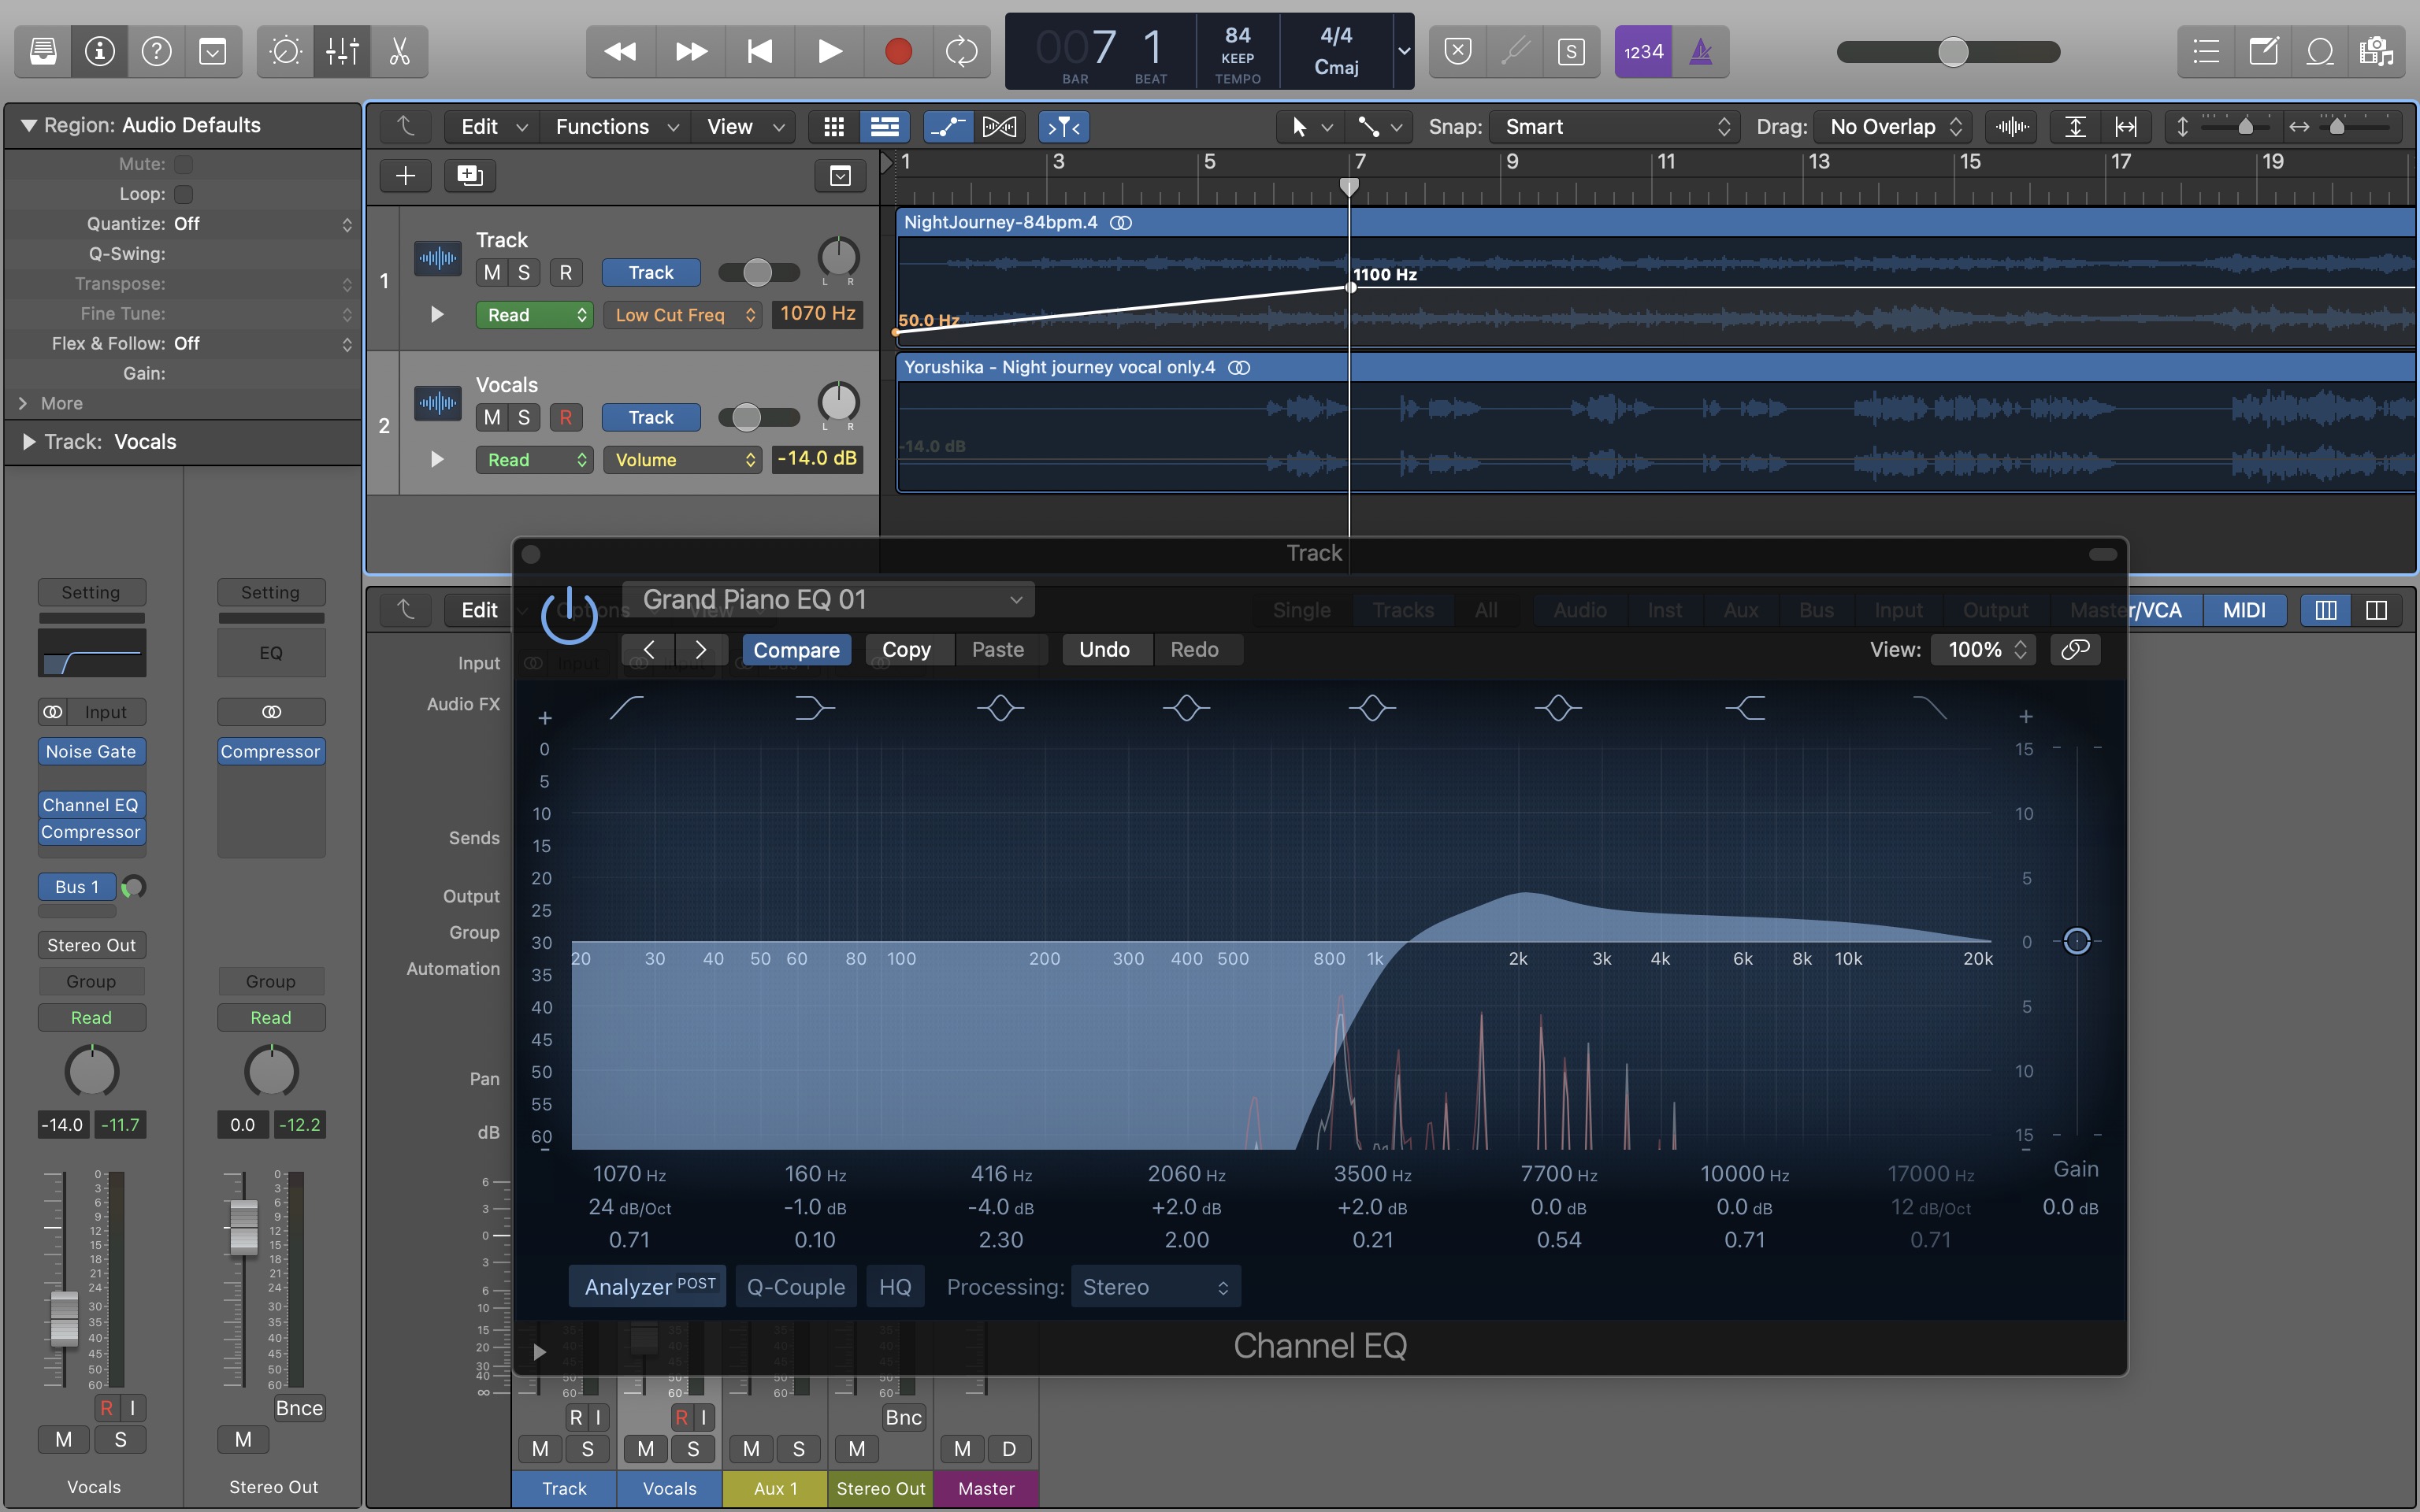
After the "Low Cut Frequency" parameter is selected, simply click on the automation line to create an automation point. You can drag the point up and down to set parameter value. In this case, dragging the point up will increase the low cut frequency, and dragging it down will do the opposite. In the screenshot below, there's an automation point at 50 Hz at the start of the timeline.
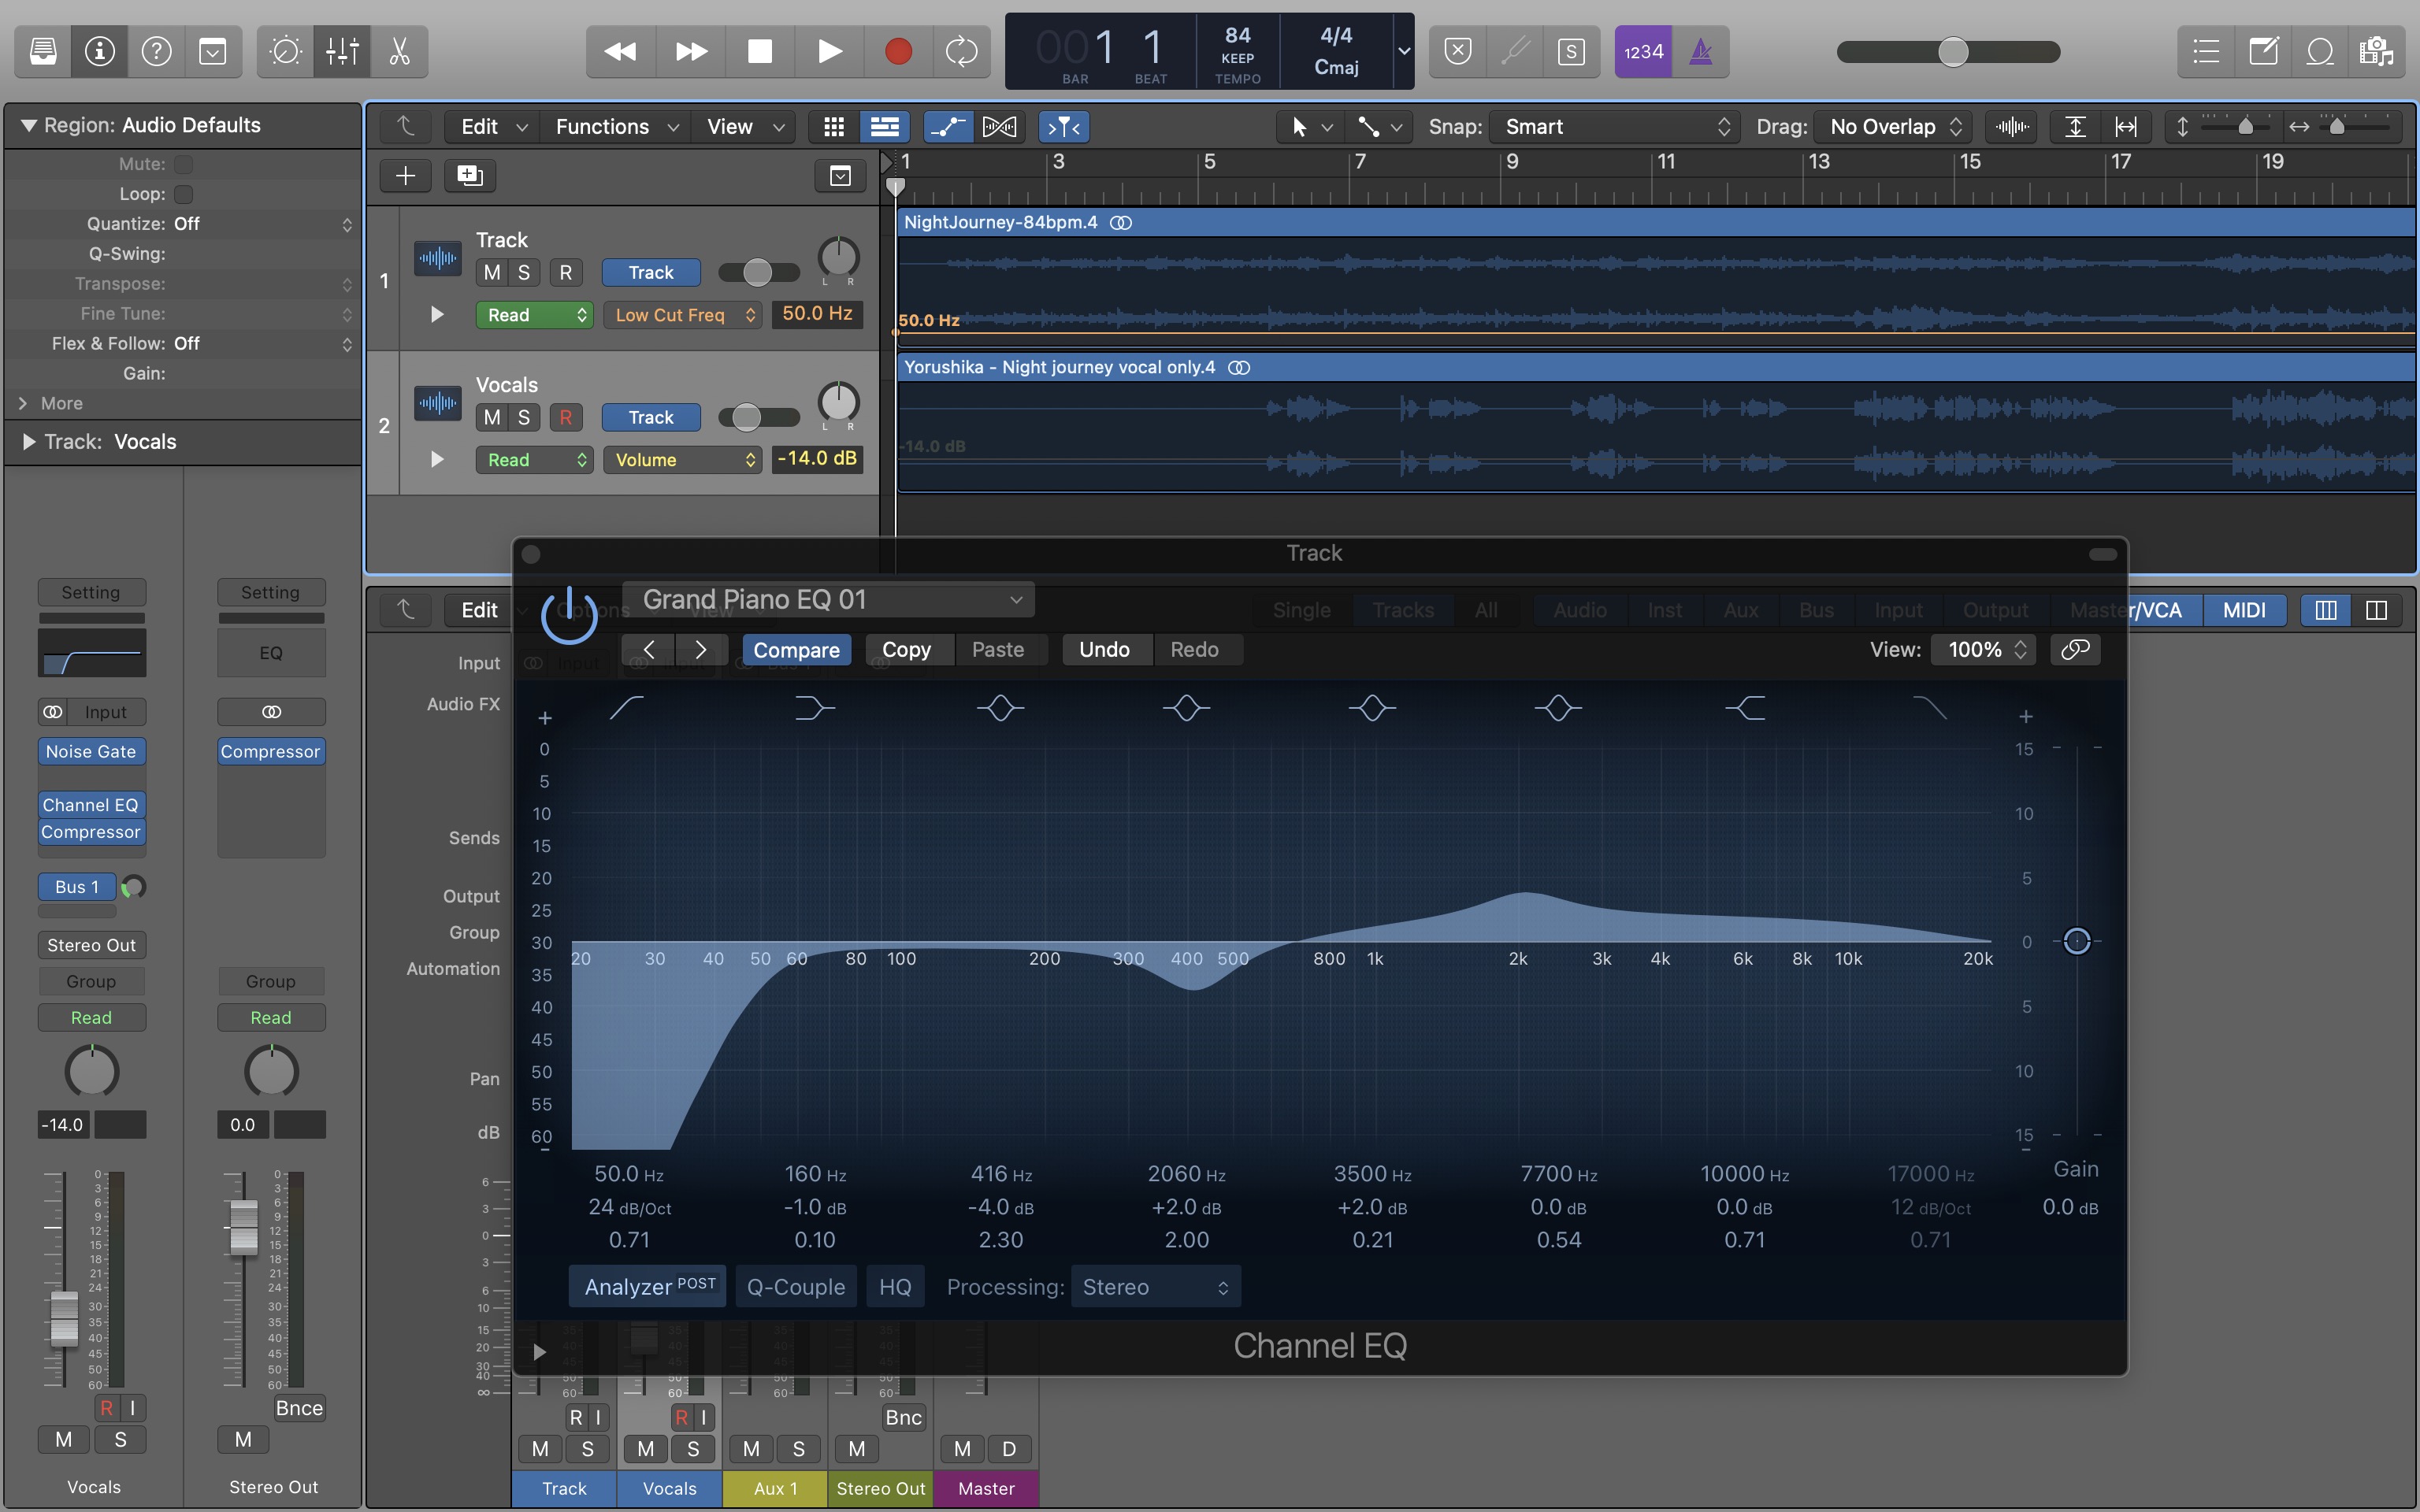
Now let's create a second automation point seven bars in at 1,100 Hz. As you can see, the change in low cut frequency is reflected in the Channel EQ plugin. At this point, if you start playback from the beginning of the timeline, you'll see the low cut filter move in realtime in the Channel EQ plugin.
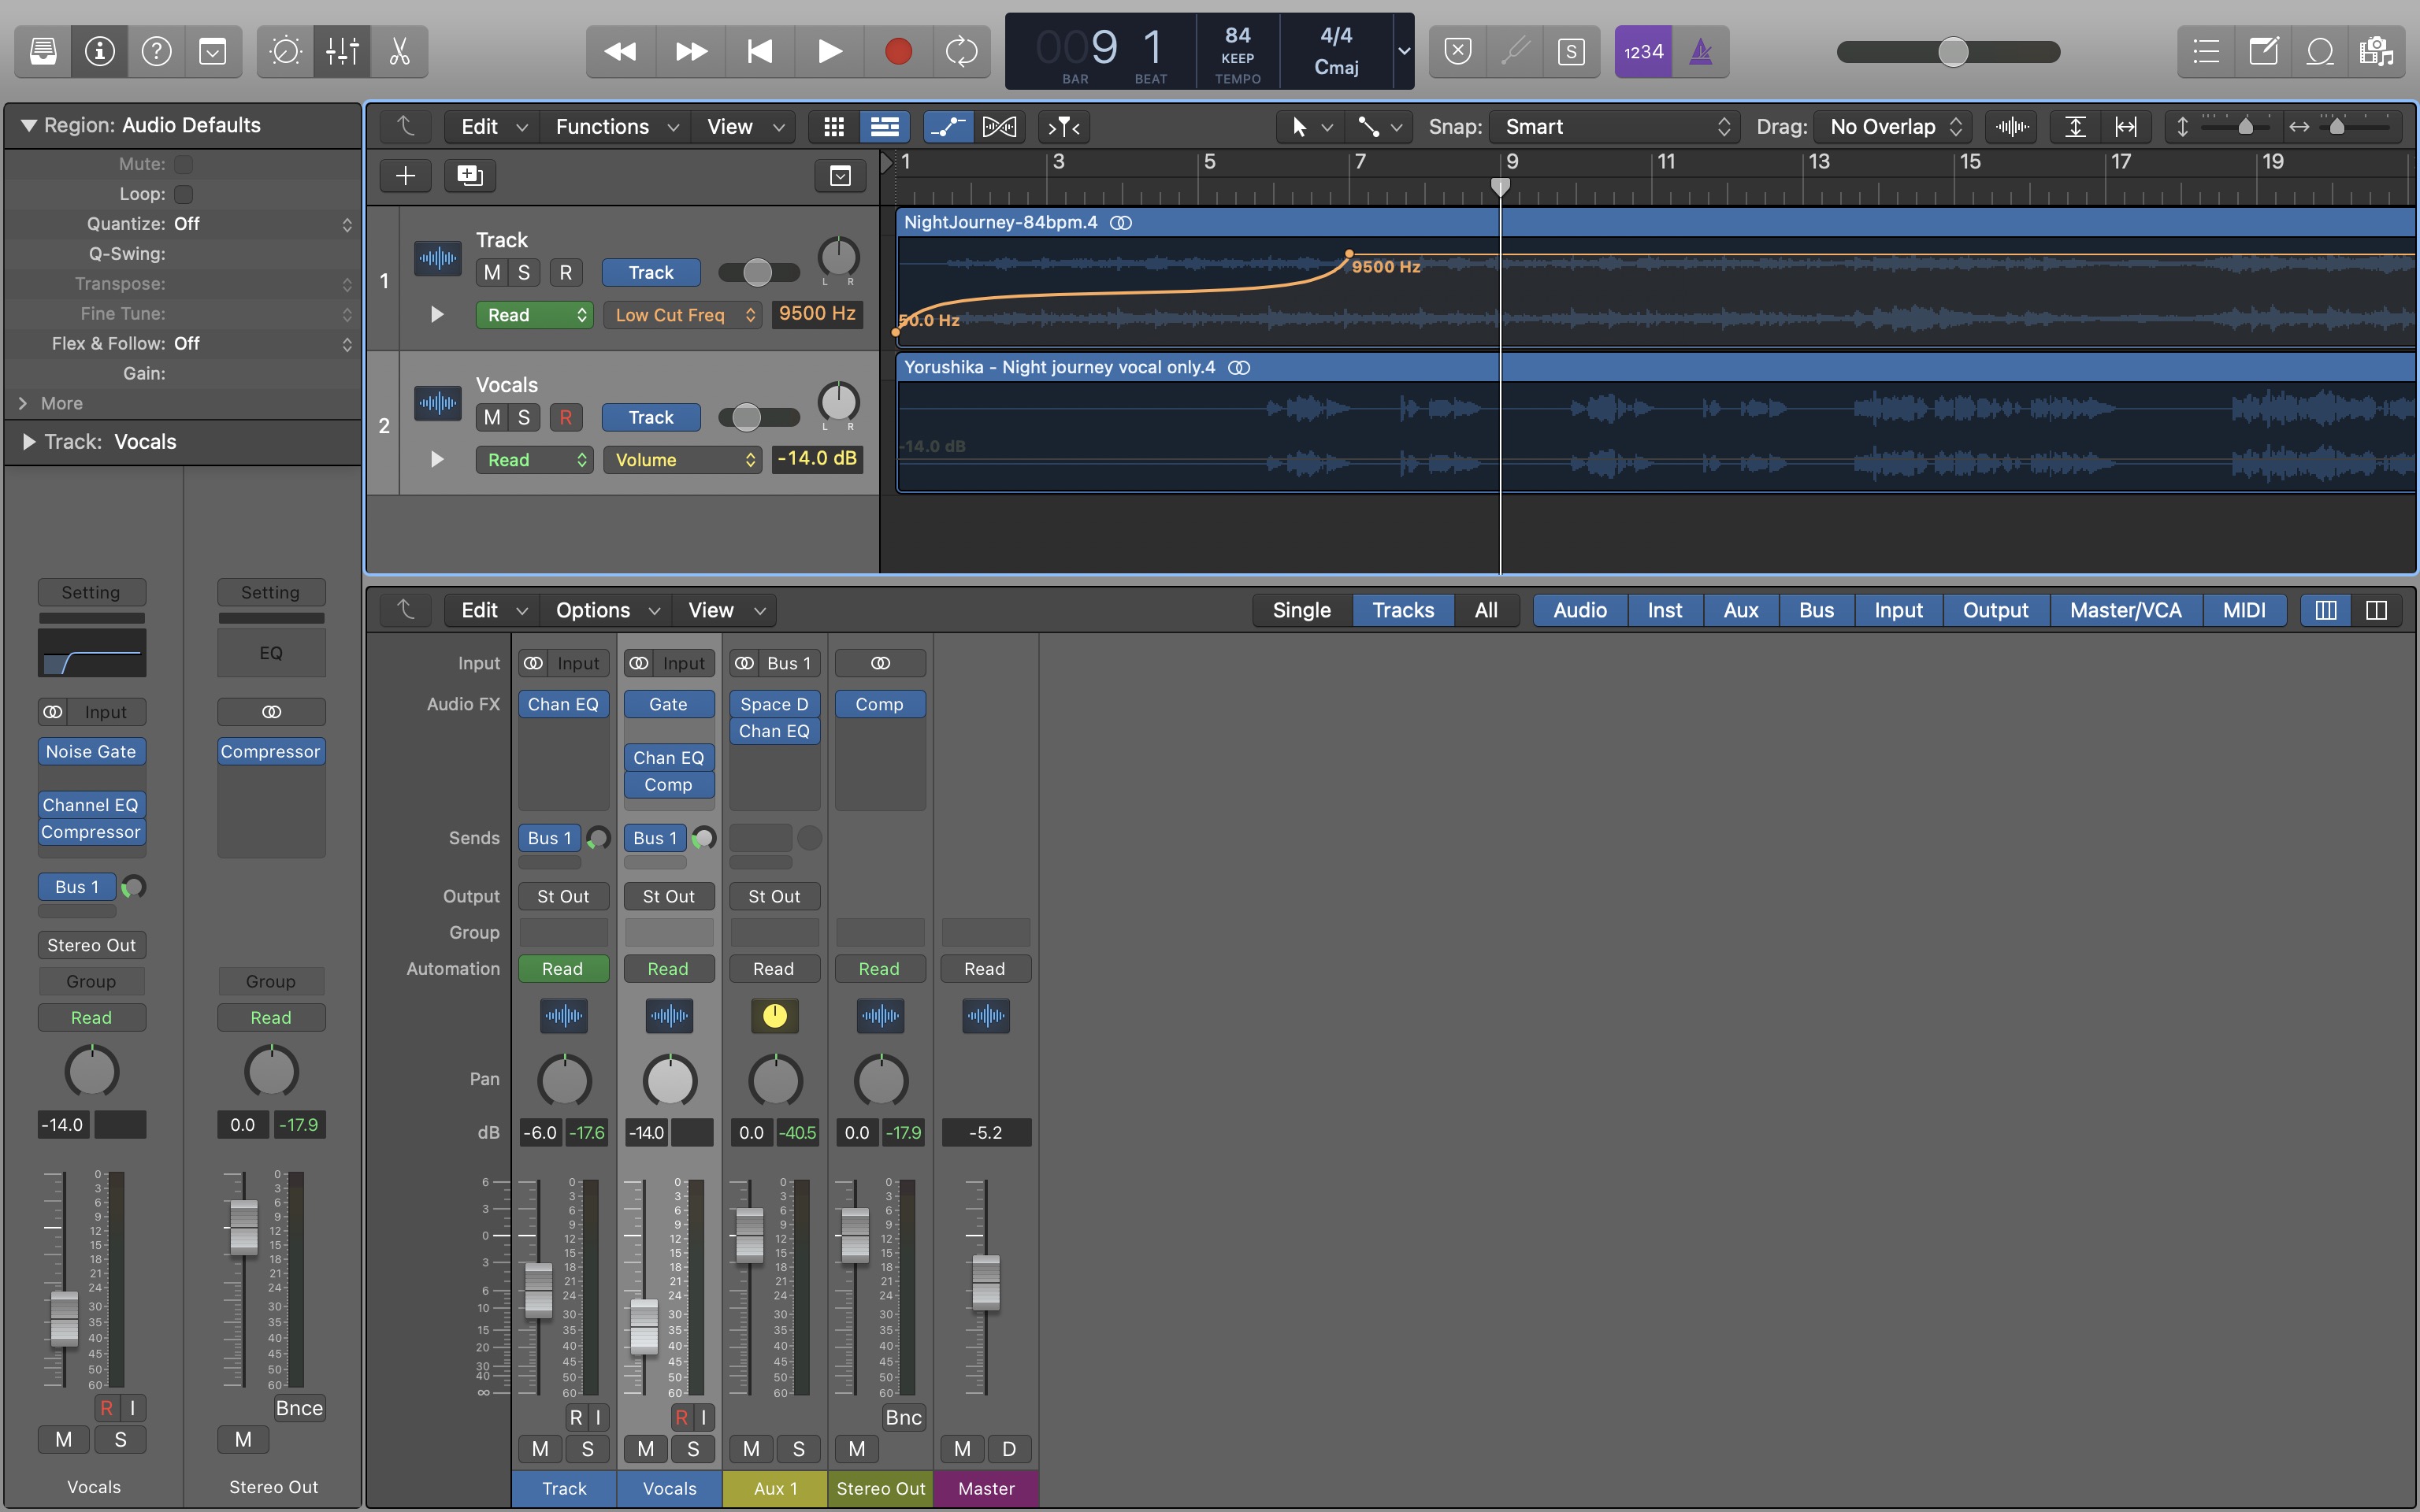
If you hate linear automation, you're in luck because curve automation is easy in Logic Pro X. In some situations, using a curve to automate effects may yield a more "natural-sounding" result – whatever that means. To use curve automation, hold down Ctrl+Shift and click on an existing automation line. You can drag it up and down to change the type and intensity of the curve.
Effects automation is a very useful tool for a variety of use cases including modern pop production and sound design for film. Whether you're creating an annoying pan effect for the next Top 40 hit or leveling out dialogue levels in a hipster indie film, you can get it done in Logic Pro X.
If you have any questions about how to automate effects in Logic Pro X, feel free to reach out to me on Twitter or send me an email.