In this tutorial, you’ll learn how to set up a multi-output drum kit in Kontakt, and how to offline bounce each component of the drum kit to a separate audio file.
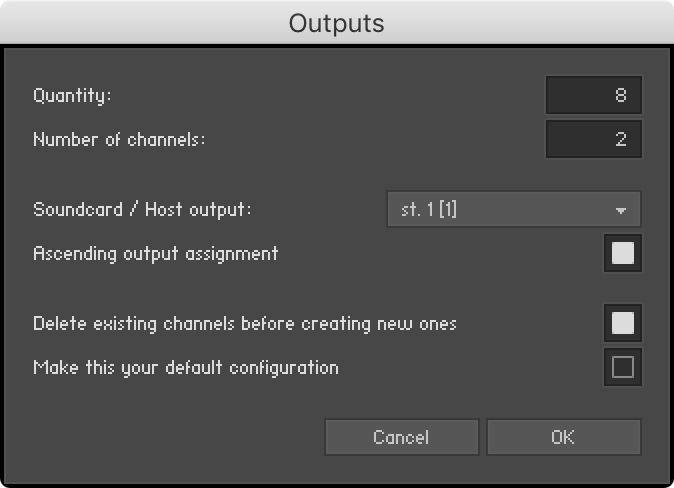
In Kontakt’s mixer session, click on the + button to bring up the output configuration window. The settings in the screenshot below will delete the existing channels, and create eight new stereo channels. Ensure the Soundcard/Host Output setting is set to st.1 [1], and the** Ascending Output Assignment** box is checked.
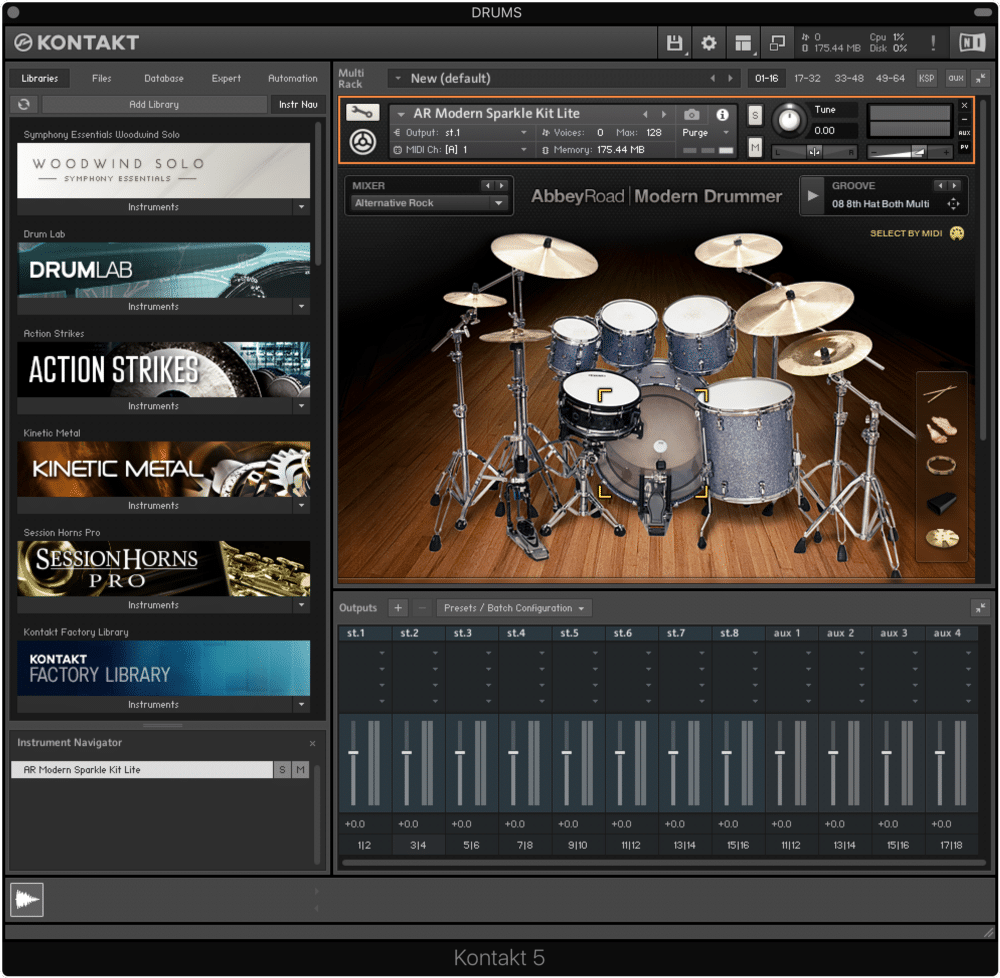
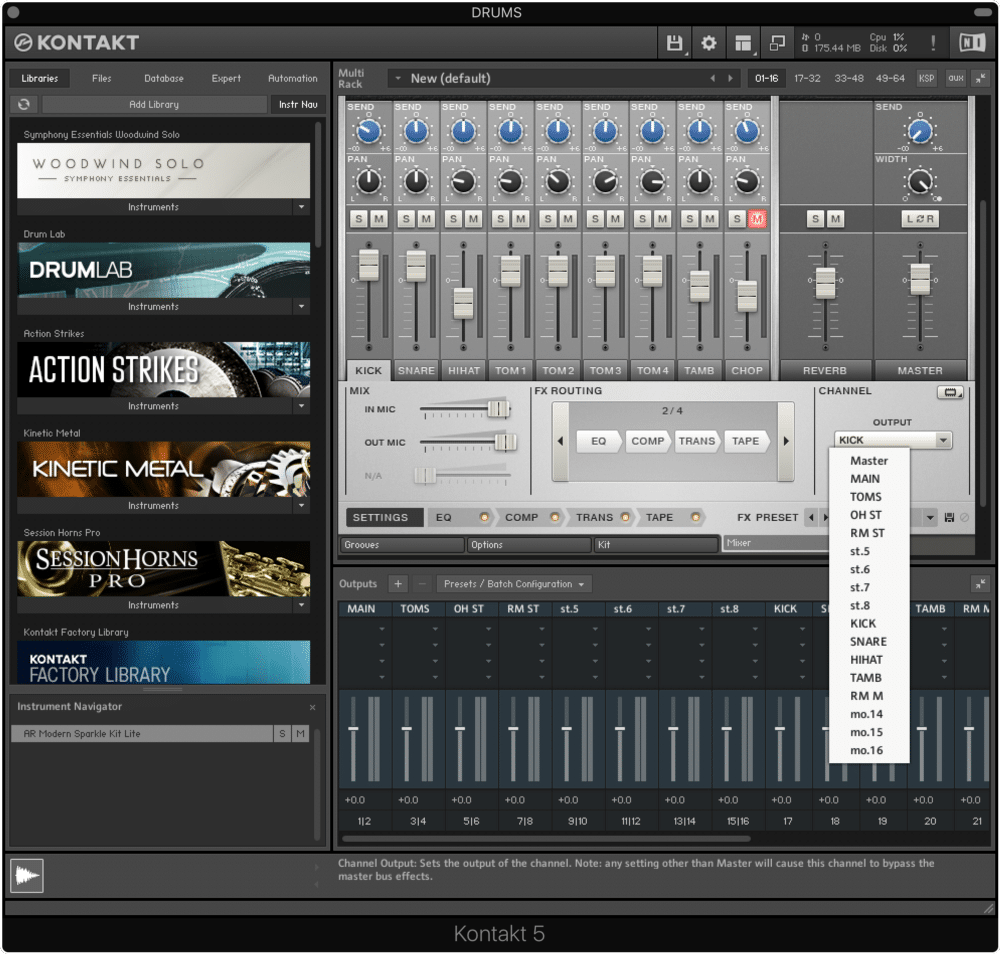
In the screenshot above, you can see my eight stereo channels take up outputs 1 – 16. Our next task is to create eight mono channels, and map them to outputs 17 – 24. We’ll also get rid of those four stereo aux channels.
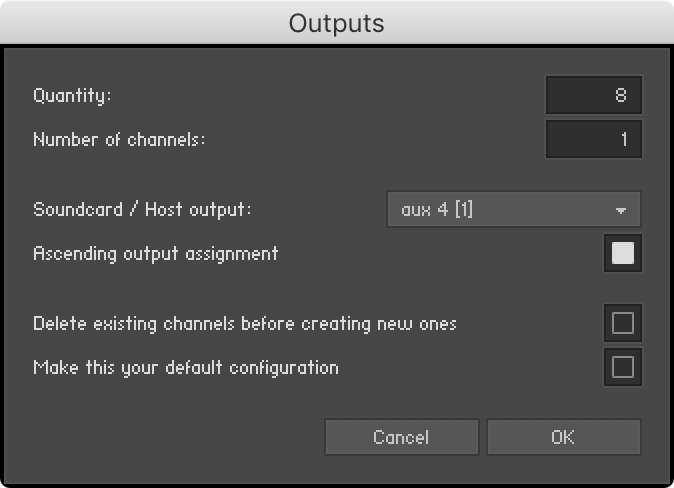
Navigate to the output configuration window again, and use the following settings to create eight mono channels starting at aux 4 [1], which corresponds to Output 17. Make sure you don’t delete the existing channels this time around.
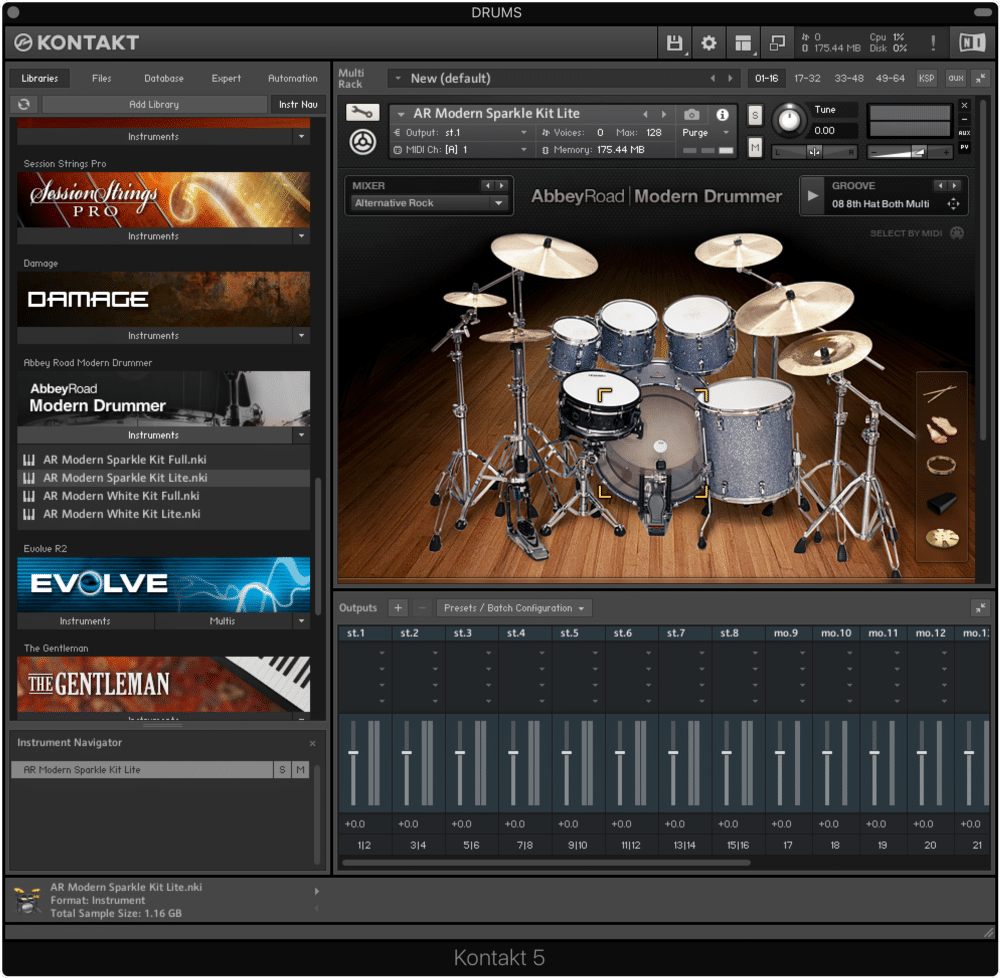
Now, you can see eight stereo channels on Outputs 1 – 16, followed by eight mono channels on Outputs 17 – 24. Next, navigate to your instrument’s mixer.
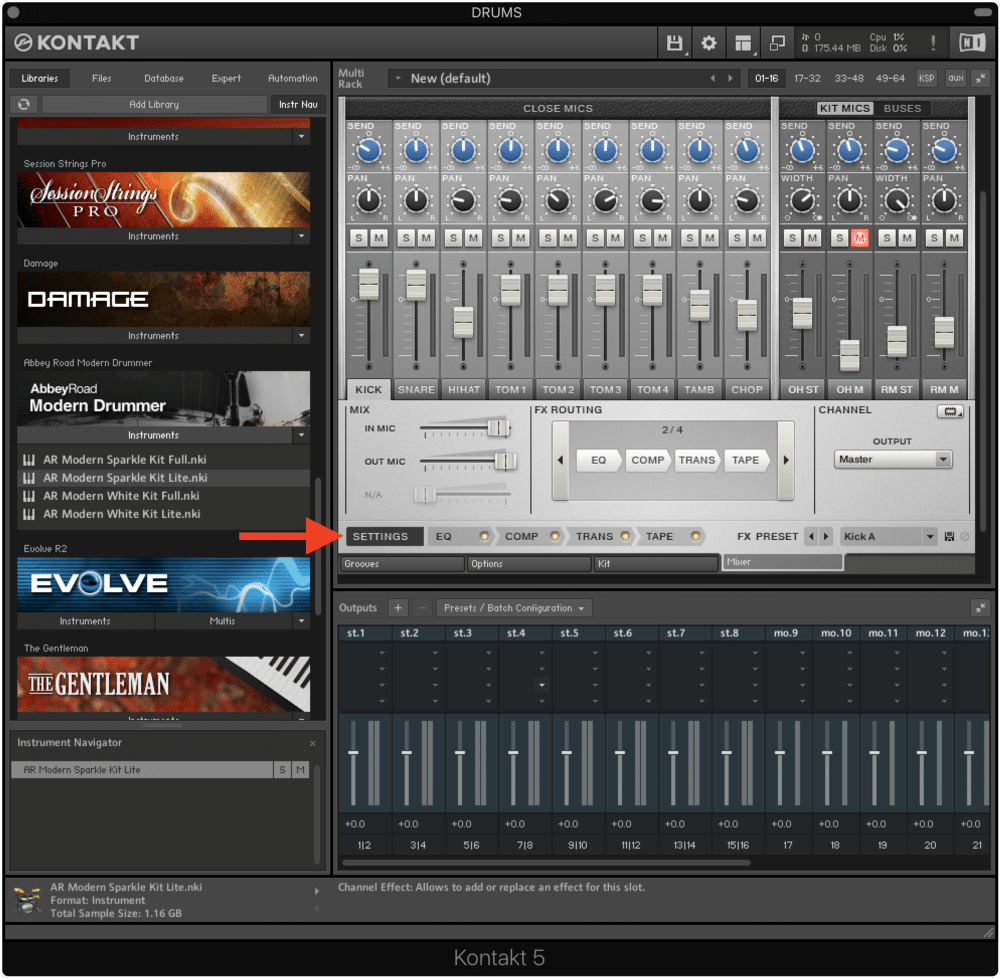
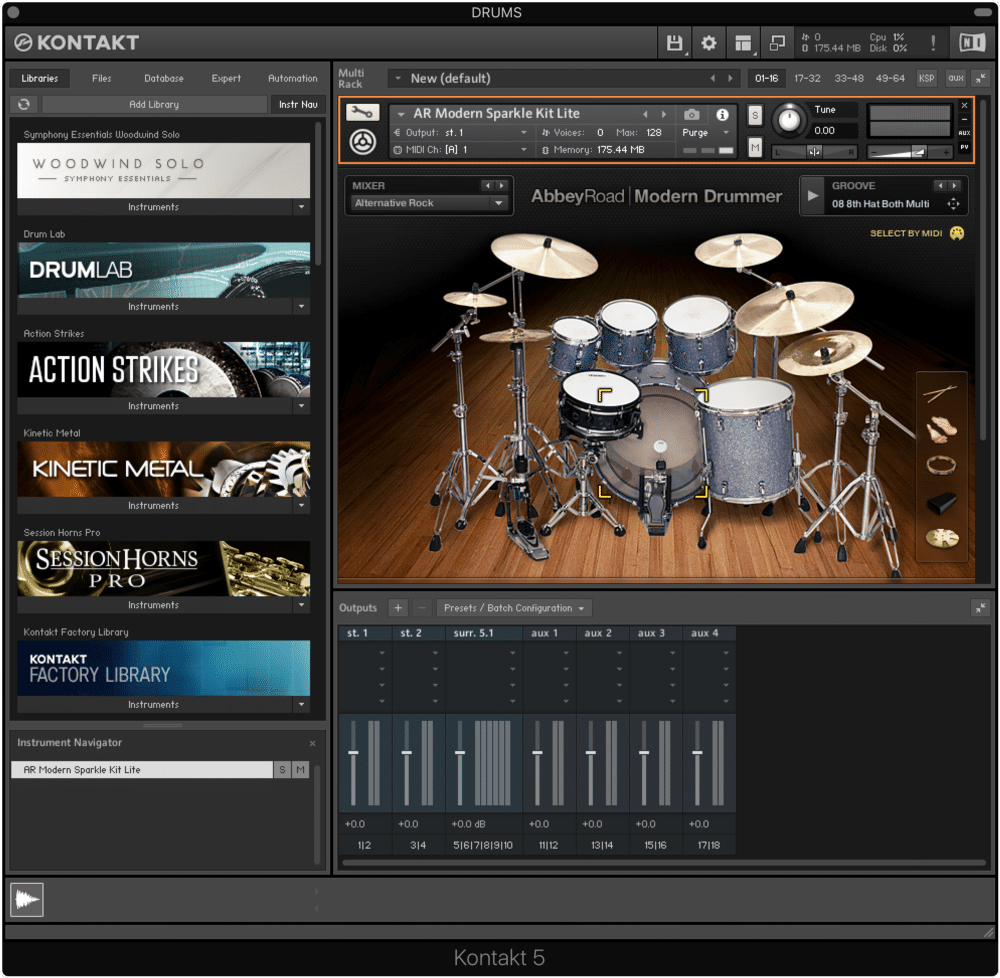
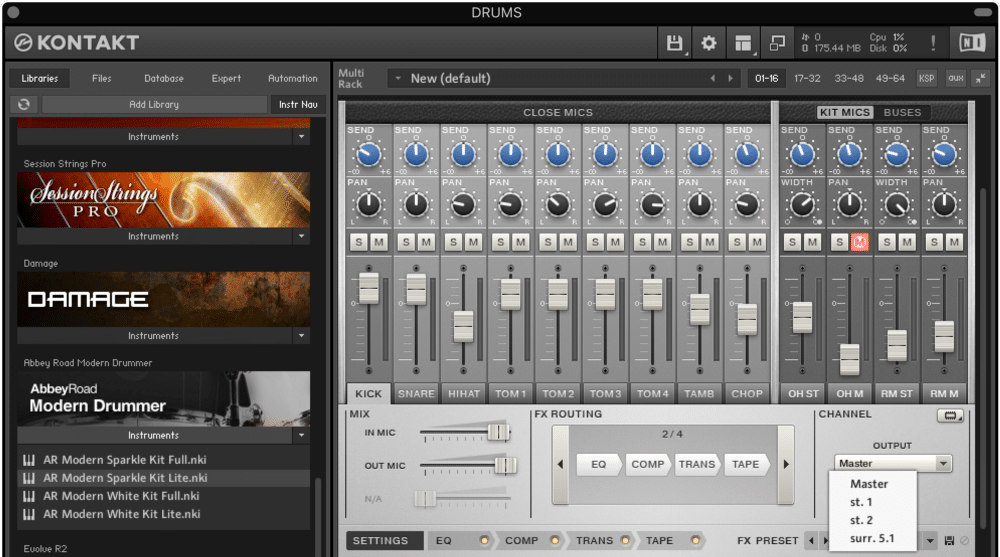
Click on SETTINGS to access the output assignment option (this may vary depending on what Kontakt library you’re using). In the screenshot above, the output selection dropdown can be found to the right of the UI.
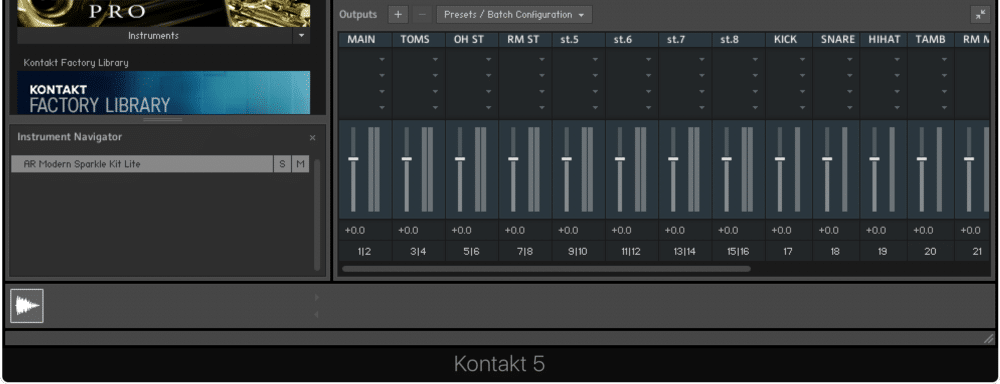
For the purposes of this tutorial, let’s use the following routings.
- MASTER: Output 1 – 2
- KICK: Output 17
- SNARE: Output 18
- HIHAT: Output 19
- TOM1: Output 3 – 4
- TOM2: Output 3 – 4
- TOM3: Output 3 – 4
- TOM4: Output 3 – 4
- TAMBOURINE: Output 20
- OH ST: Output 5 – 6
- RM ST: Output 7 – 8
- RM M: Output 21.
With this routing setup, kick, snare, hi-hat, tambourine, and the mono room mic will get routed to dedicated mono outputs. All four toms will get routed to one single stereo output. Finally, the stereo overhead and stereo room mics will get routed to dedicated stereo outputs.

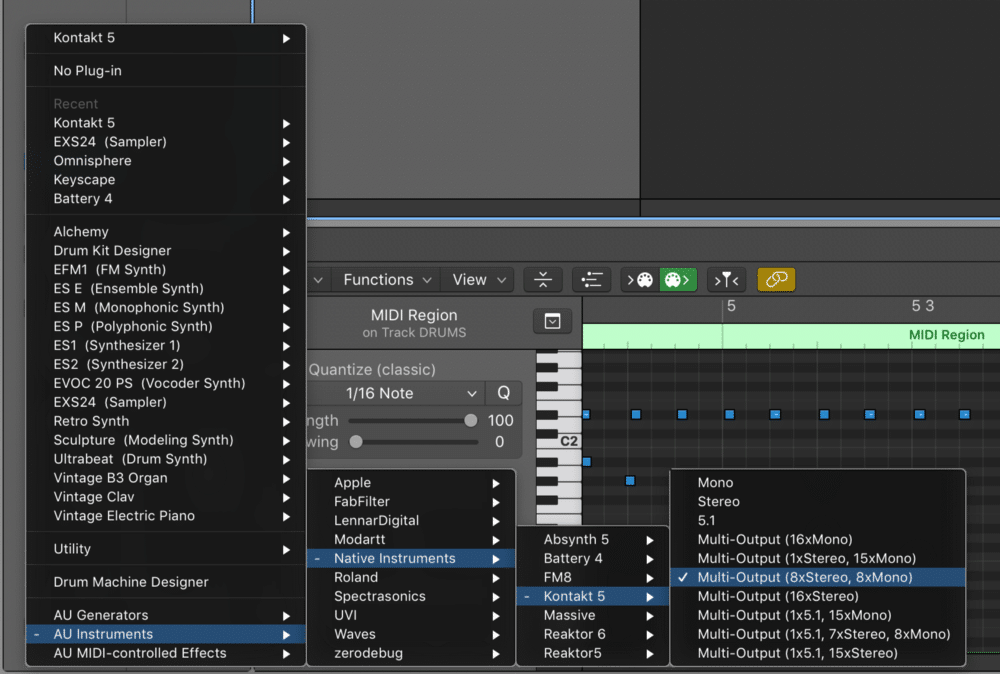
Next, go to Logic Pro X’s mixer view, and click the + button under the fader to access the multi-output channels. Since we created a 8xStereo/8xMono configuration, there will be 15 additional channel strips in addition to the main output channel strip, for a total of 16 (8x Stereo/8x Mono) channels.
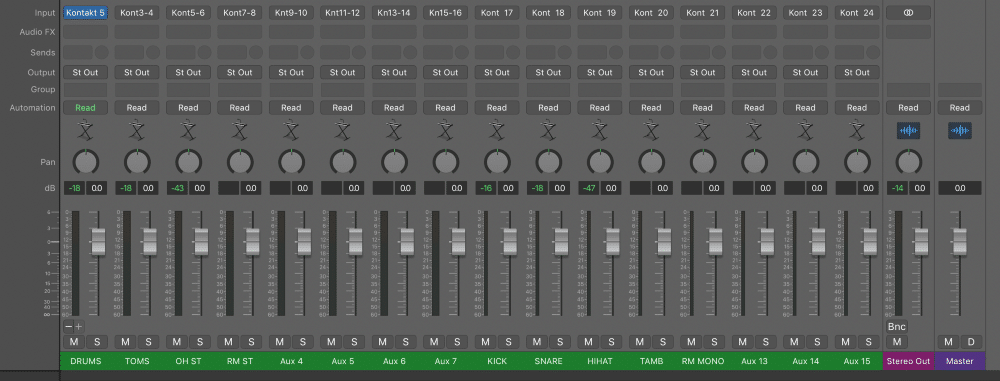

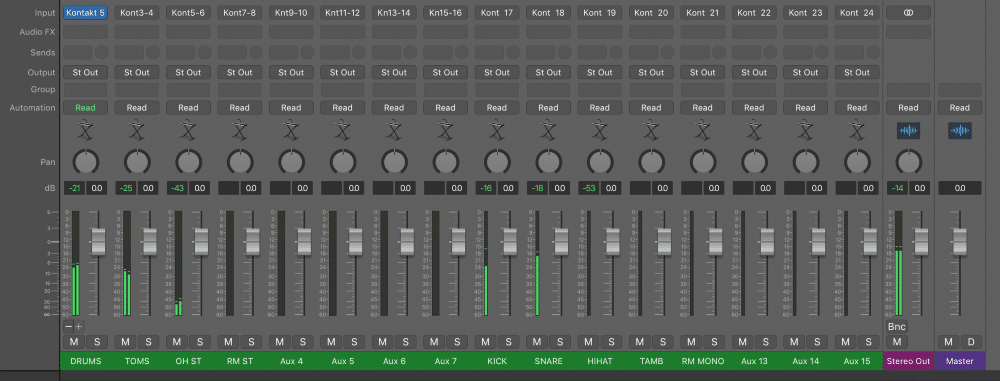
Finally, we can bounce each component into a separate audio track. To do this, select the DRUMS track, and press Cmd-Ctrl-B.
Ensure that Include Instrument Multi-Outputs and** As Additional Tracks** are both checked. When the offline bounce is finished, you’ll be presented with individual audio tracks for each.

Since my MIDI sequence didn’t contain any tambourine, there is no resulting audio file. Lastly, the audio files have different lengths because Logic automatically trims silence off the end of the file.