Fading audio in and out is useful in a variety of situations. Whether you need to do a long fade out at the end of a song or add a short fade in at the start of an audio sample, Logic Pro X has the necessary tools to get it done. In this post, you’ll learn how to fade in and fade out audio in Logic Pro X.
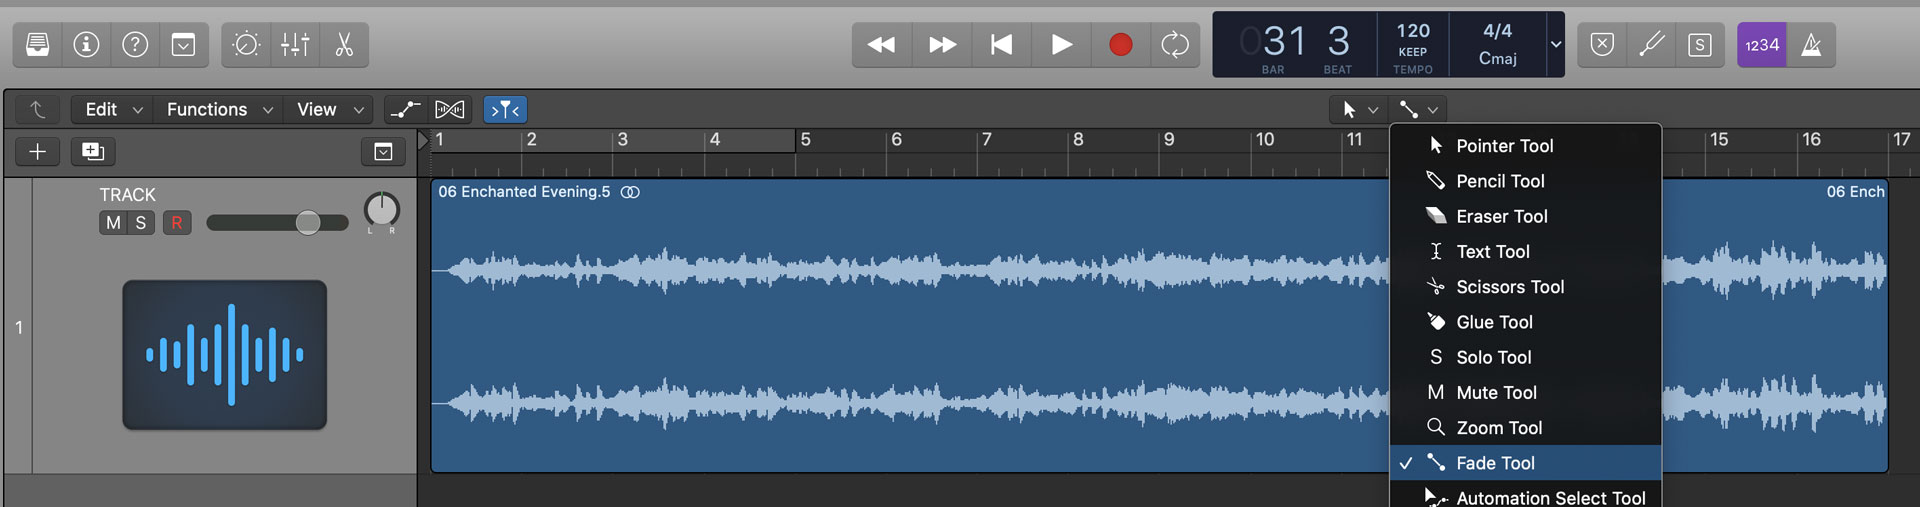
Fade with the Fade Tool
The easiest way to fade audio in Logic Pro X is to use the fade tool. This method doesn’t require volume automation, and it can only be used with audio files. If you’re looking for a way to fade out software instruments, you’ll need to use the volume automation method instead.
The fade tool doesn’t snap to Logic’s grid, so I wouldn’t recommend it for making super precise edits across multiple tracks. However, it is perfectly suitable for making fades on individual audio files. For me, the fade tool is most useful for adding very short fades at the start and end of audio clips.
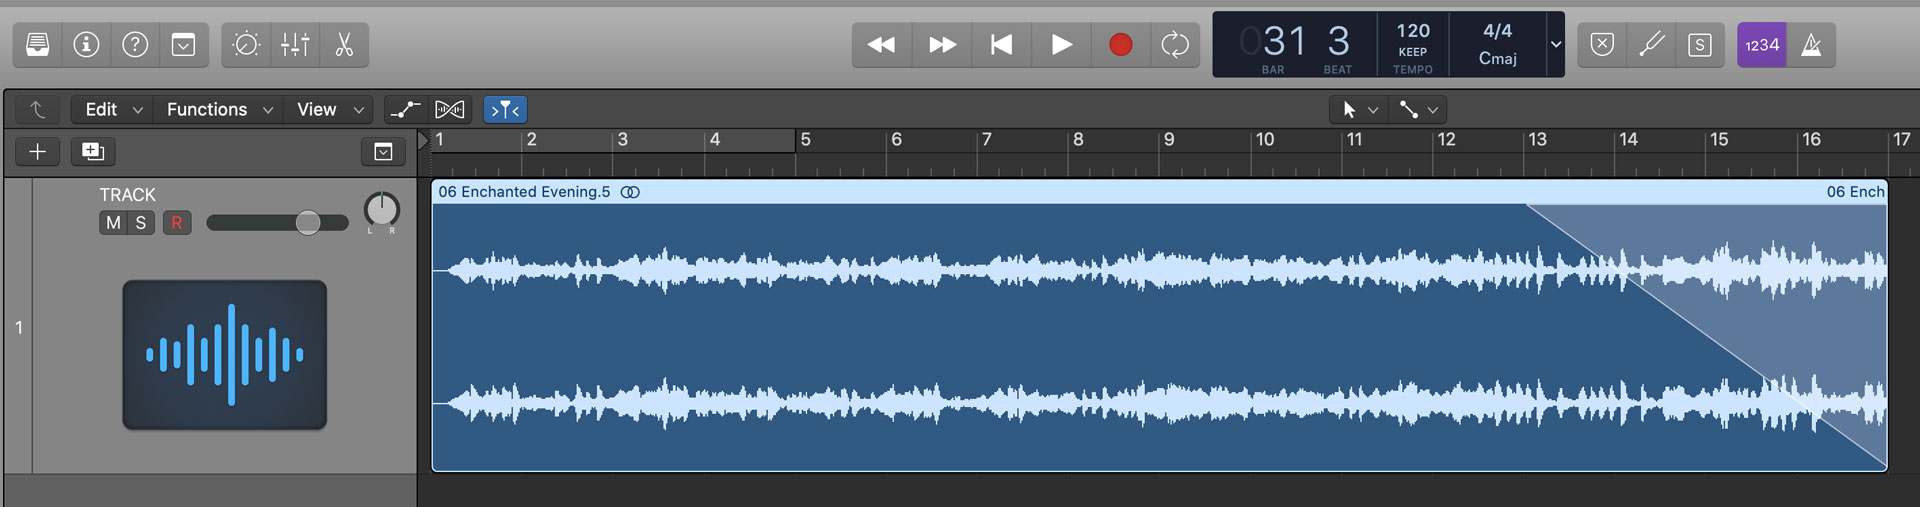
For this example, we’ll fade out the last four bars of the audio clip below.

First, change your secondary tool to the fade tool in Logic Pro X.
Next, hold down the ⌘ key, and click and drag from the end of the audio clip to the left. In this example, I created a fade out from m17 to m13.
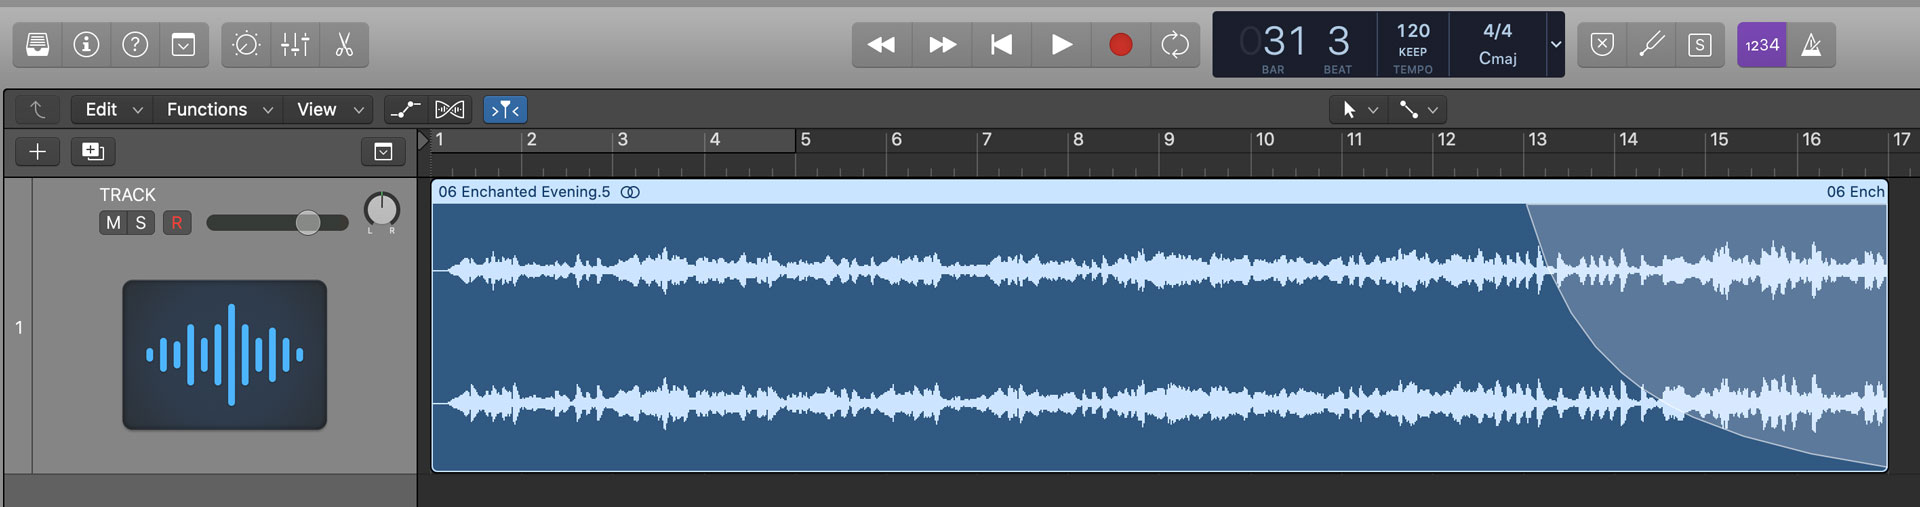
By default, the fade tool will create a linear fade that lowers volume at a steady rate over time. By clicking and dragging up or down, the curve of the fade can be changed to logarithmic or exponential. The screenshot of the fade out below shows an example of a logarithmic curve.
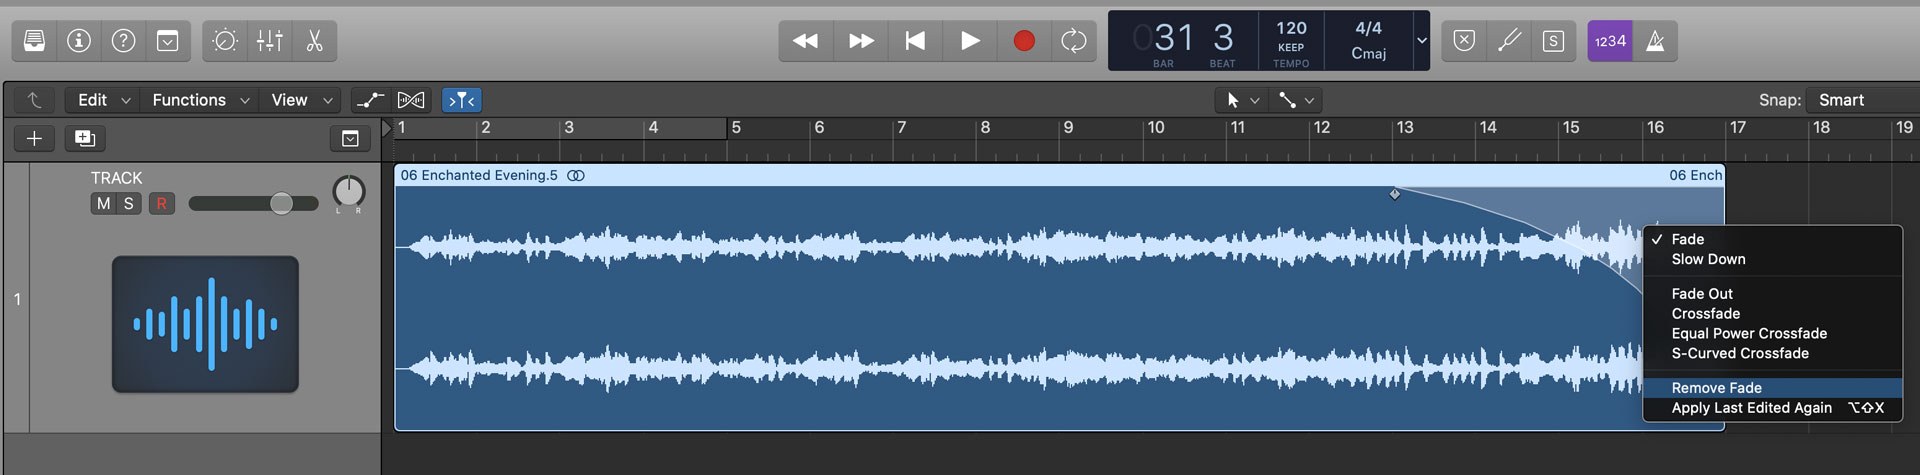
To remove a fade, right click on the fade and select “Remove Fade”.
Fade with Volume Automation
Volume automation is another way to fade in and fade out audio in Logic Pro X. Unlike the fade tool method mentioned above, volume automation can be used to fade out software instrument tracks, auxiliary tracks, and more. Since volume automation can be snapped to Logic’s grid, it’s the best method for making precise fades, especially across multiple tracks.
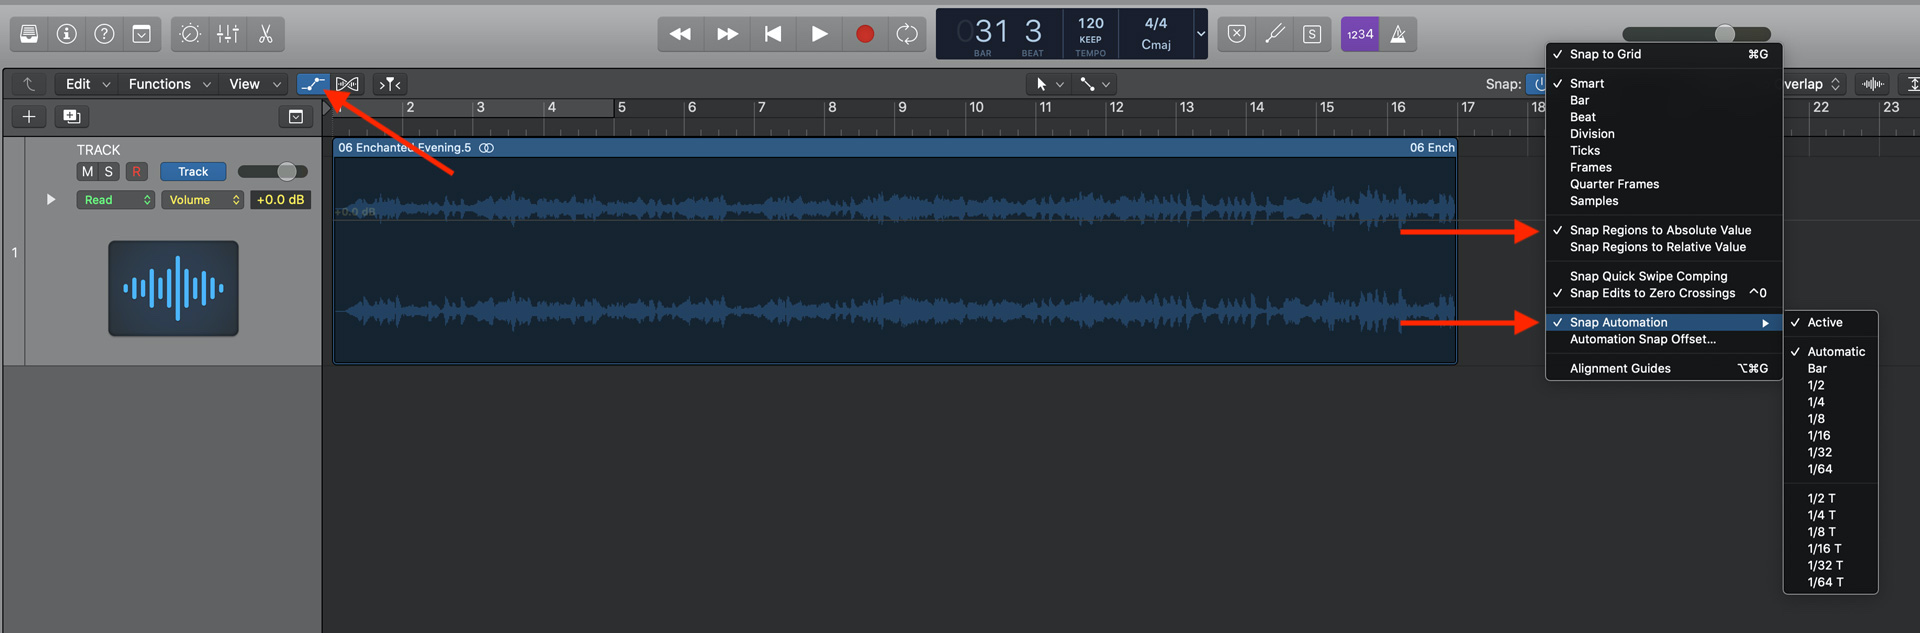
First, make sure “Snap Automation” is enabled in your snap settings. I usually keep the sensitivity setting on “Automatic”, but feel free to change it to another value if needed. I also recommend enabling “Snap Regions to Absolute Value”. After your snap settings have been configured, click the automation mode next to “View” in the top right of the Logic Pro X user interface.
Next, ensure the automation parameter is set as “Volume”, and click anywhere on the yellow automation line to make an automation point. Since I am looking to fade out the last four measures, I’ve made two automation points – m13 at 0 dB and m17 at -∞ dB. If needed, more automation points can be added in between to change the automation curve.
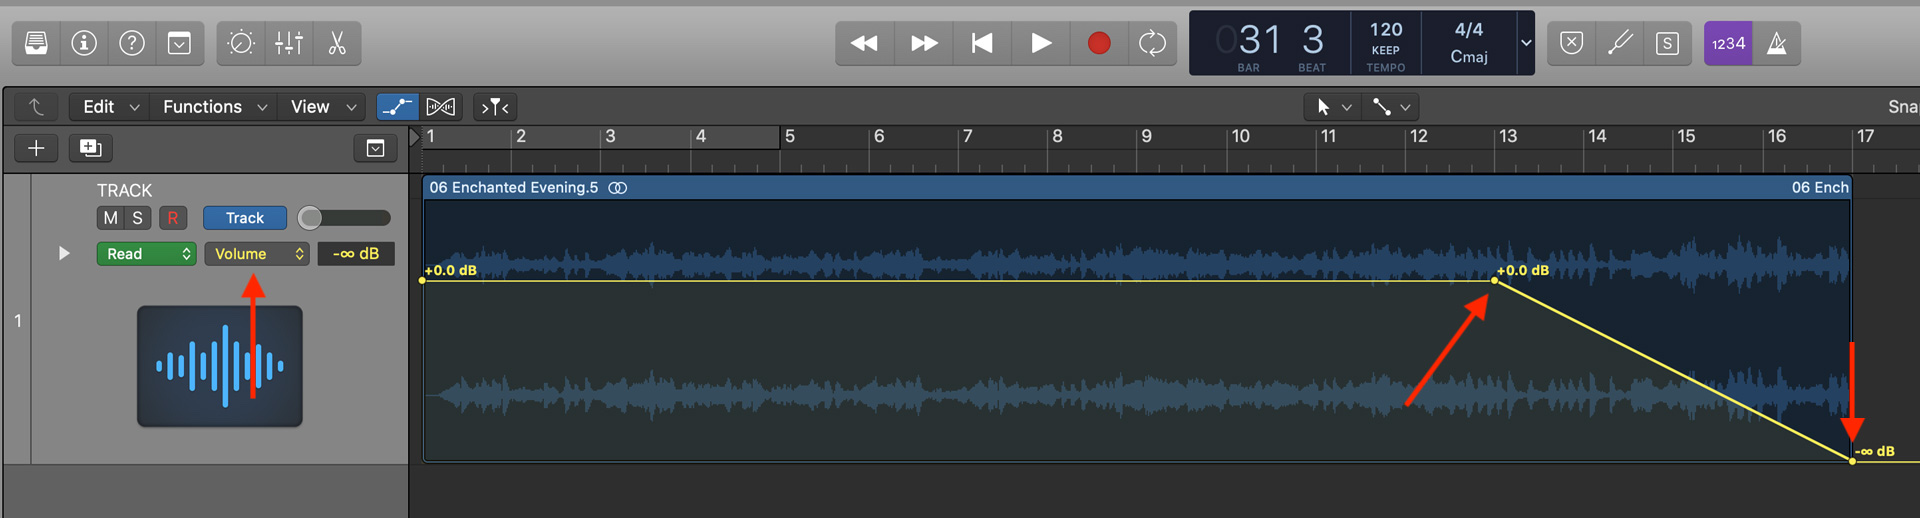
To remove an automation point, click on the point and press the delete key.
Fade with Destructive Editing
The final way to fade out a region in Logic Pro X is to use the built-in audio editor to make destructive edits on the audio file. Keep in mind destructive edits will be saved directly into the audio file, so you should only use this method if you know what you’re doing. In general, destructive editing is useful for making small edits to individual audio samples without having to bounce audio.
First, select the audio file to edit, and press ⌘6 to open Logic Pro X’s audio editor. Next, click and drag on the audio waveform to select the region you want to edit. Finally, click on “Functions” and select “Fade In” or “Fade Out”.
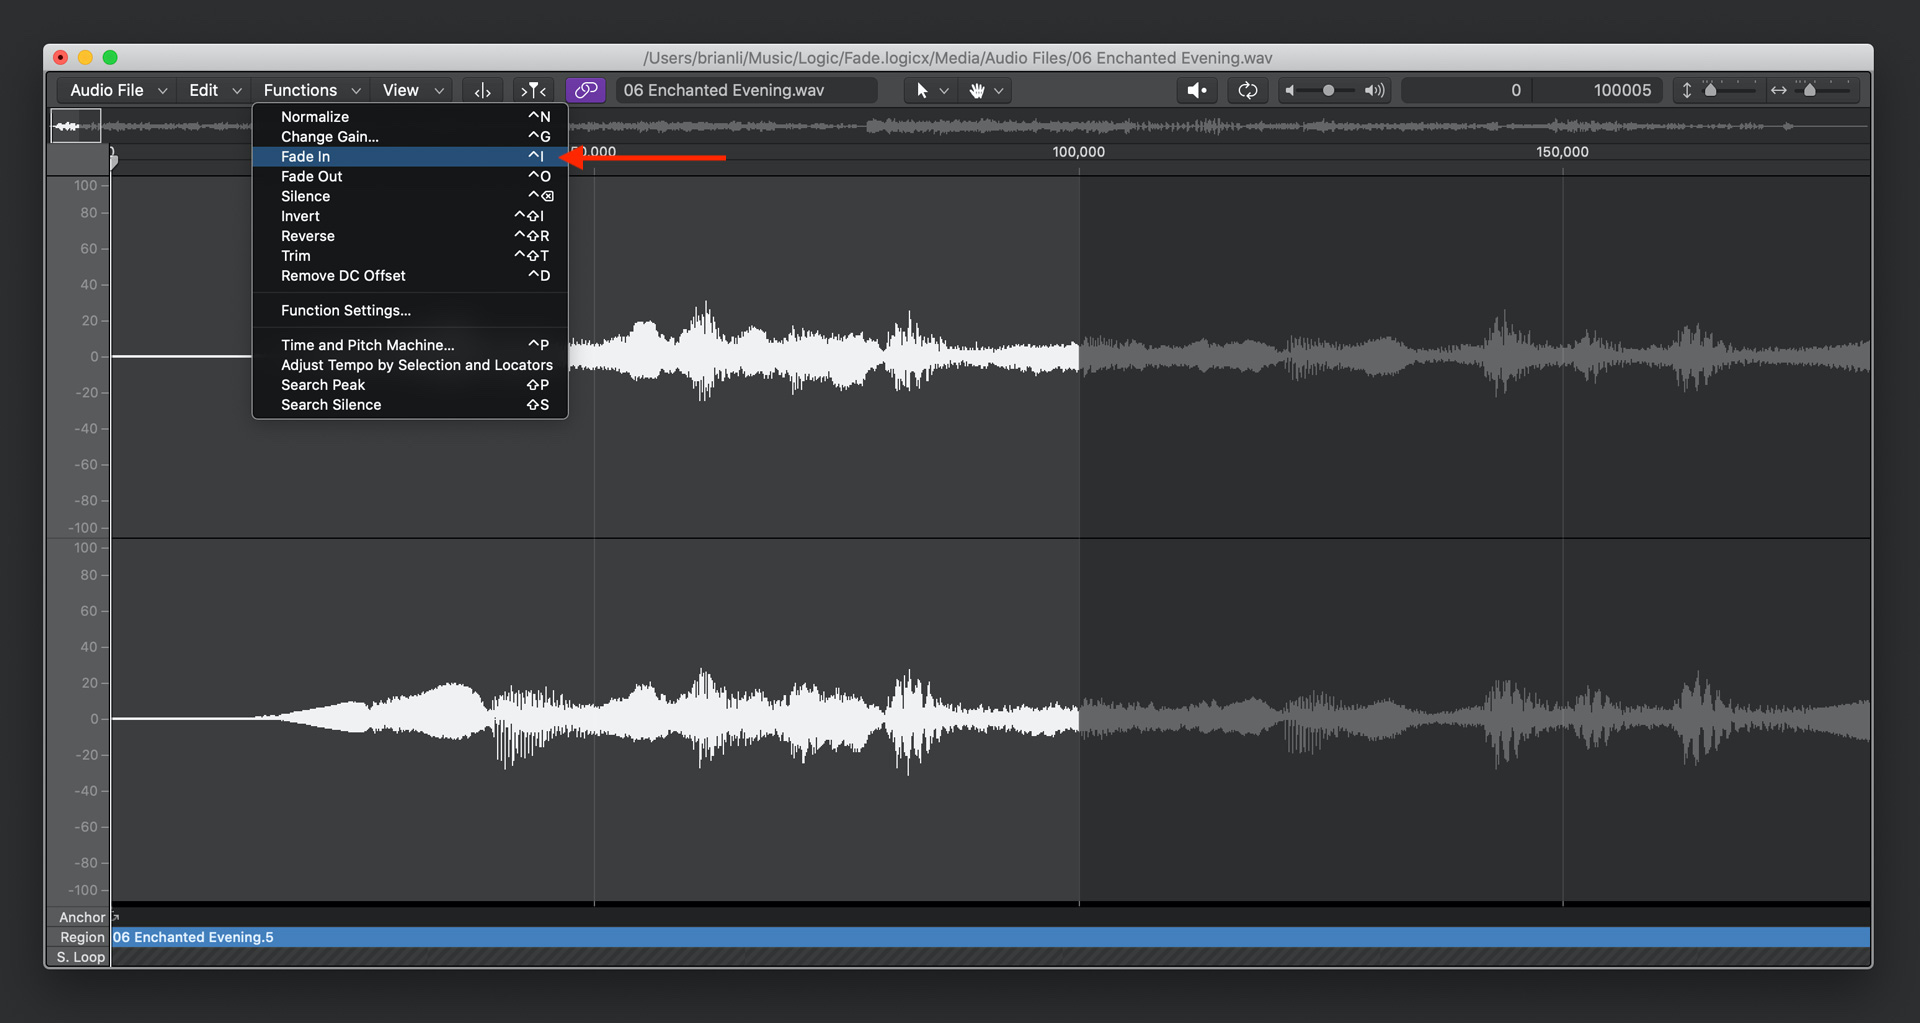
This destructive editing method doesn’t allow you to specify the fade curve, so I recommend only using it to make very small fades.
Conclusion
Logic Pro X gives you three different ways to fade in and fade out audio. The fade tool features a customizable curve, and is useful for non-destructive editing for individual files. Fading with volume automation supports snapping, and is the best method for making precise edits. Finally, using the audio editor to perform destructive edits is most useful for adding quick and certain fades to individual audio samples. If you have any questions about how to create fades in Logic Pro X, feel free to reach out on Twitter or send me an email.