Over the years, Transmit for macOS has grown from a simple FTP app to a full-blown file management workhorse that supports external services like Dropbox, Amazon S3, and Backblaze B2, and more. In this post, you’ll learn how to configure Transmit 5 to manage files on your Google Cloud Storage bucket.
Create a Google Cloud Storage HMAC Key
Unlike traditional SFTP servers, Google Cloud Storage buckets don’t have usernames and passwords. In order to connect to a GCS bucket, Transmit leverages Google Cloud’s Interoperability API, which “allows Google Cloud Storage to interoperate with tools written for other cloud storage systems.” To use the Interoperability API, you’ll need to create a Hash-based Message Authentication Code, or HMAC, key. The HMAC key comes in the form of a key pair (access key and secret key), and effectively acts as a username and password combination in the context of Transmit.
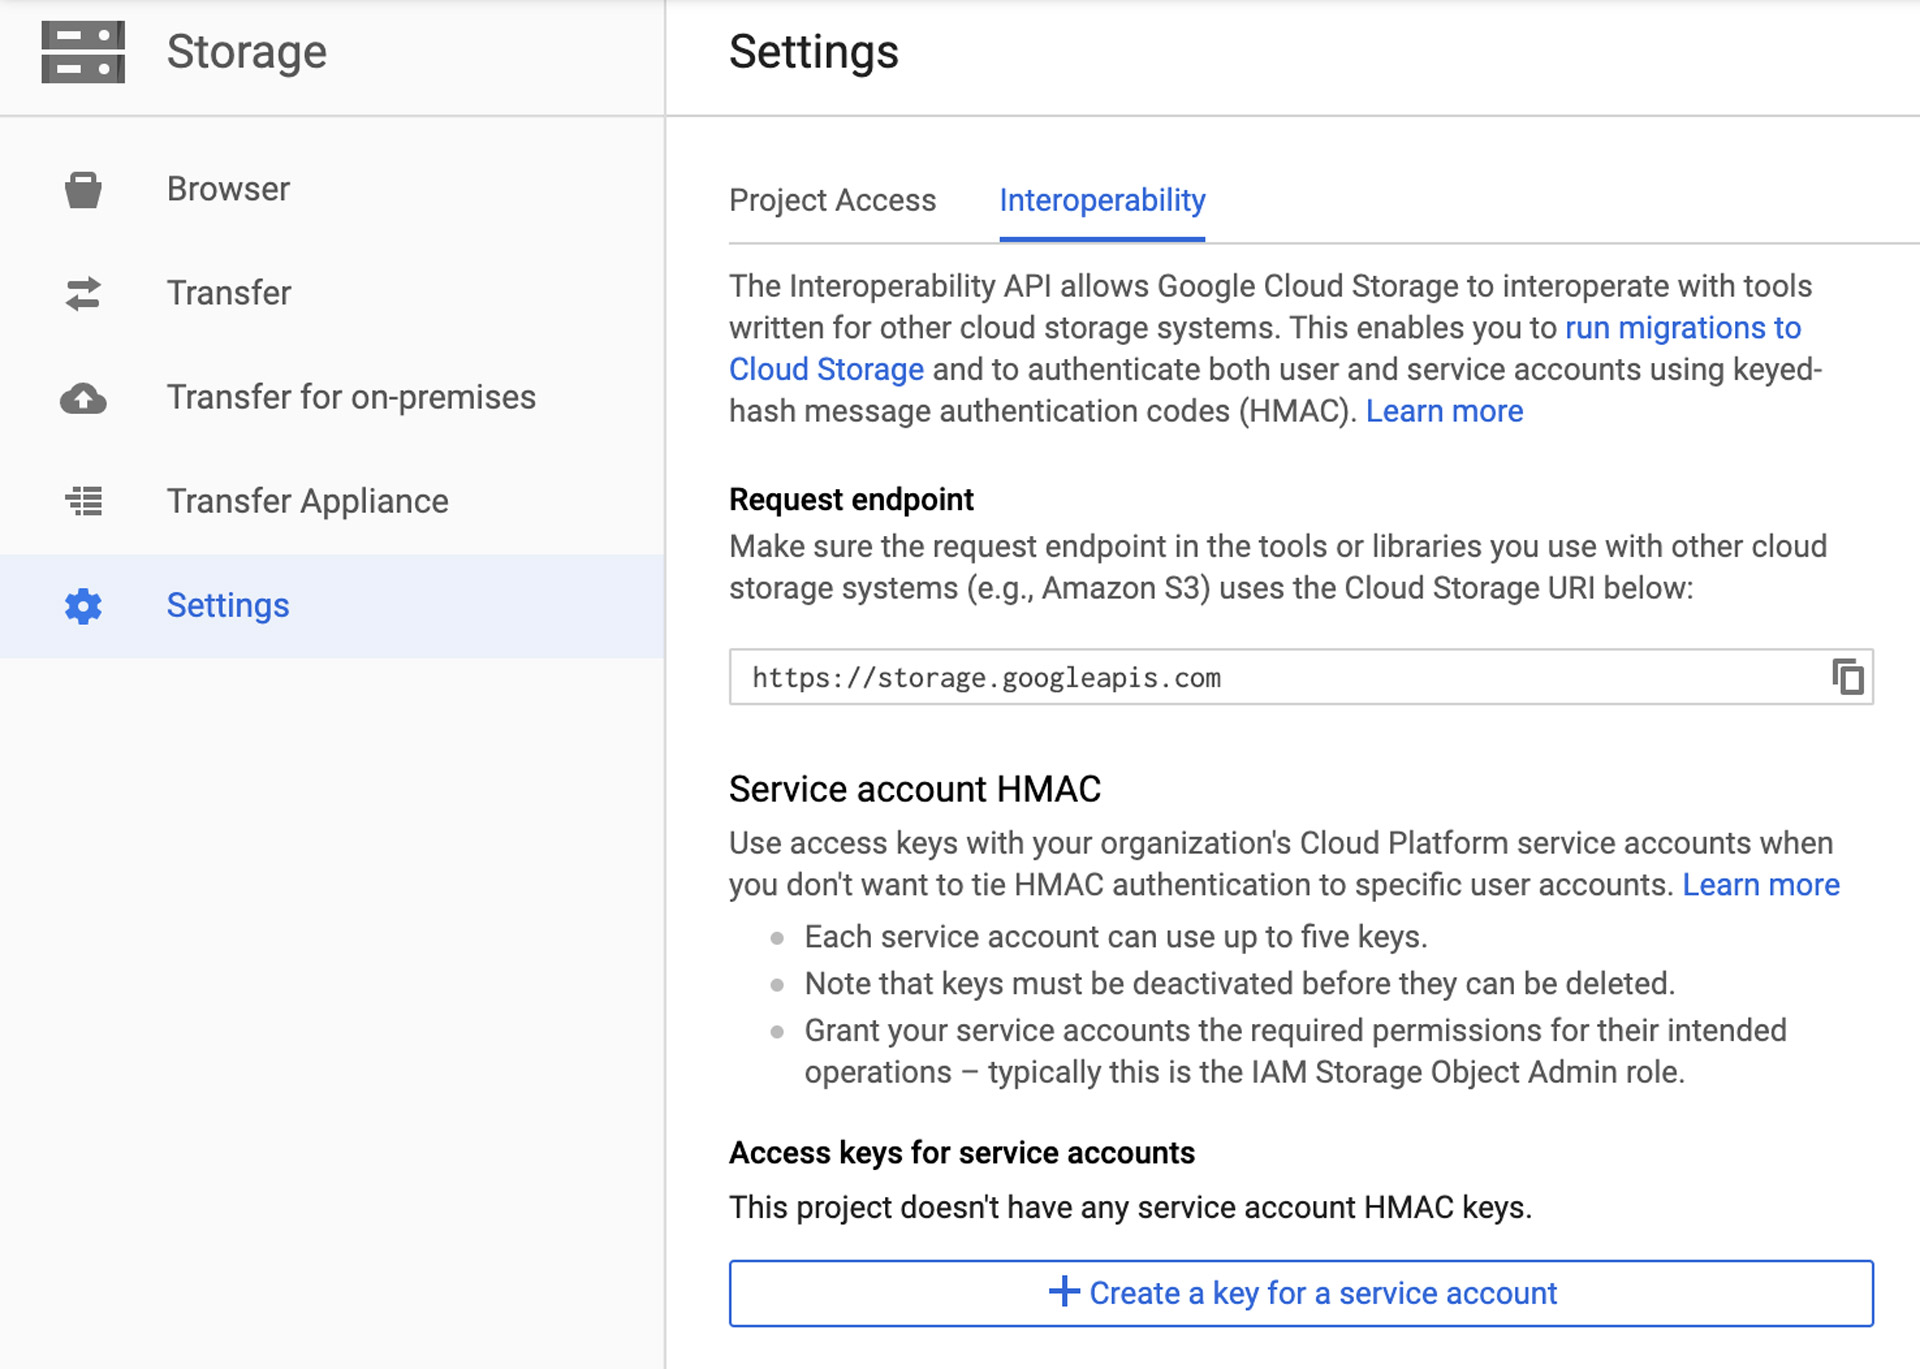
To create an HMAC key, navigate to the Google Cloud Storage dashboard.
Next, click on Settings -> Interoperability. Under Access keys for service accounts, click on Create a key for a service account.
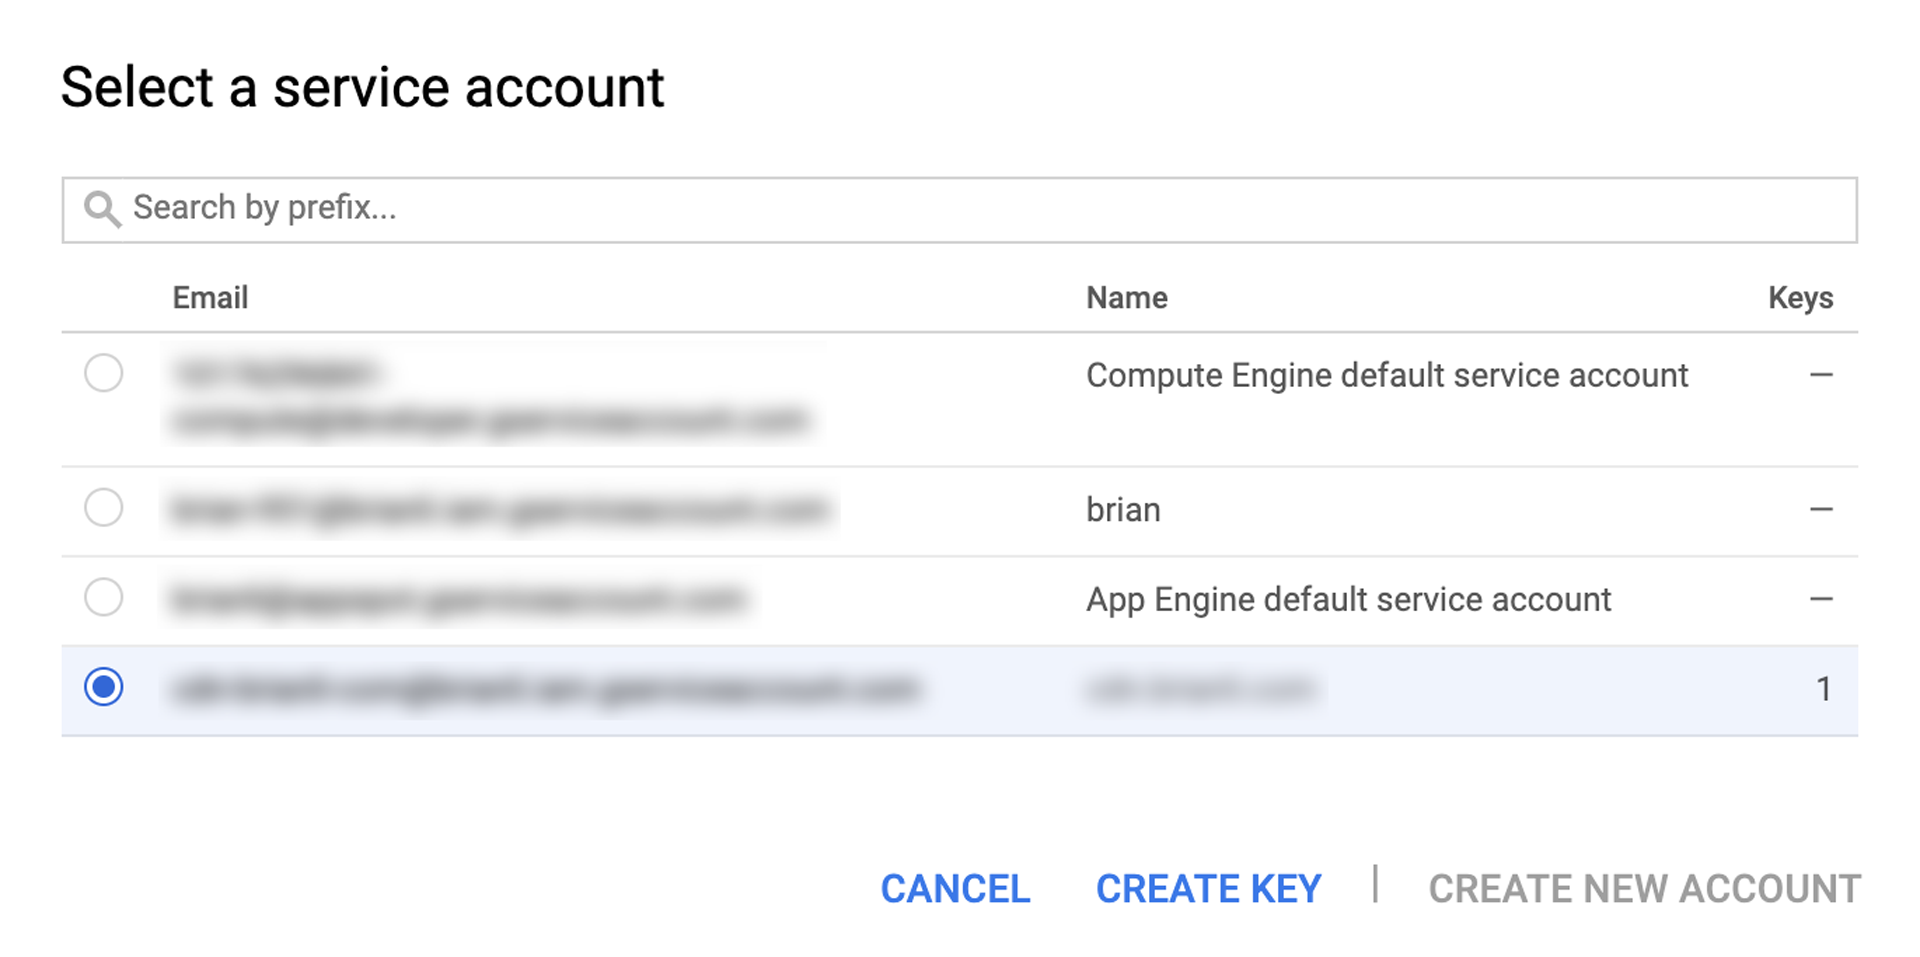
You should see a popup like the one in the screenshot below. Select the relevant service account that you’d like to generate the HMAC key for. In this example, I have selected a service account that only has access to Google Cloud Storage.
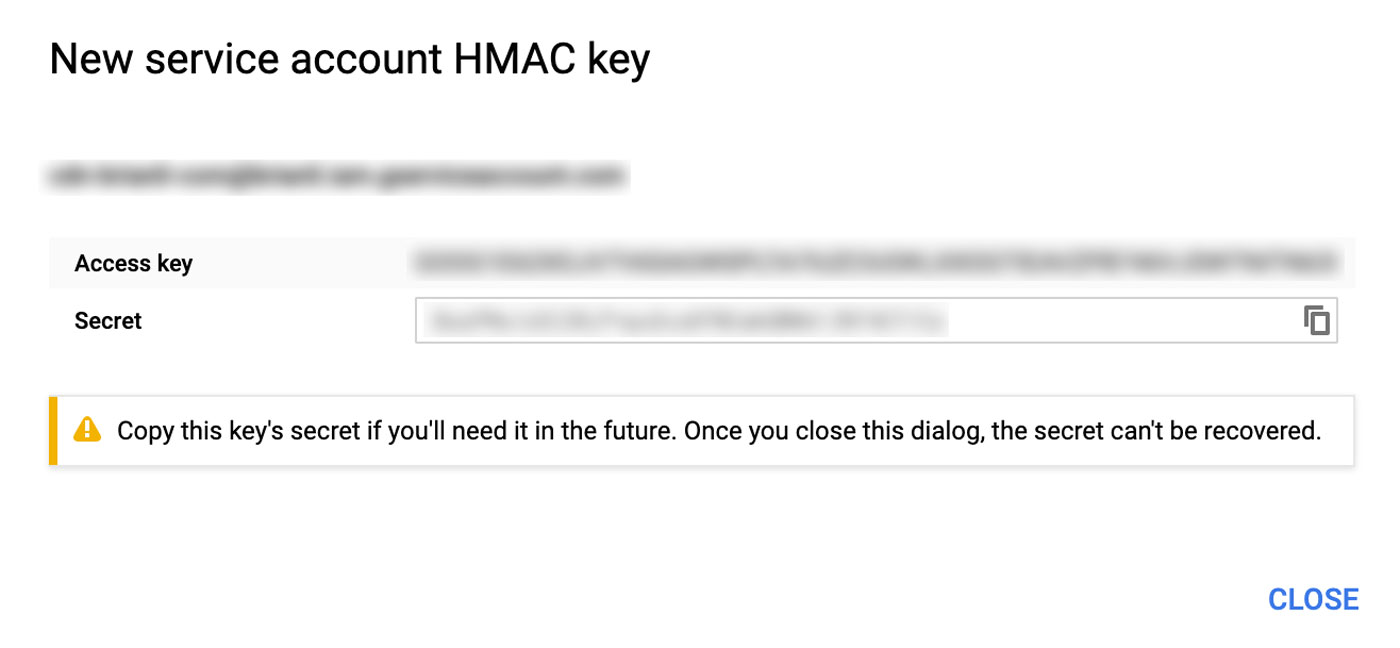
Google Cloud Storage will now present you with an HMAC key pair consisting of an access key and a secret key. Copy and paste these credentials somewhere safe – preferably a password manager like 1Password.
Configure Transmit to Access Your GCS Bucket
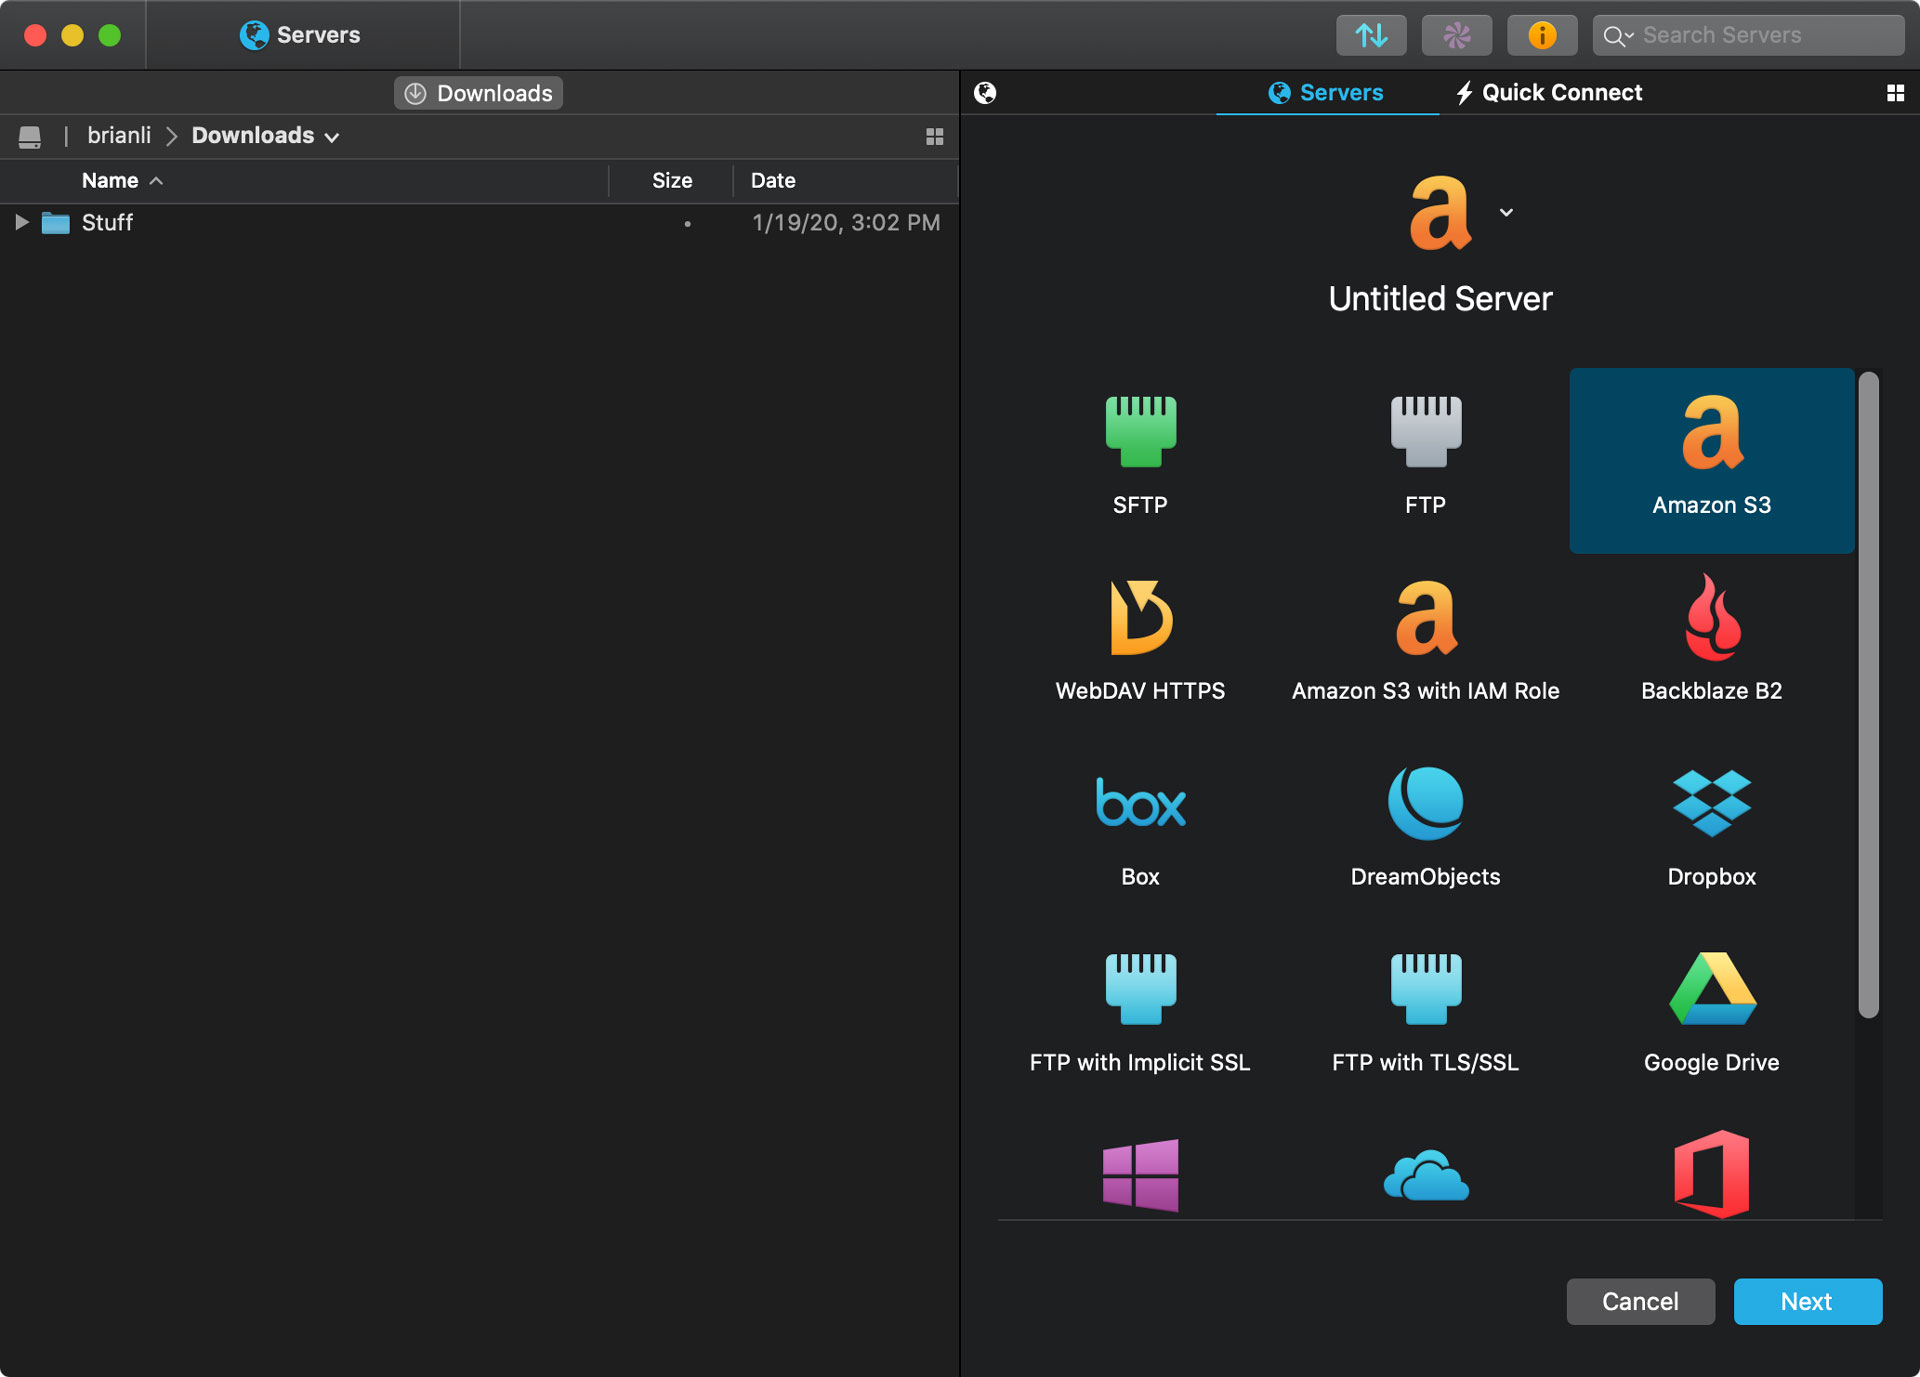
Next, open up Transmit 5, and add a server. Ironically enough, the first step to connecting your Google Cloud Storage bucket with Transmit is to select the Amazon S3 option. Feel free to name your server as well because leaving it as “Untitled Server” is a bad idea and will undoubtedly cause regrets in the future.
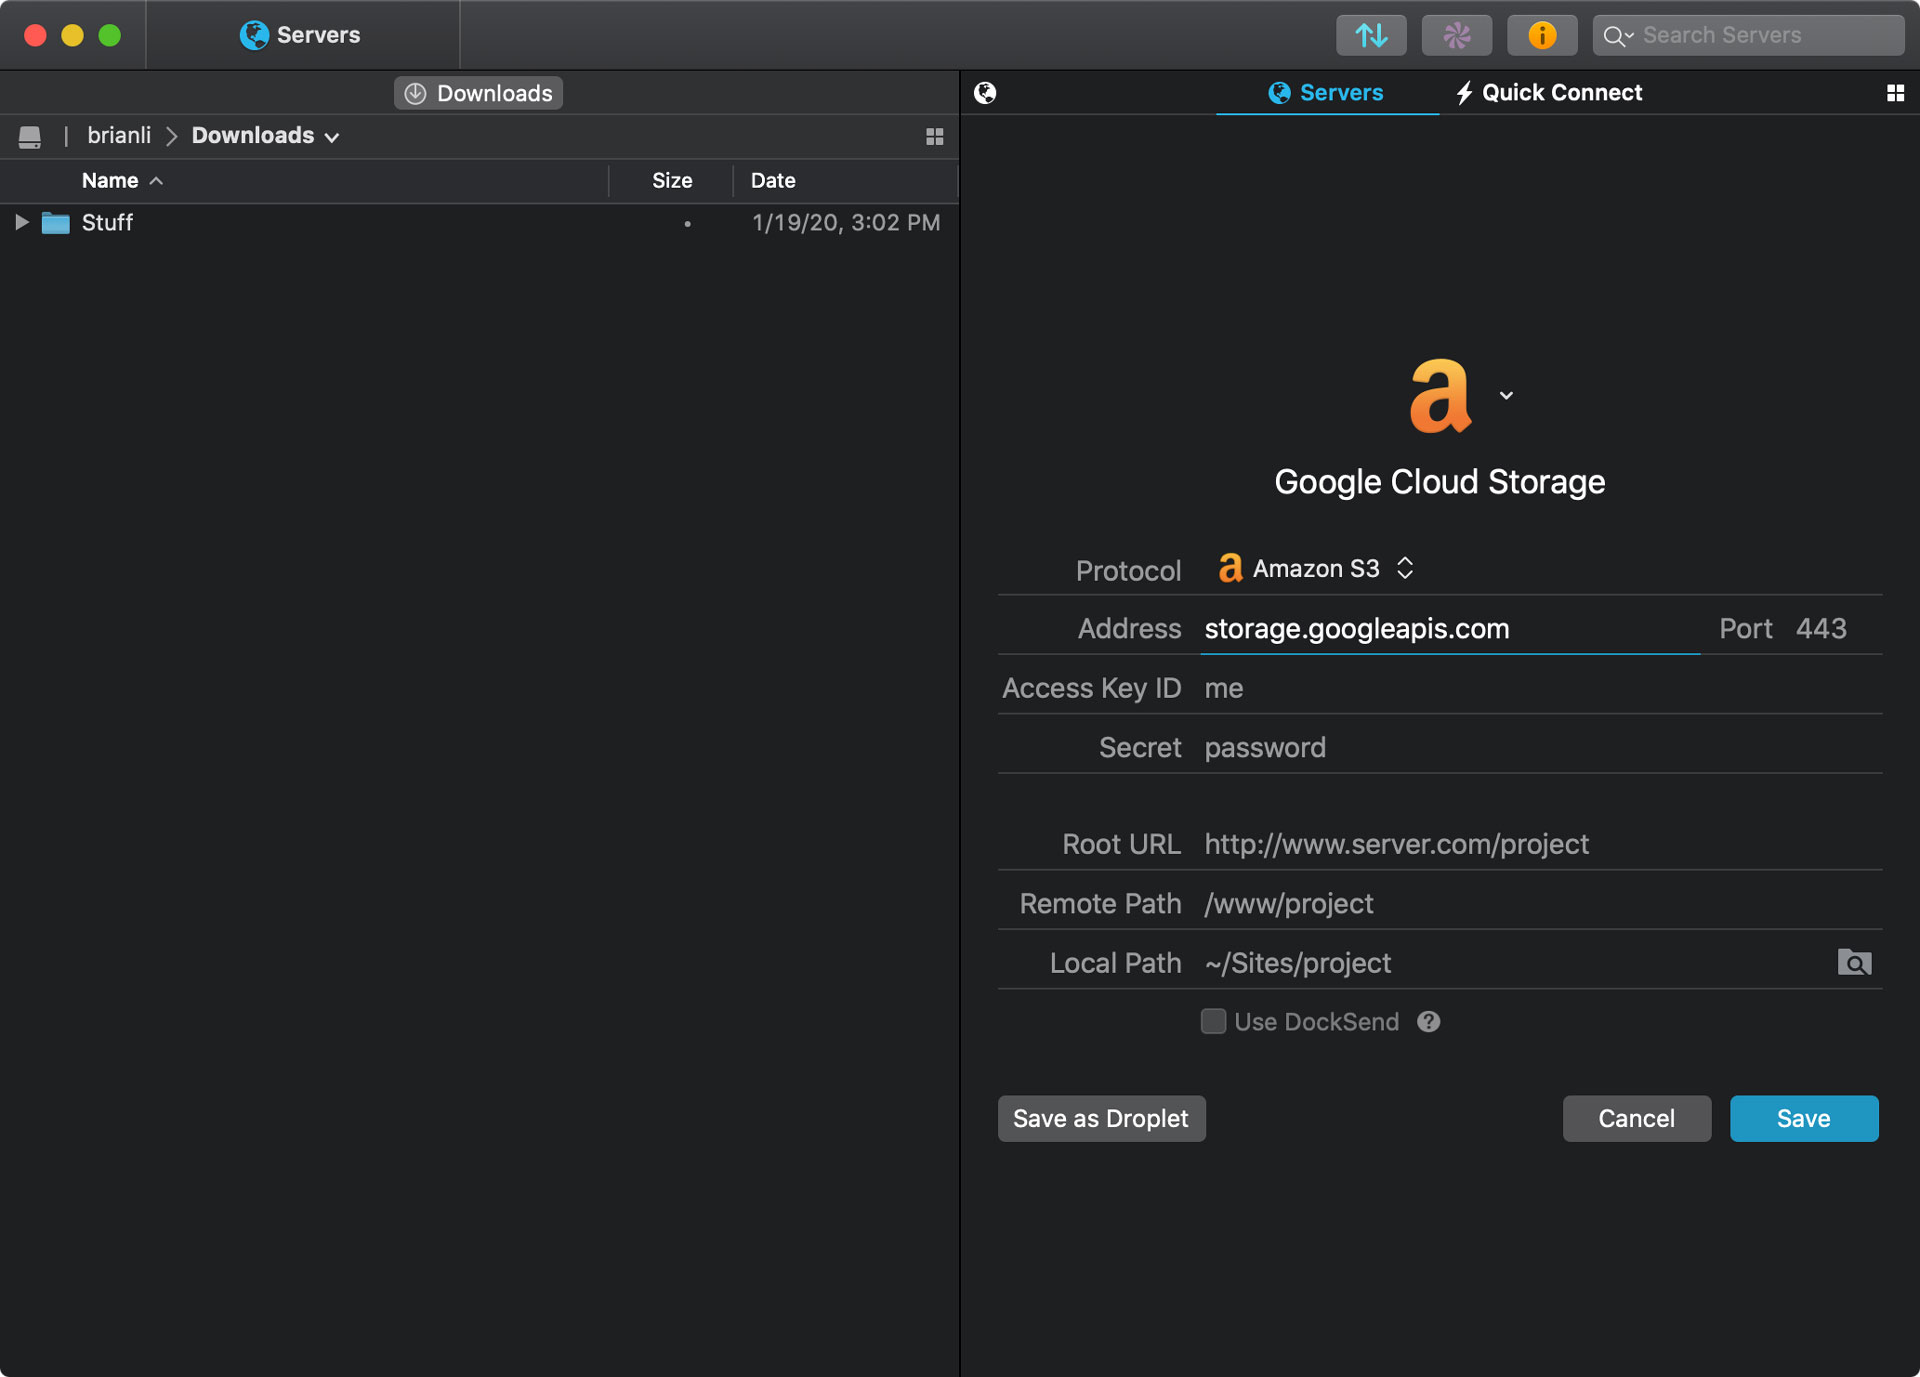
Next, type in https://storage.googleapis.com for the Address field. For Access Key ID field, use the access key from the HMAC key pair. Similarly, use the secret key from the HMAC key pair for the Secret field, and click Save.
You should now see the newly configured Google Cloud Storage bucket with an Amazon Web Services logo in your Transmit 5 server list.

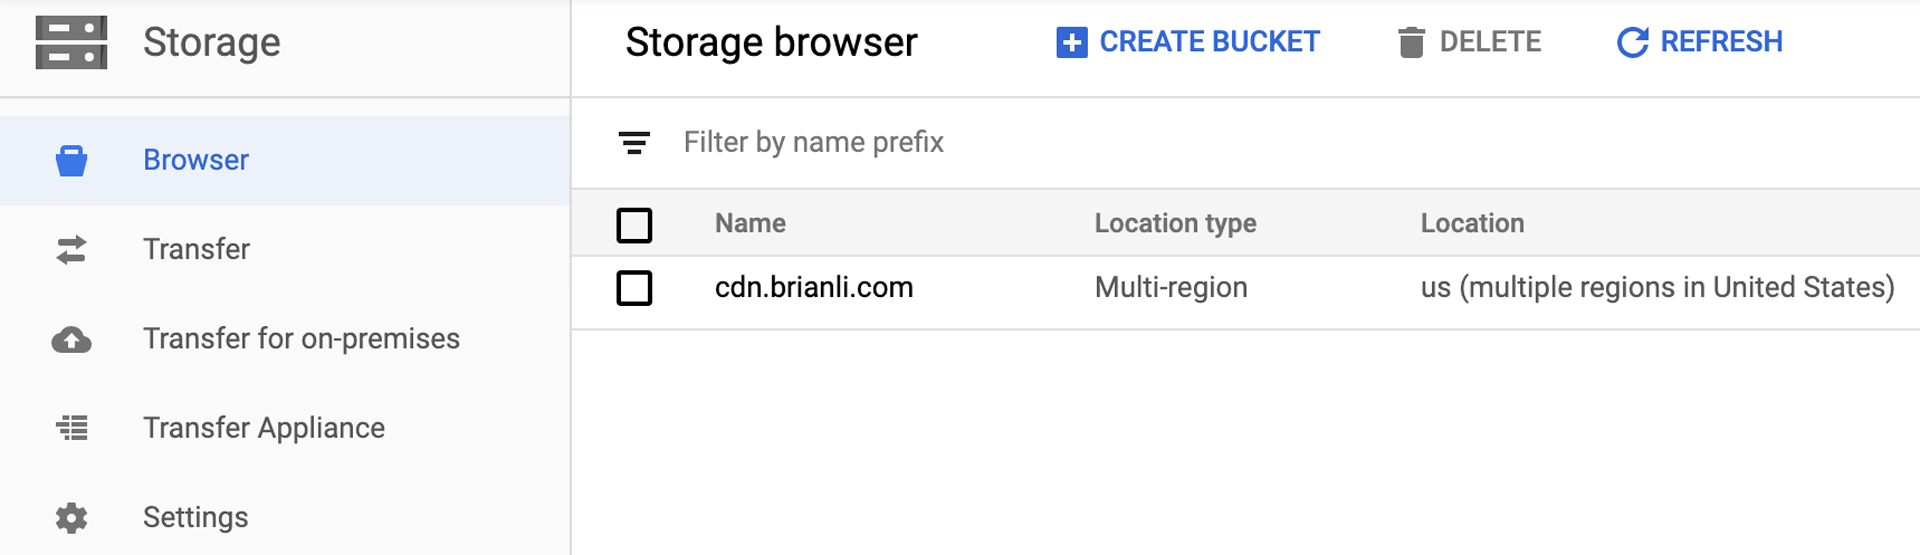
Finally, double click on the Google Cloud Storage server in Transmit 5 to access your bucket. In the screenshot below, cdn.brianli.com is the name of my Google Cloud Storage bucket.
Managing files in your Google Cloud Storage bucket with Transmit 5 is more covenient than using GCS’ web interface, and less scary than using gsutil in Terminal – especially if you’re not comfortable with command line. I hope this tutorial was helpful, and feel free to reach out to me on Twitter or send me an email if you have any questions or comments.