Before proceeding with this tutorial, make sure you’re running the latest version of the ICONex Chrome Extension wallet — v.1.0.1.32 is the first version to support the token swap. If you already have ICONex installed and have funds stored in the wallet, make sure you have either your Keystore/Wallet Password or your Private Key backed up. To update the ICONex Chrome Extension, either enable developer mode and update, or delete the extension and redownload it from the Google Play Store. Keep in mind deleting the extension will wipe your wallet as well, so you’ll need your Keystore file or private key to load it. Please do not proceed if you don’t have your wallet backed up.
The ICX token swap will end on September 25, so don’t feel like you have to rush to complete the swap ASAP. Personally, I will be waiting to see if we get Ledger support in the next two months before swapping my tokens.
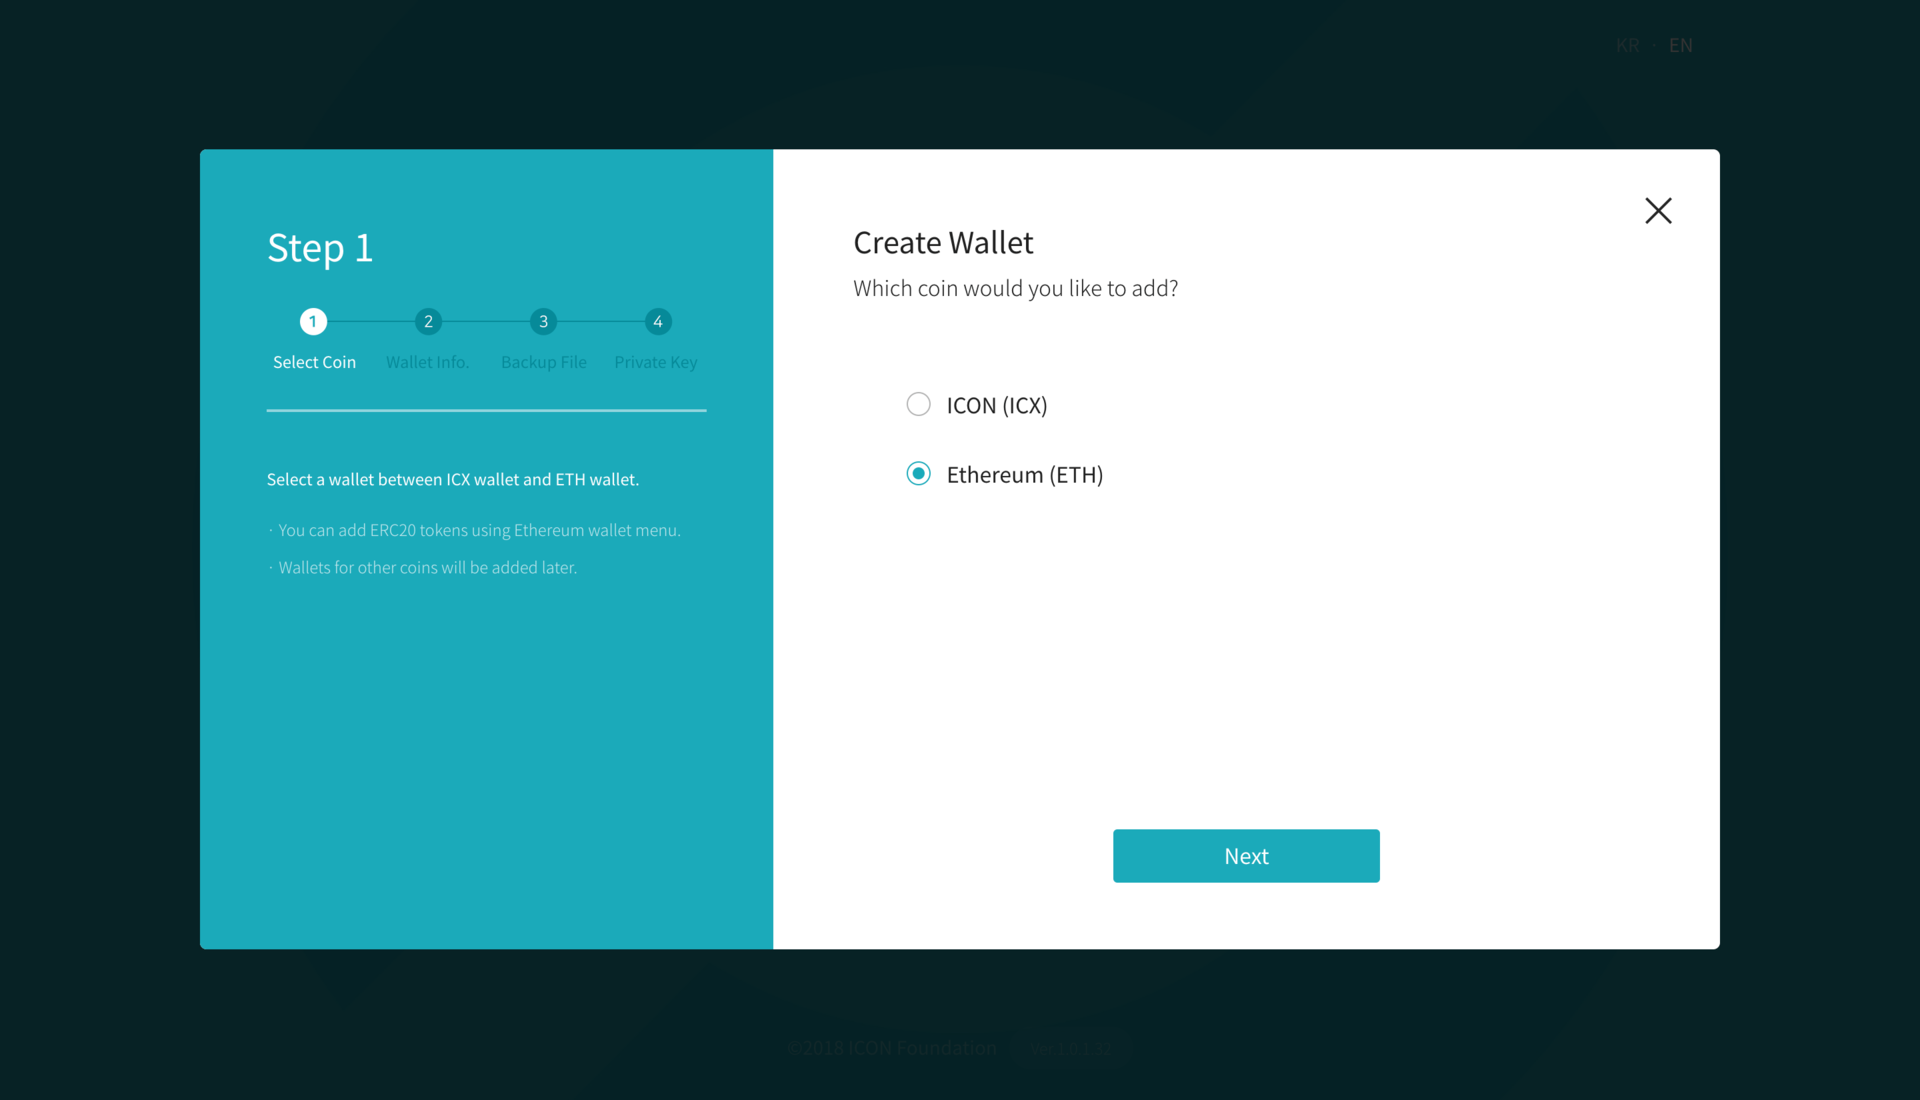
1. Create an ICONex ETH Wallet
If you’re already storing your ICX ERC-20 tokens in ICONex, please skip to Step 2. If you don’t already have an ICONex ETH wallet, you’ll need to create one to hold your ICX ERC-20 tokens before request a mainnet token swap. To create an ETH wallet, click on Create Wallet.
Select Ethereum (ETH) to create an ETH wallet.
Give your wallet a name and password. To prevent any confusion, I named my wallet TokenSwapERC20.
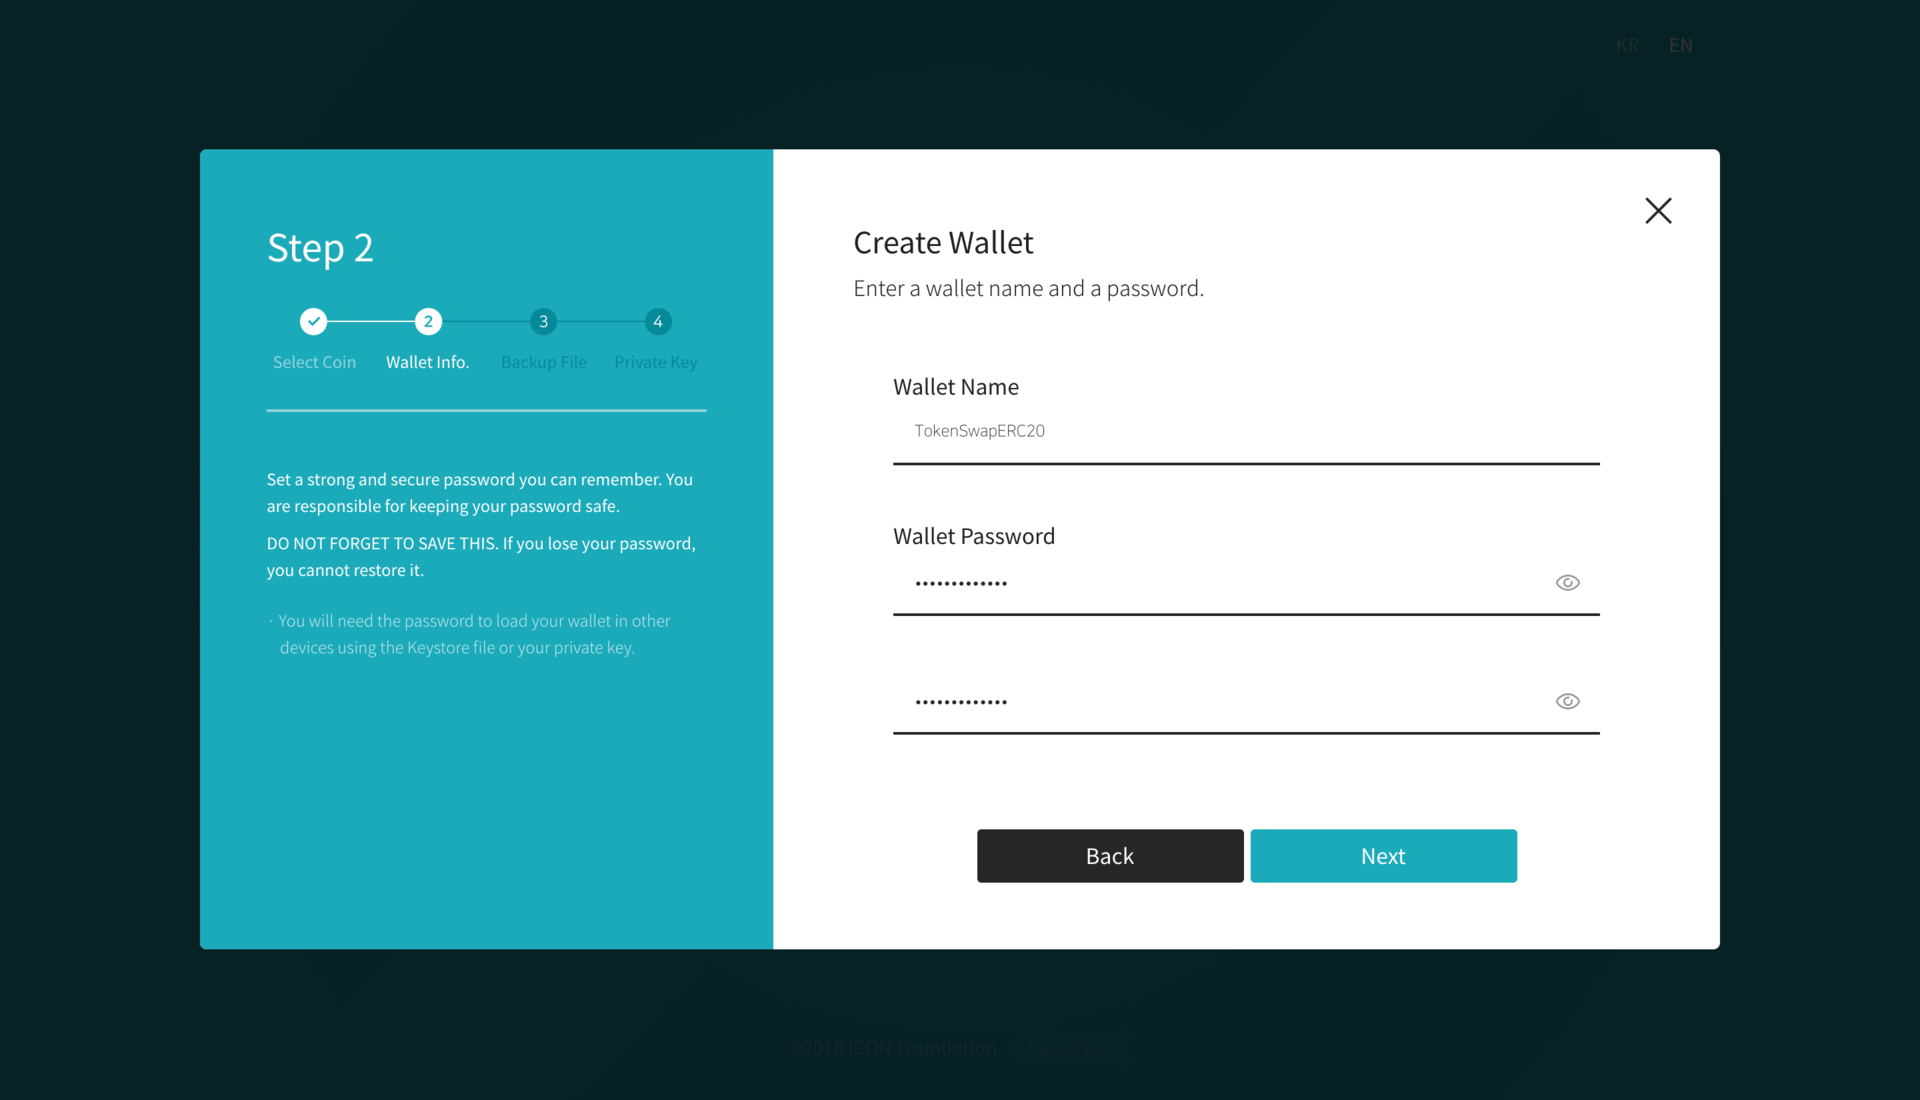
Be sure to save the Keystore file and keep it in a safe place.
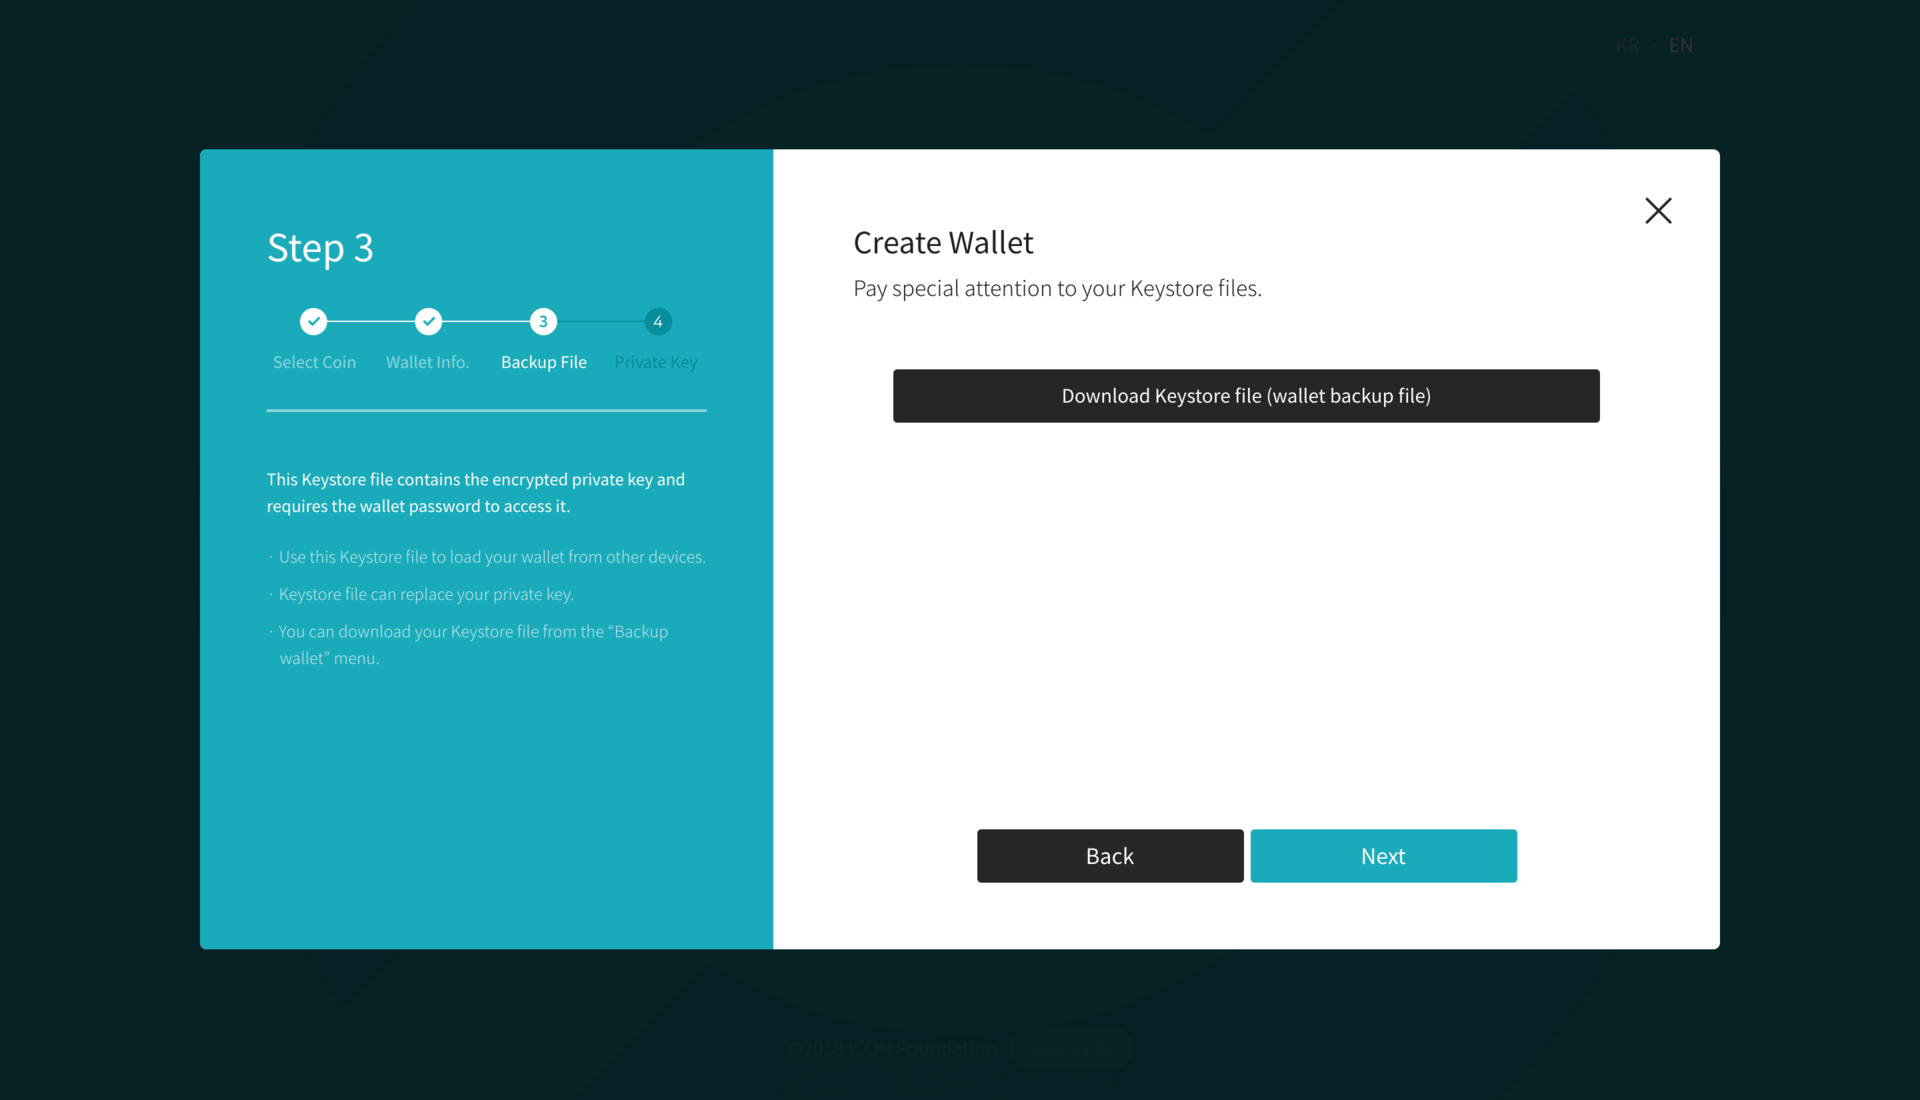
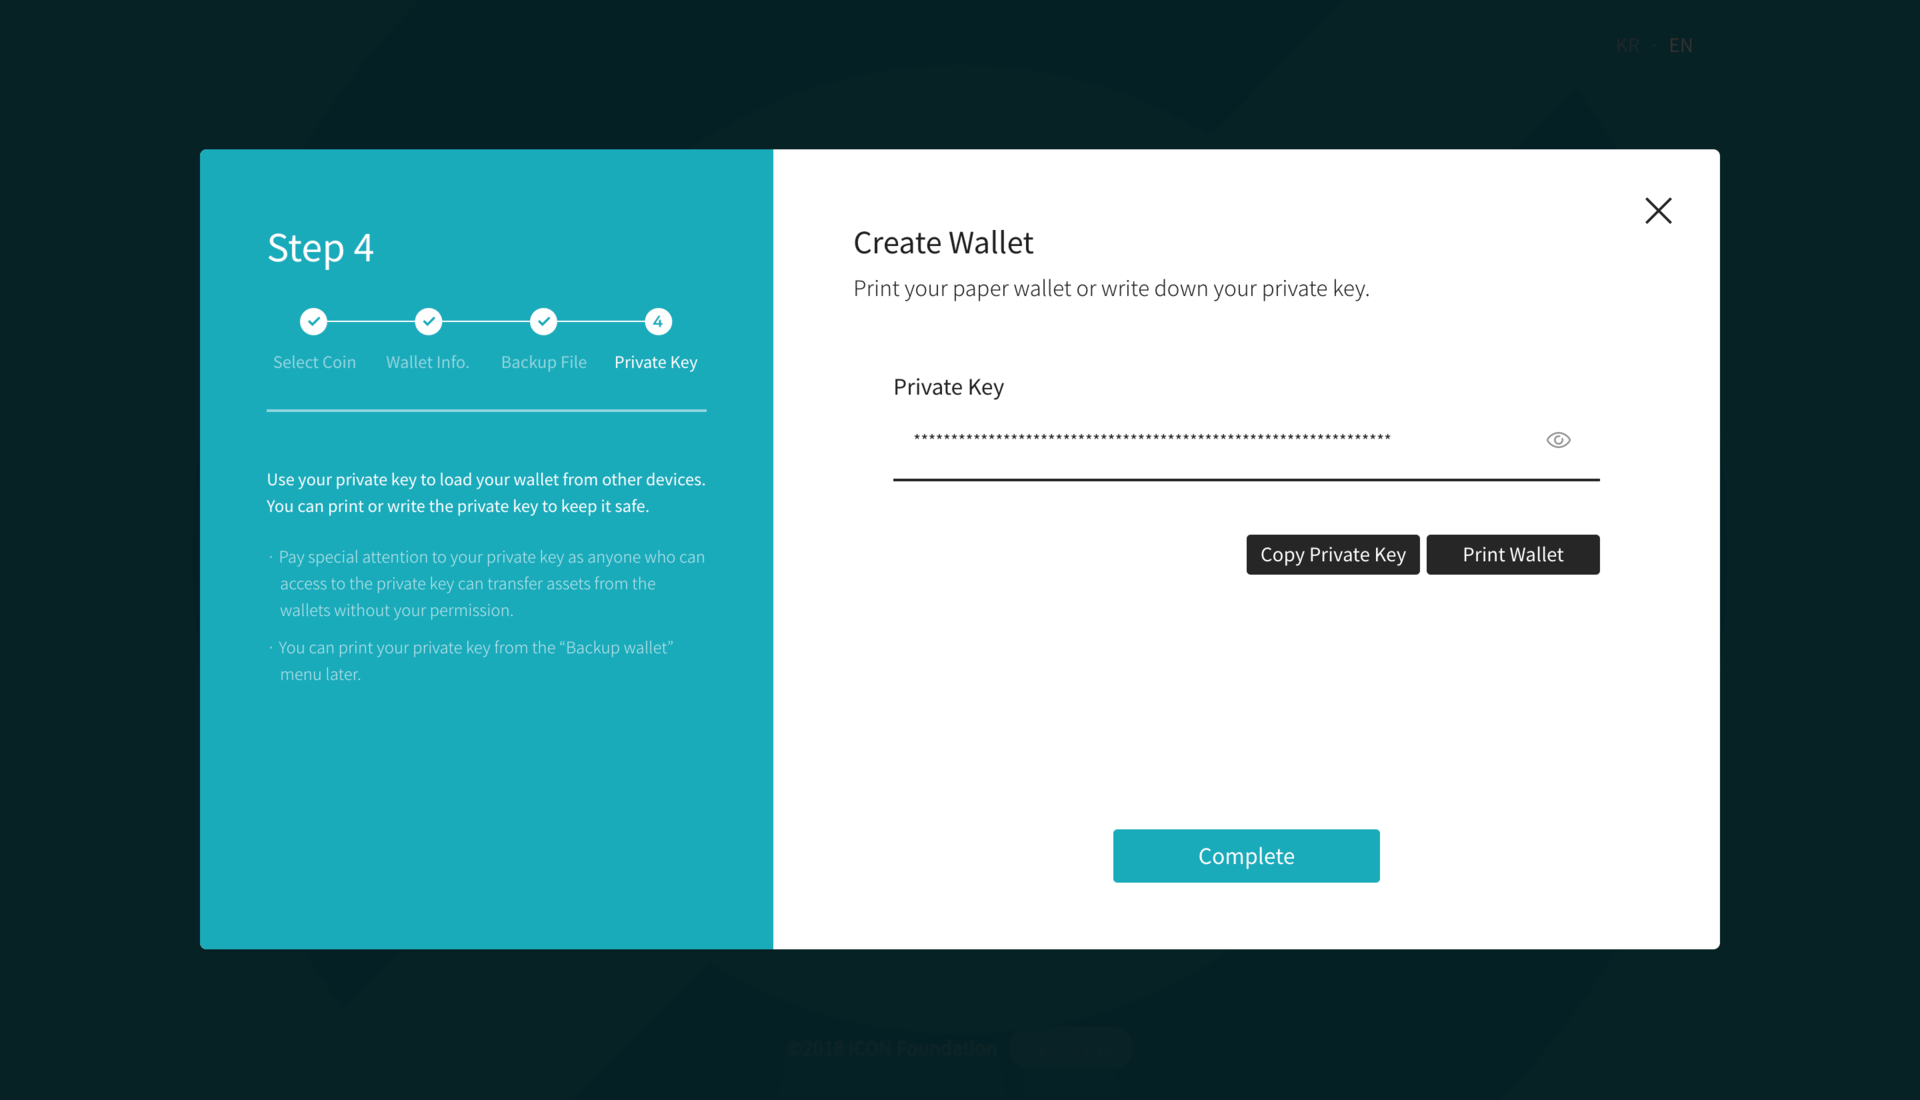
Write down your private key and put it somewhere safe.
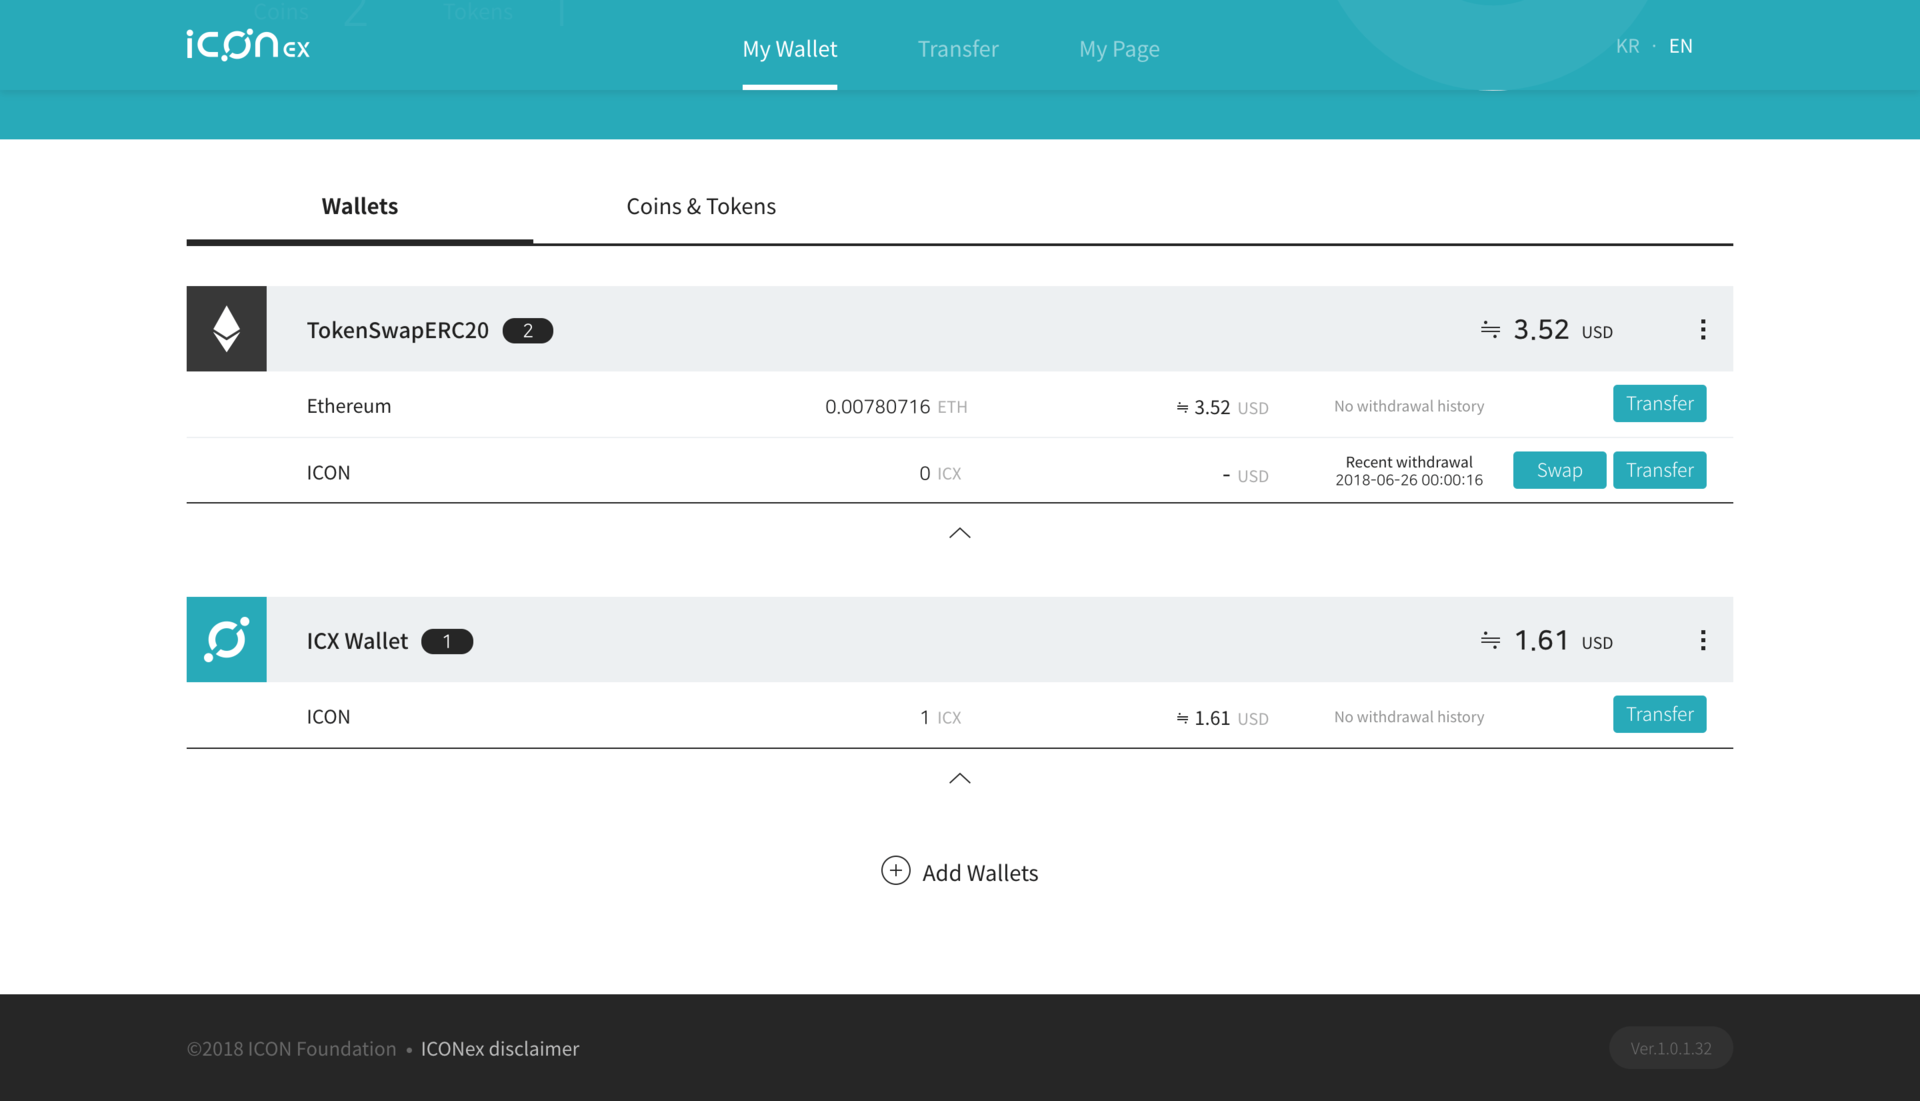
After your wallet is created, you should see something like this.
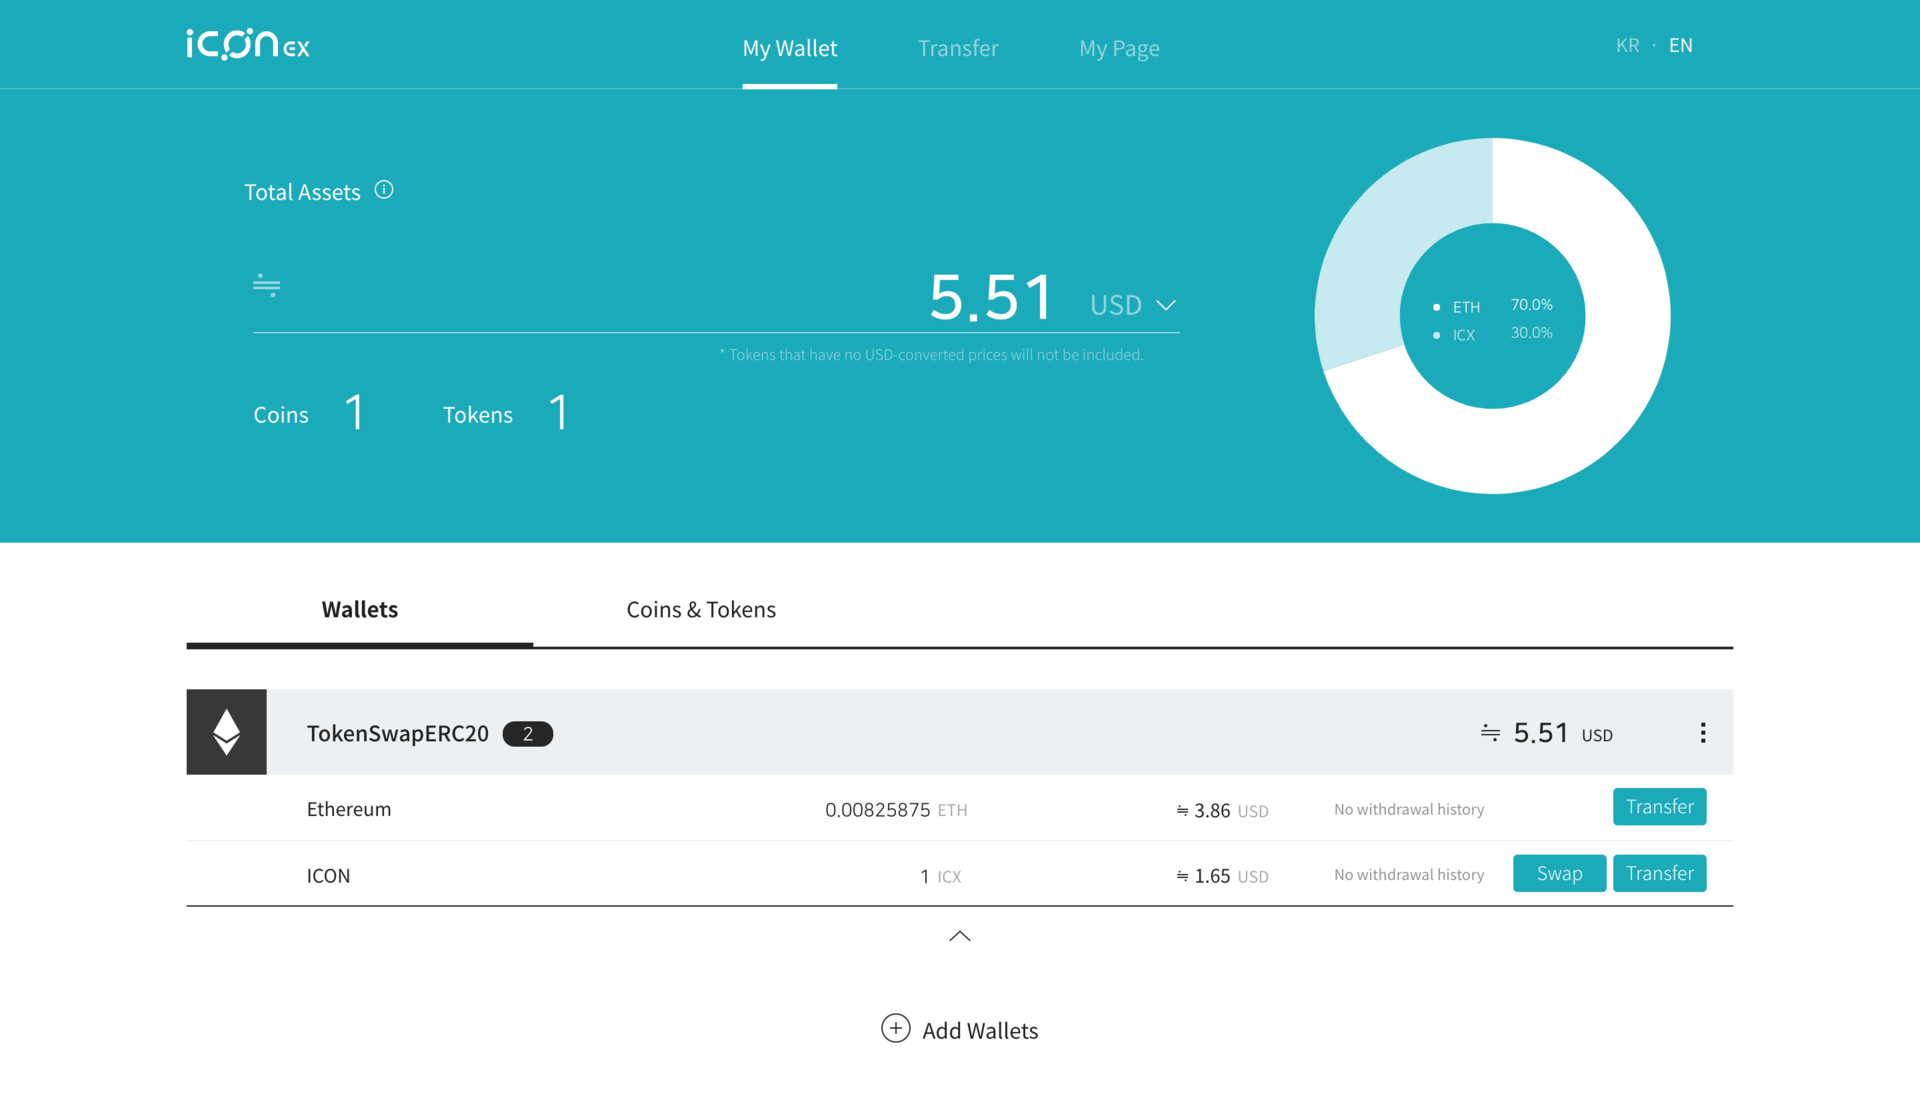
If you don’t see the ICX token, click on the wallet dropdown (three small circles), and click Add Token. Use the following details to add the ICX token.
- Address: 0xb5a5f22694352c15b00323844ad545abb2b11028
- Token Name: ICON
- Token Symbol: ICX
- Number of Decimals: 18
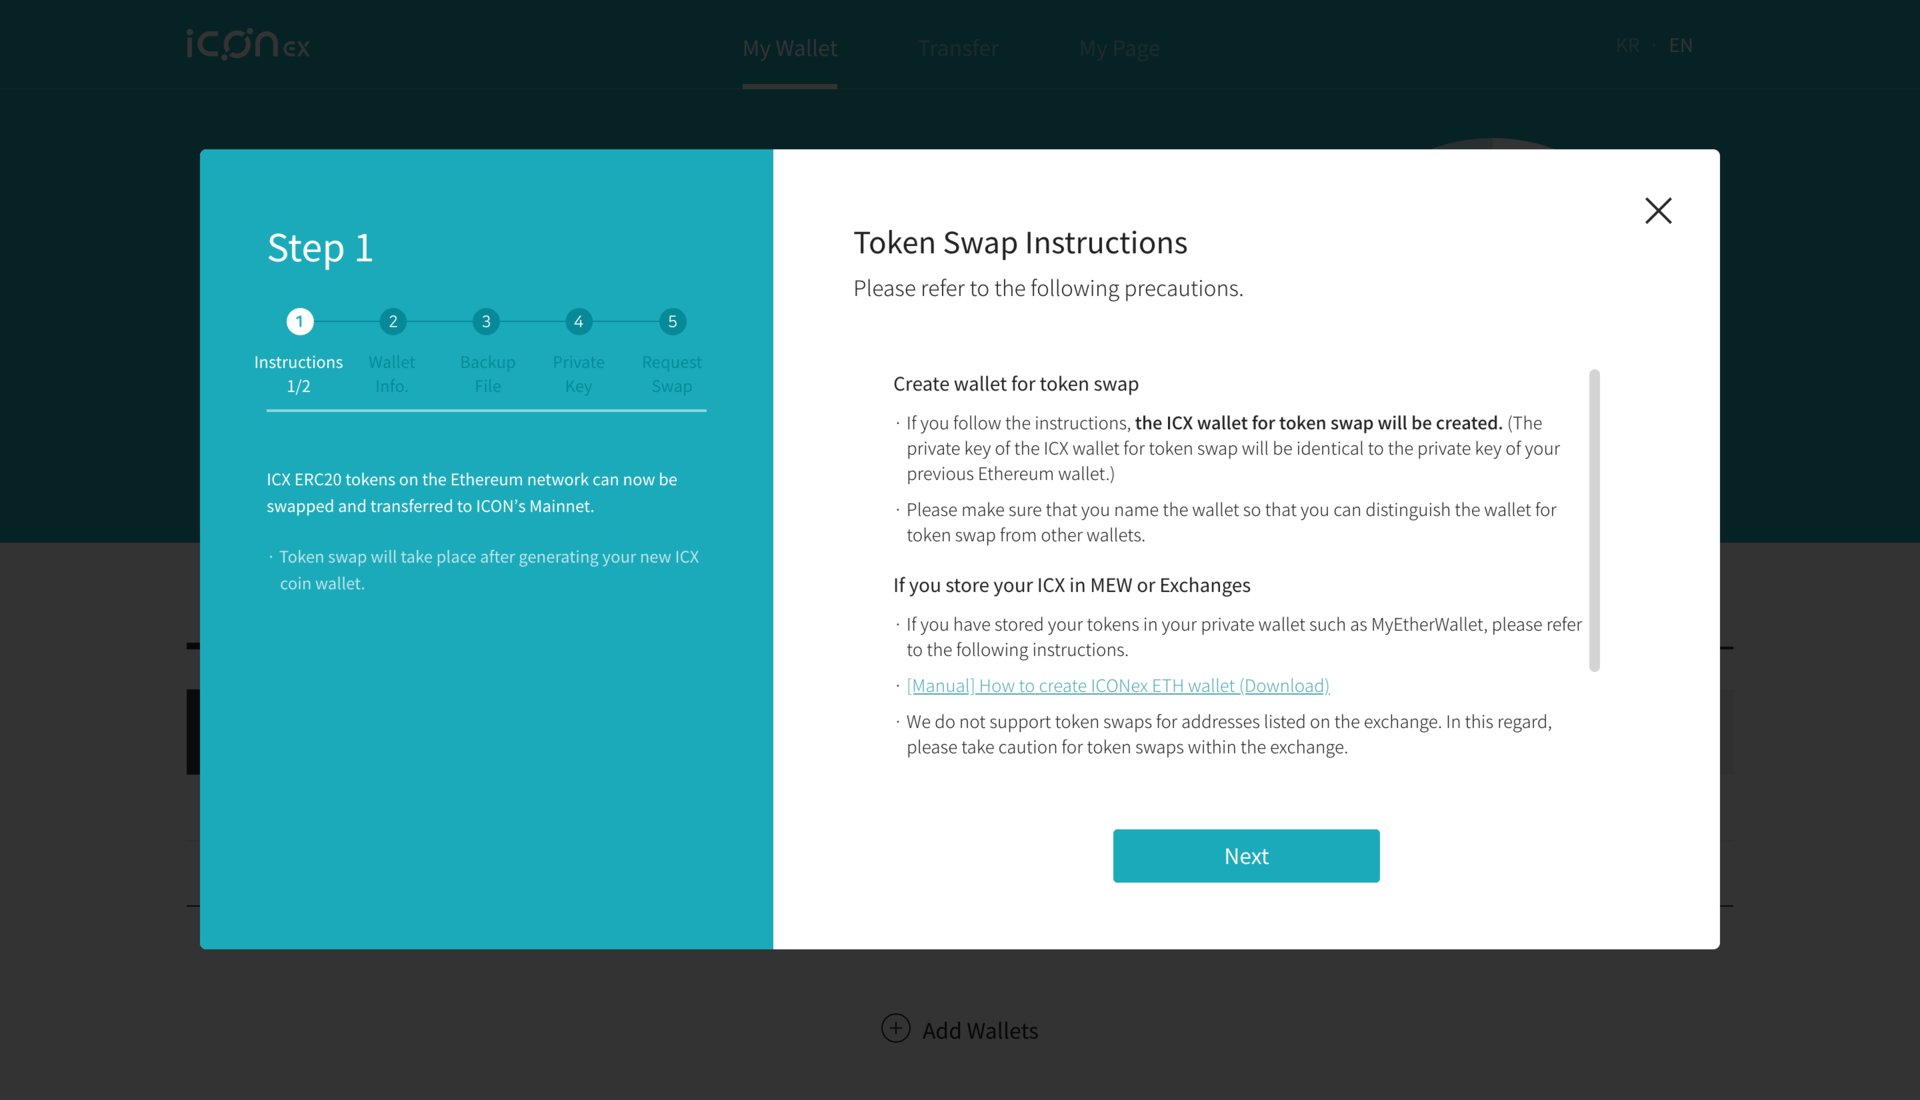
2. Request ICX Token Swap
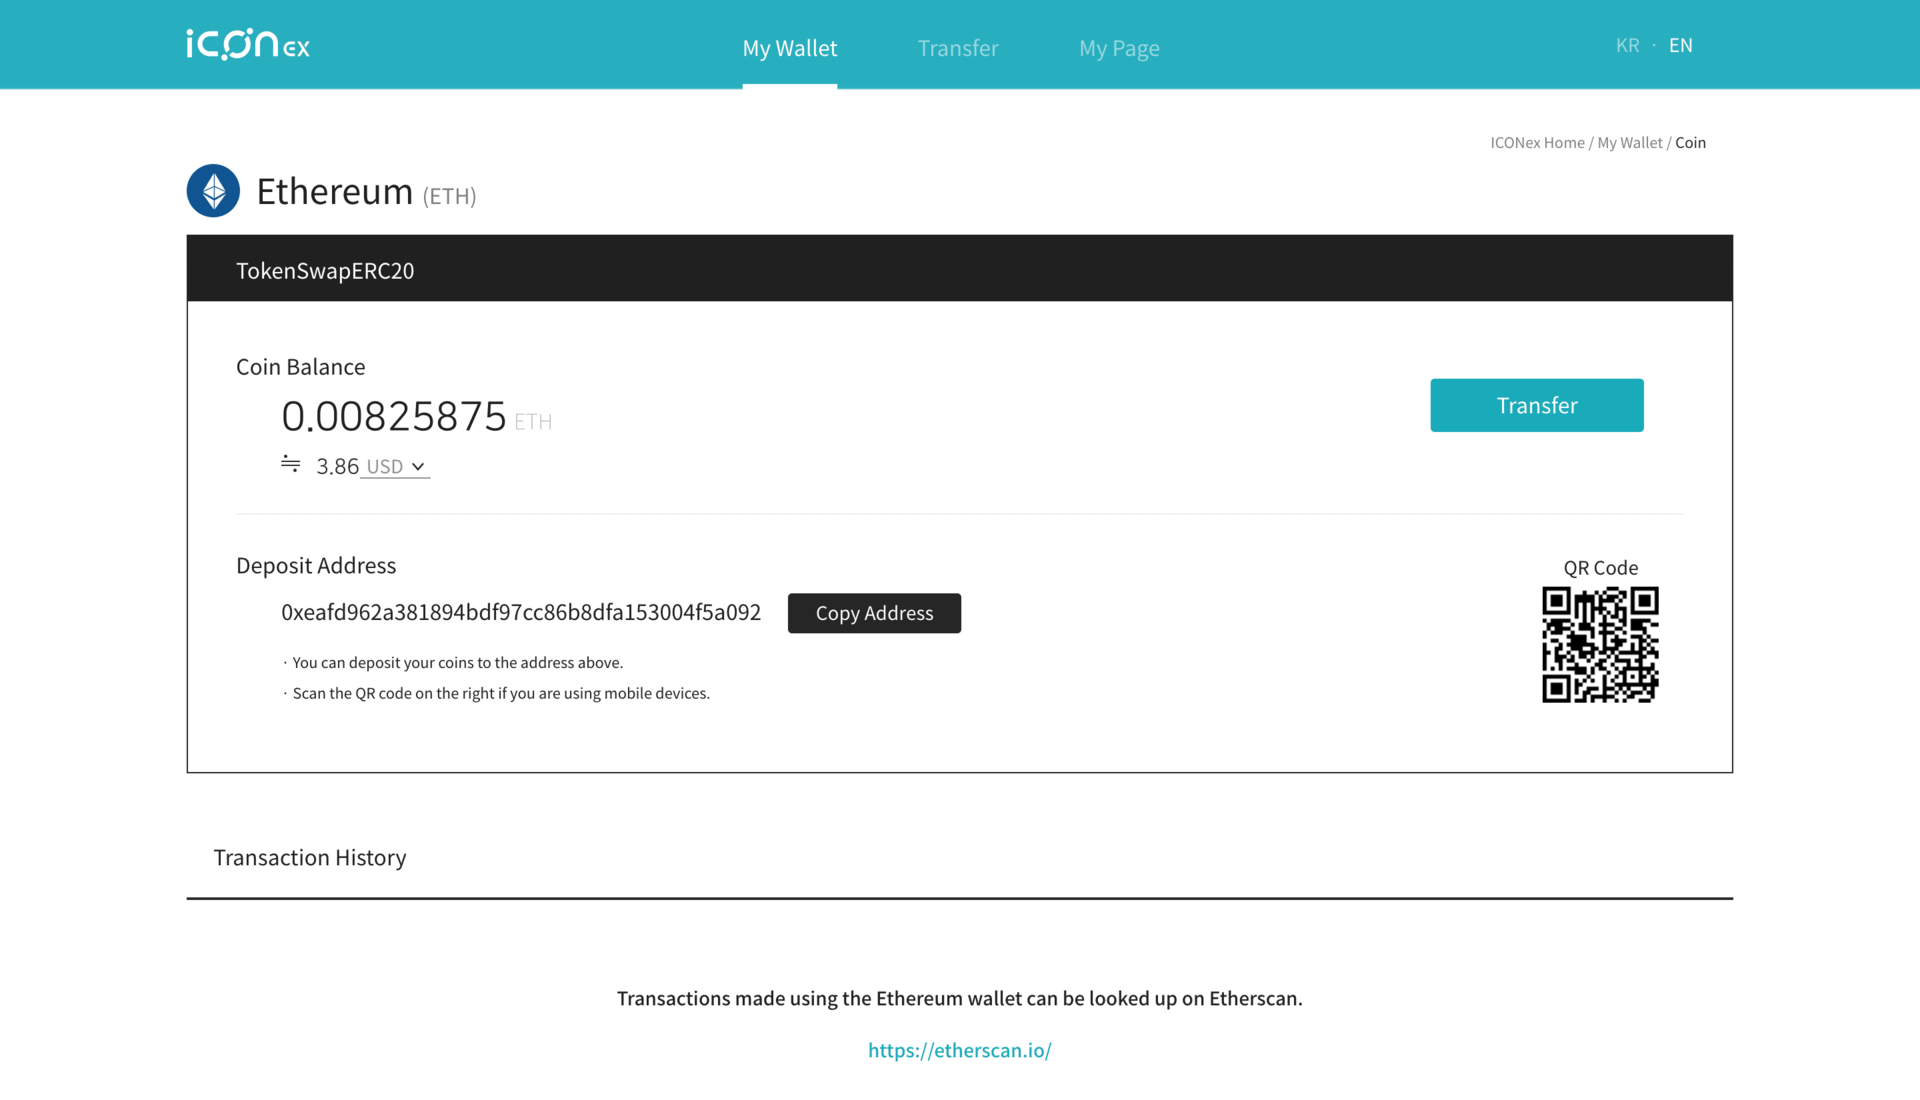
Next, click on the Ethereum wallet to view your deposit address. To request a token swap, you’ll need some ETH for gas fees, so send a few dollars worth of ETH to your deposit address. After depositing ETH to your wallet, send your ICX ERC-20 tokens to this same address.
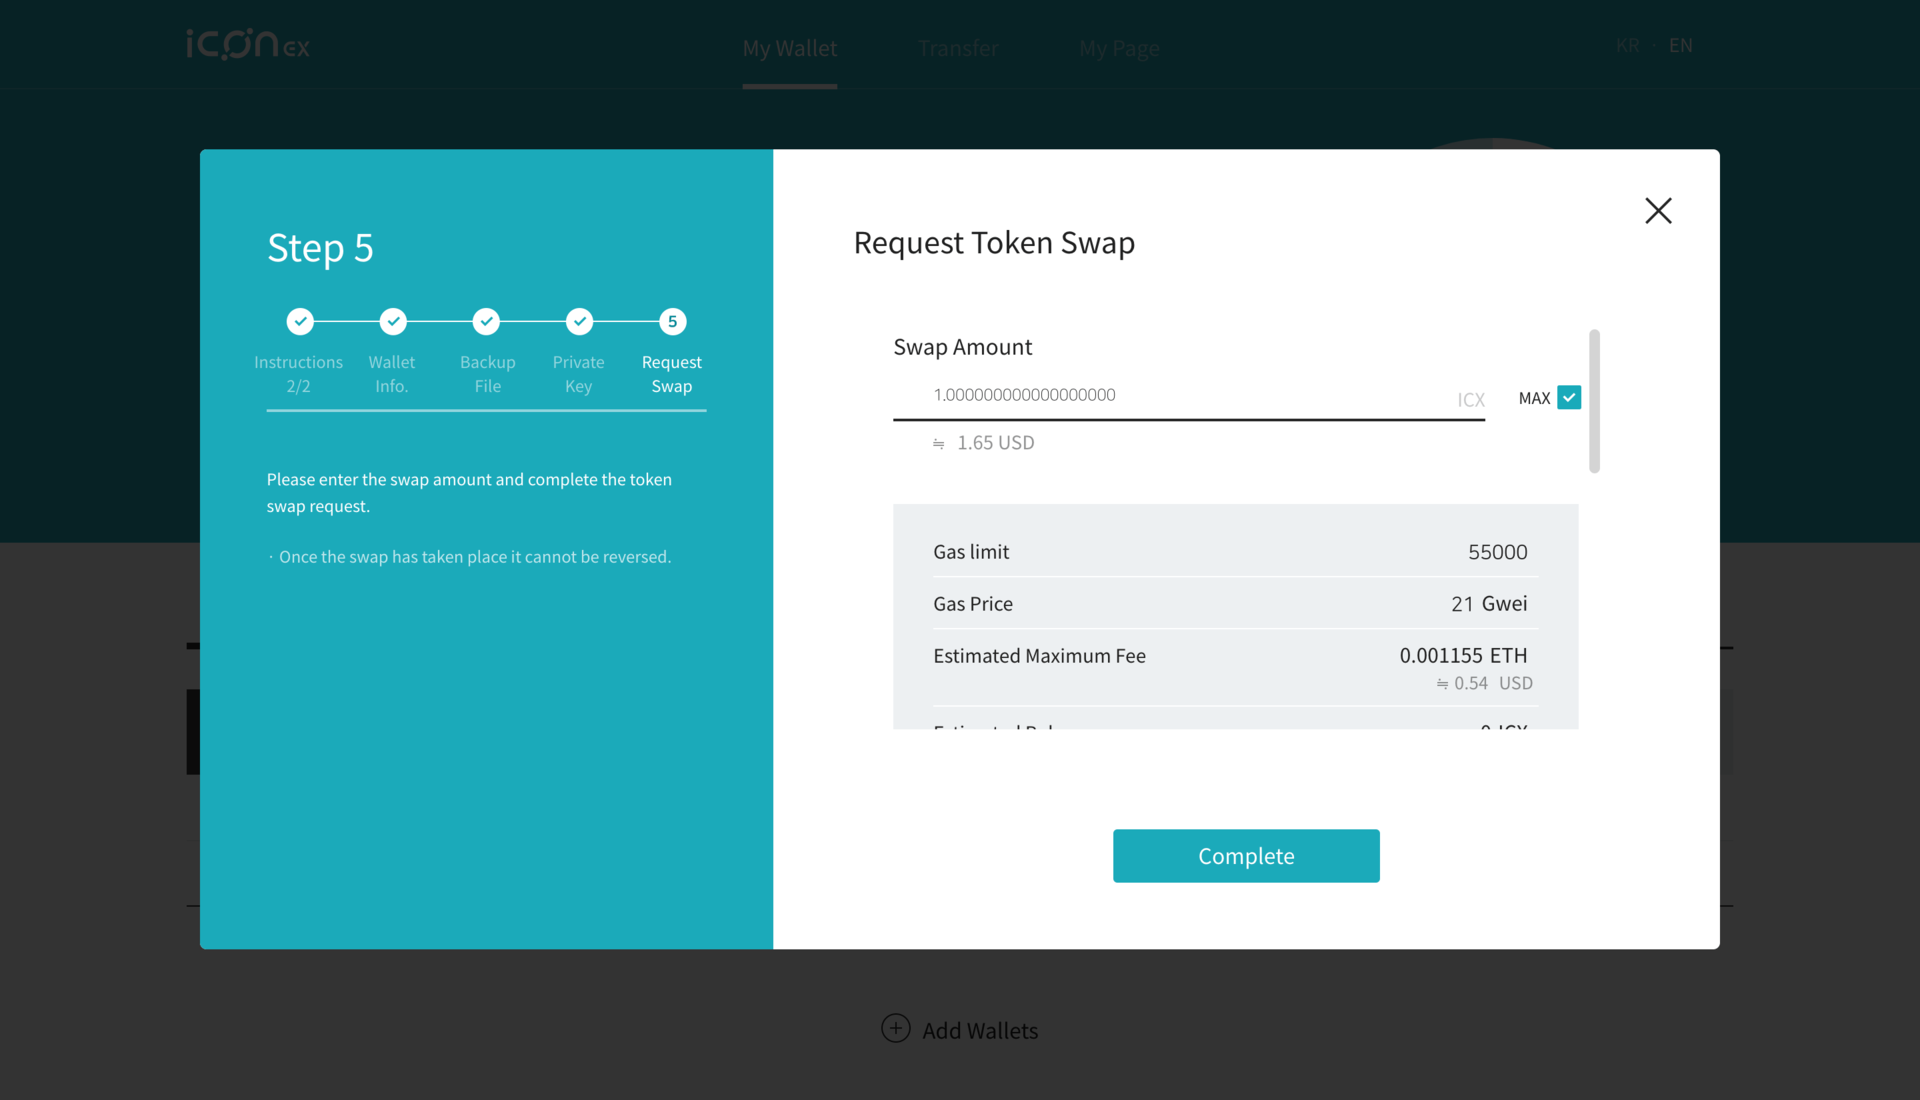
Once you’ve confirmed you have both ETH and ICX in your wallet, click on the Swap button in the ICON row of your ETH wallet. Be sure to read all the onscreen instructions, which will guide you in creating an ICX mainnet wallet and requesting the token swap.
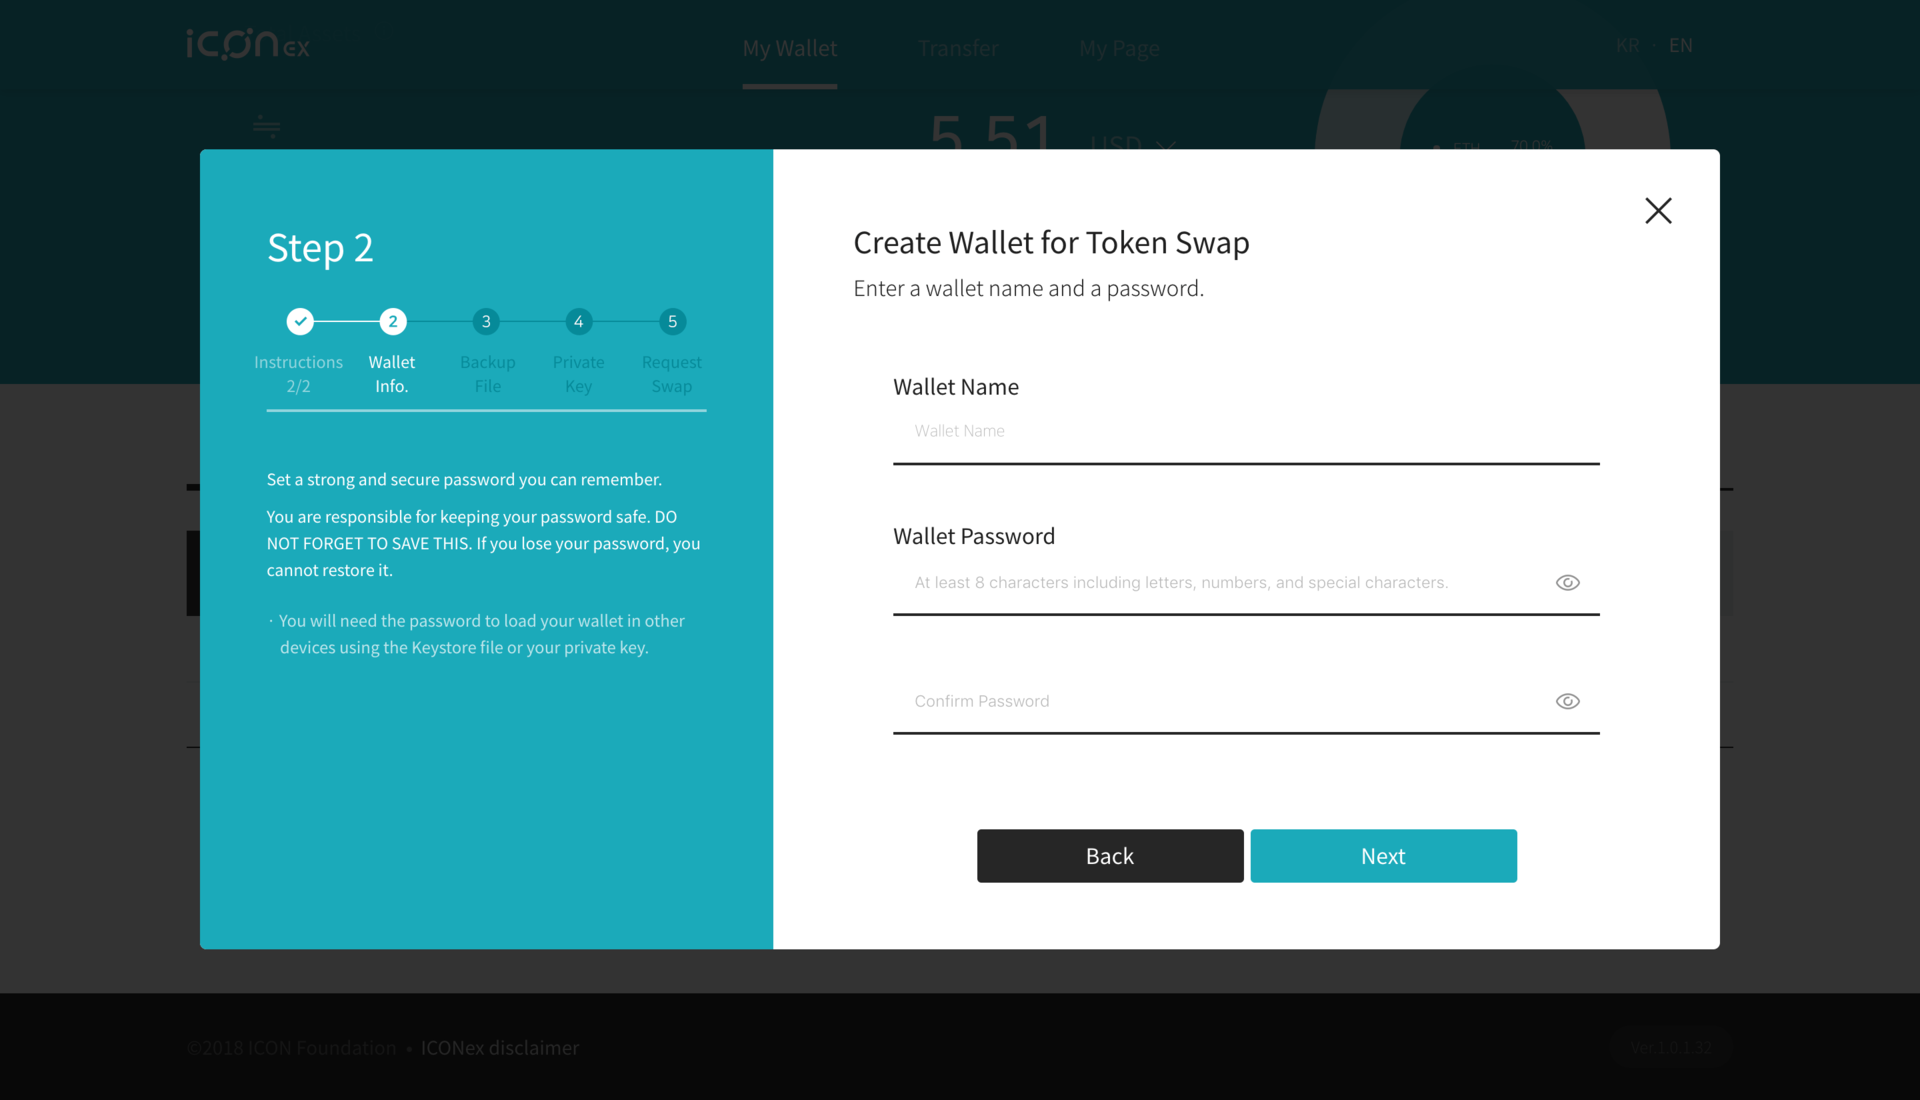
Create a name and password for your ICX wallet.
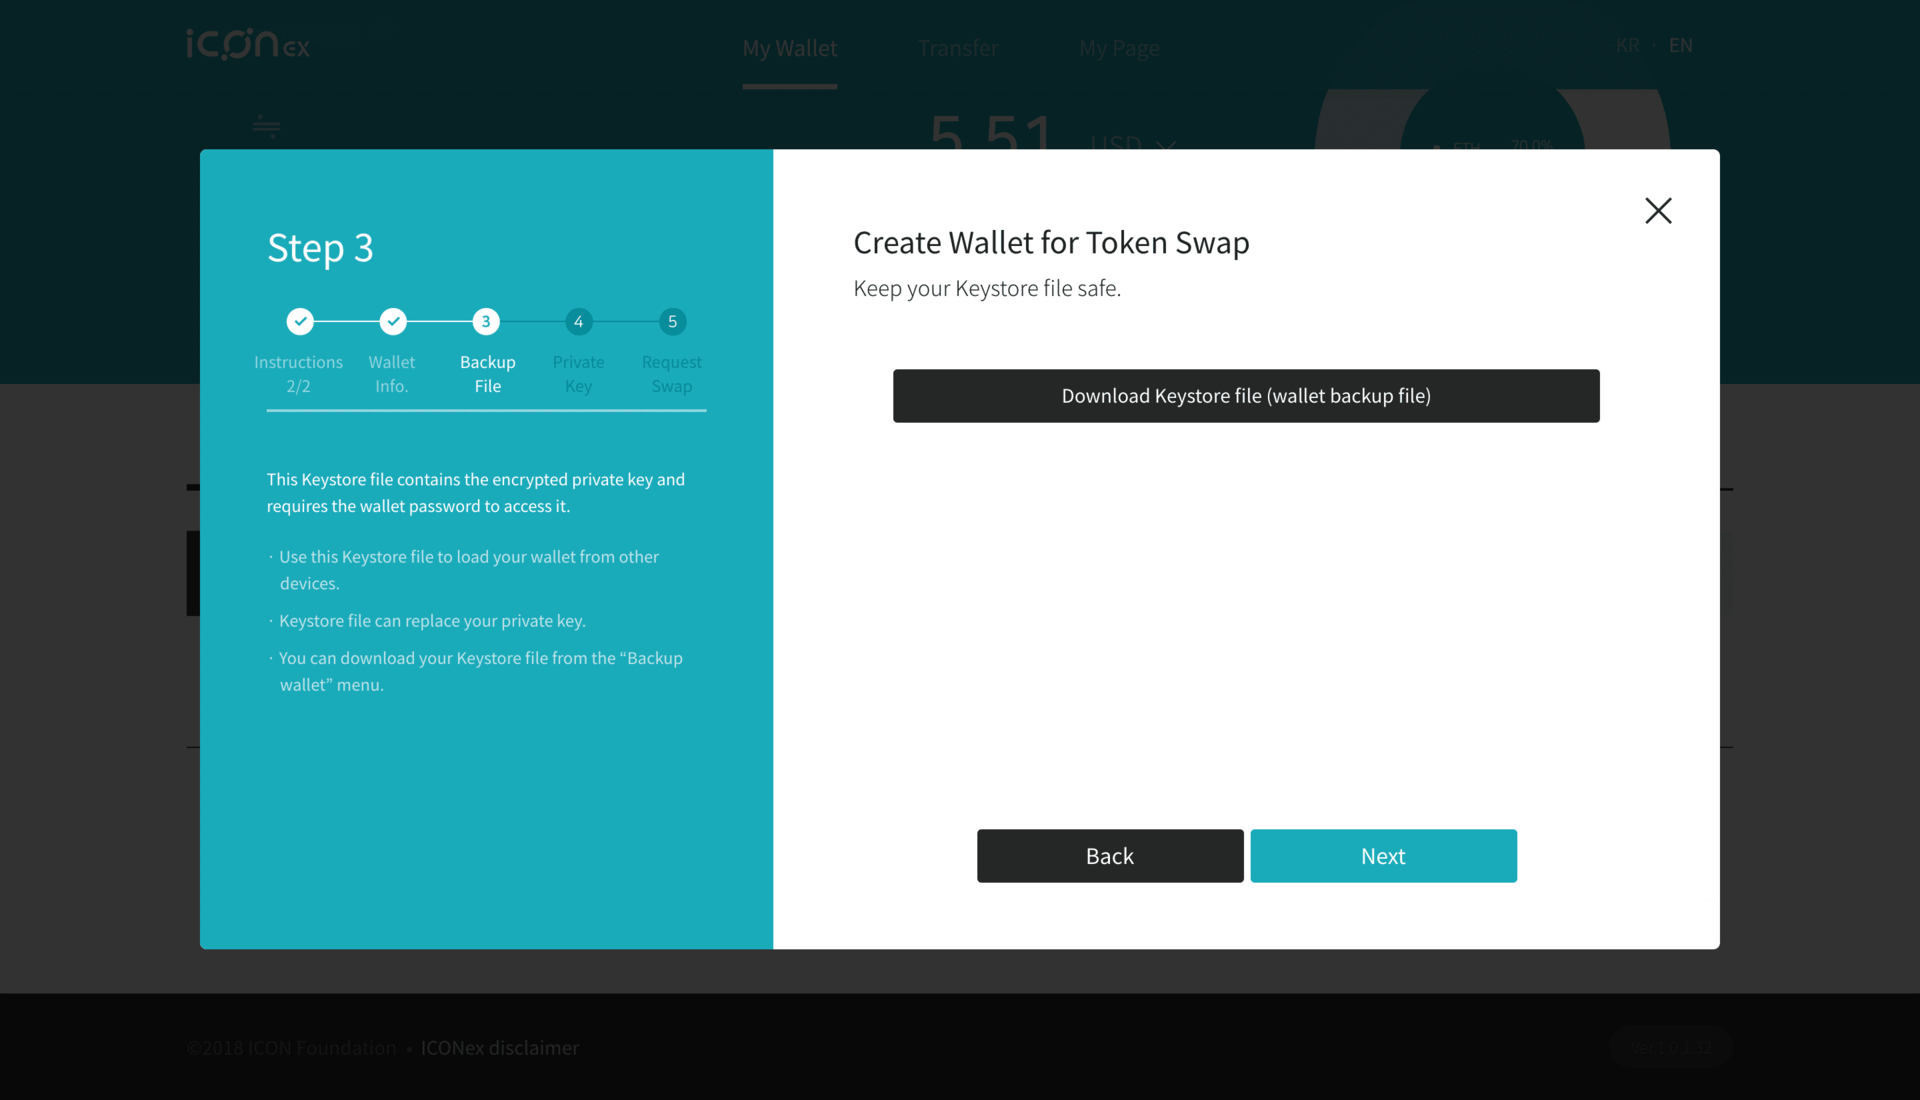
Save your ICX Keystore file and keep it safe.
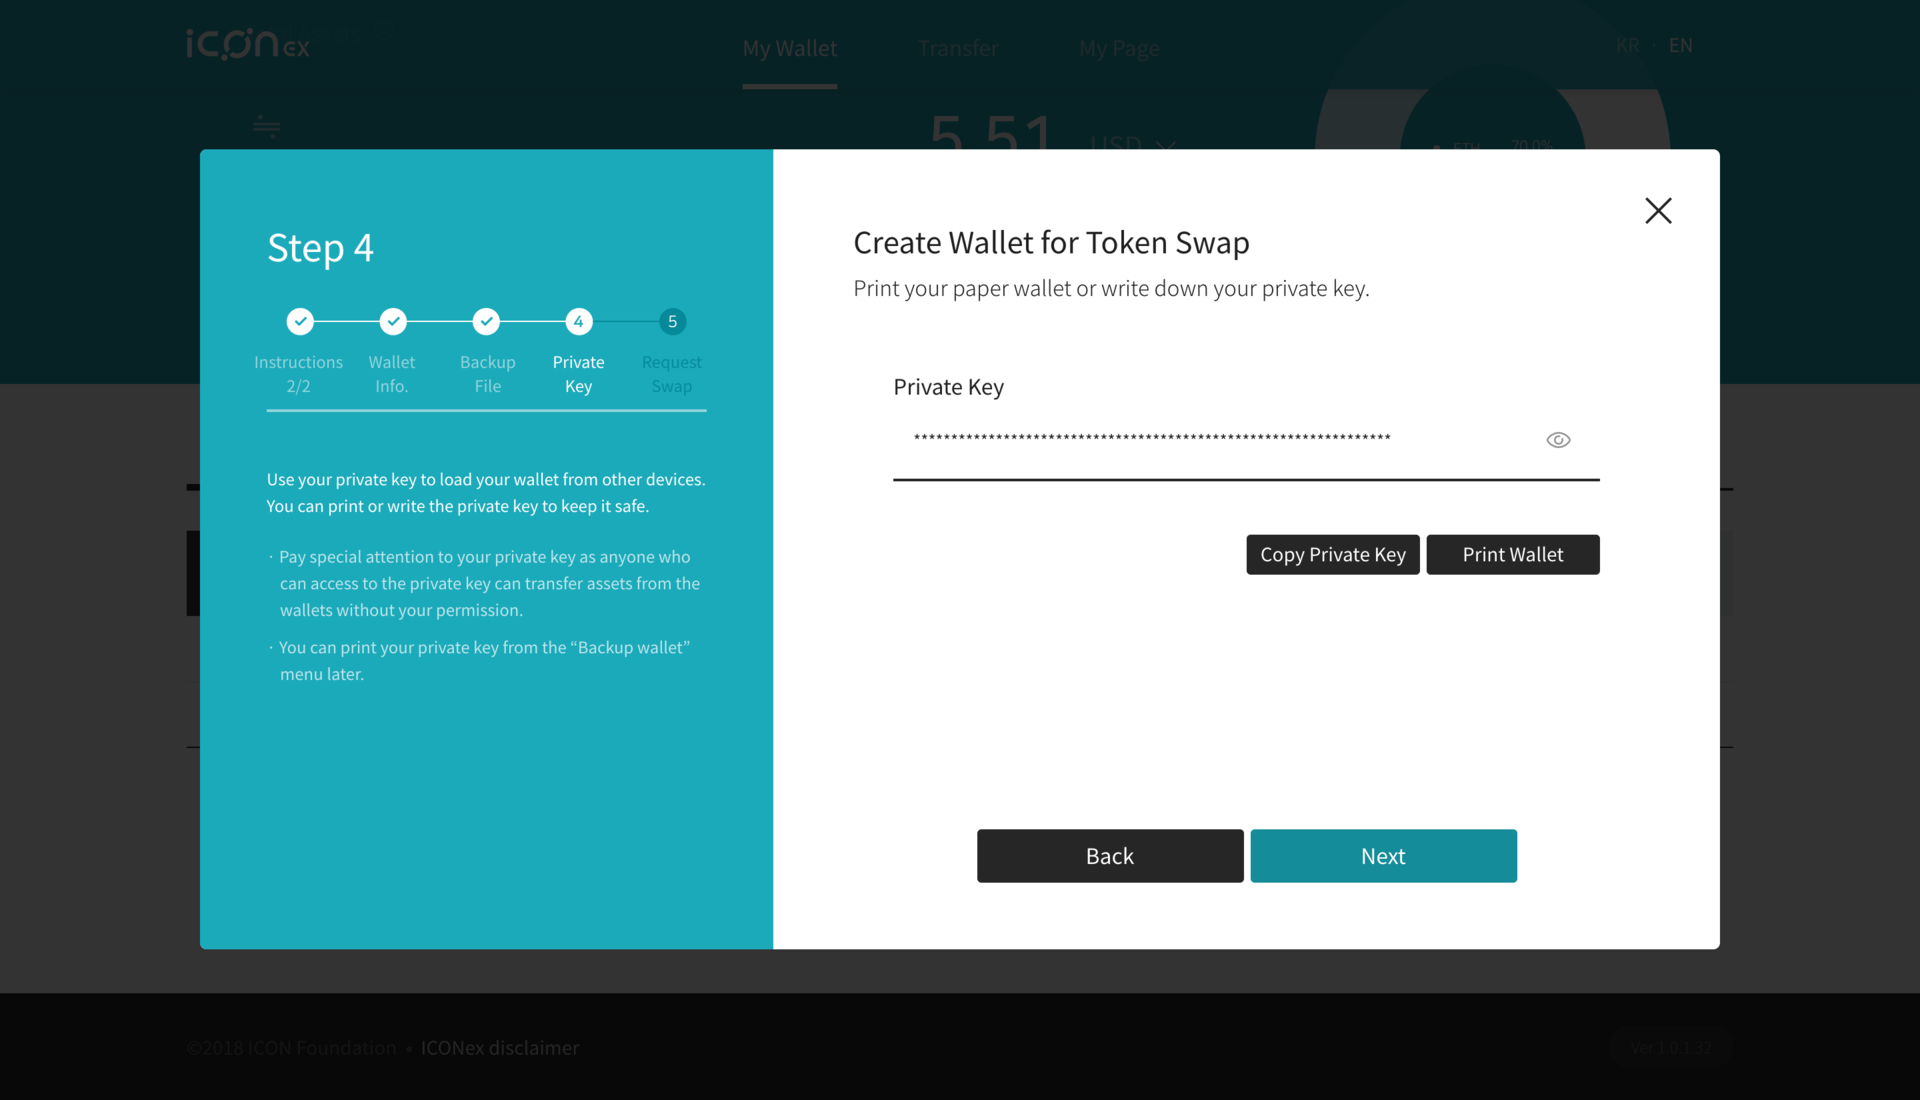
Save your ICX private key and keep it safe.
Finally, specify how many ICX you want to swap (probably Max), and click the Complete button.
Congratulations! You’ve officially swapped your ICX tokens. Since ICON processes swaps once a day at 9:00 (UTC+9), you’ll receive your mainnet tokens within 24 hours.
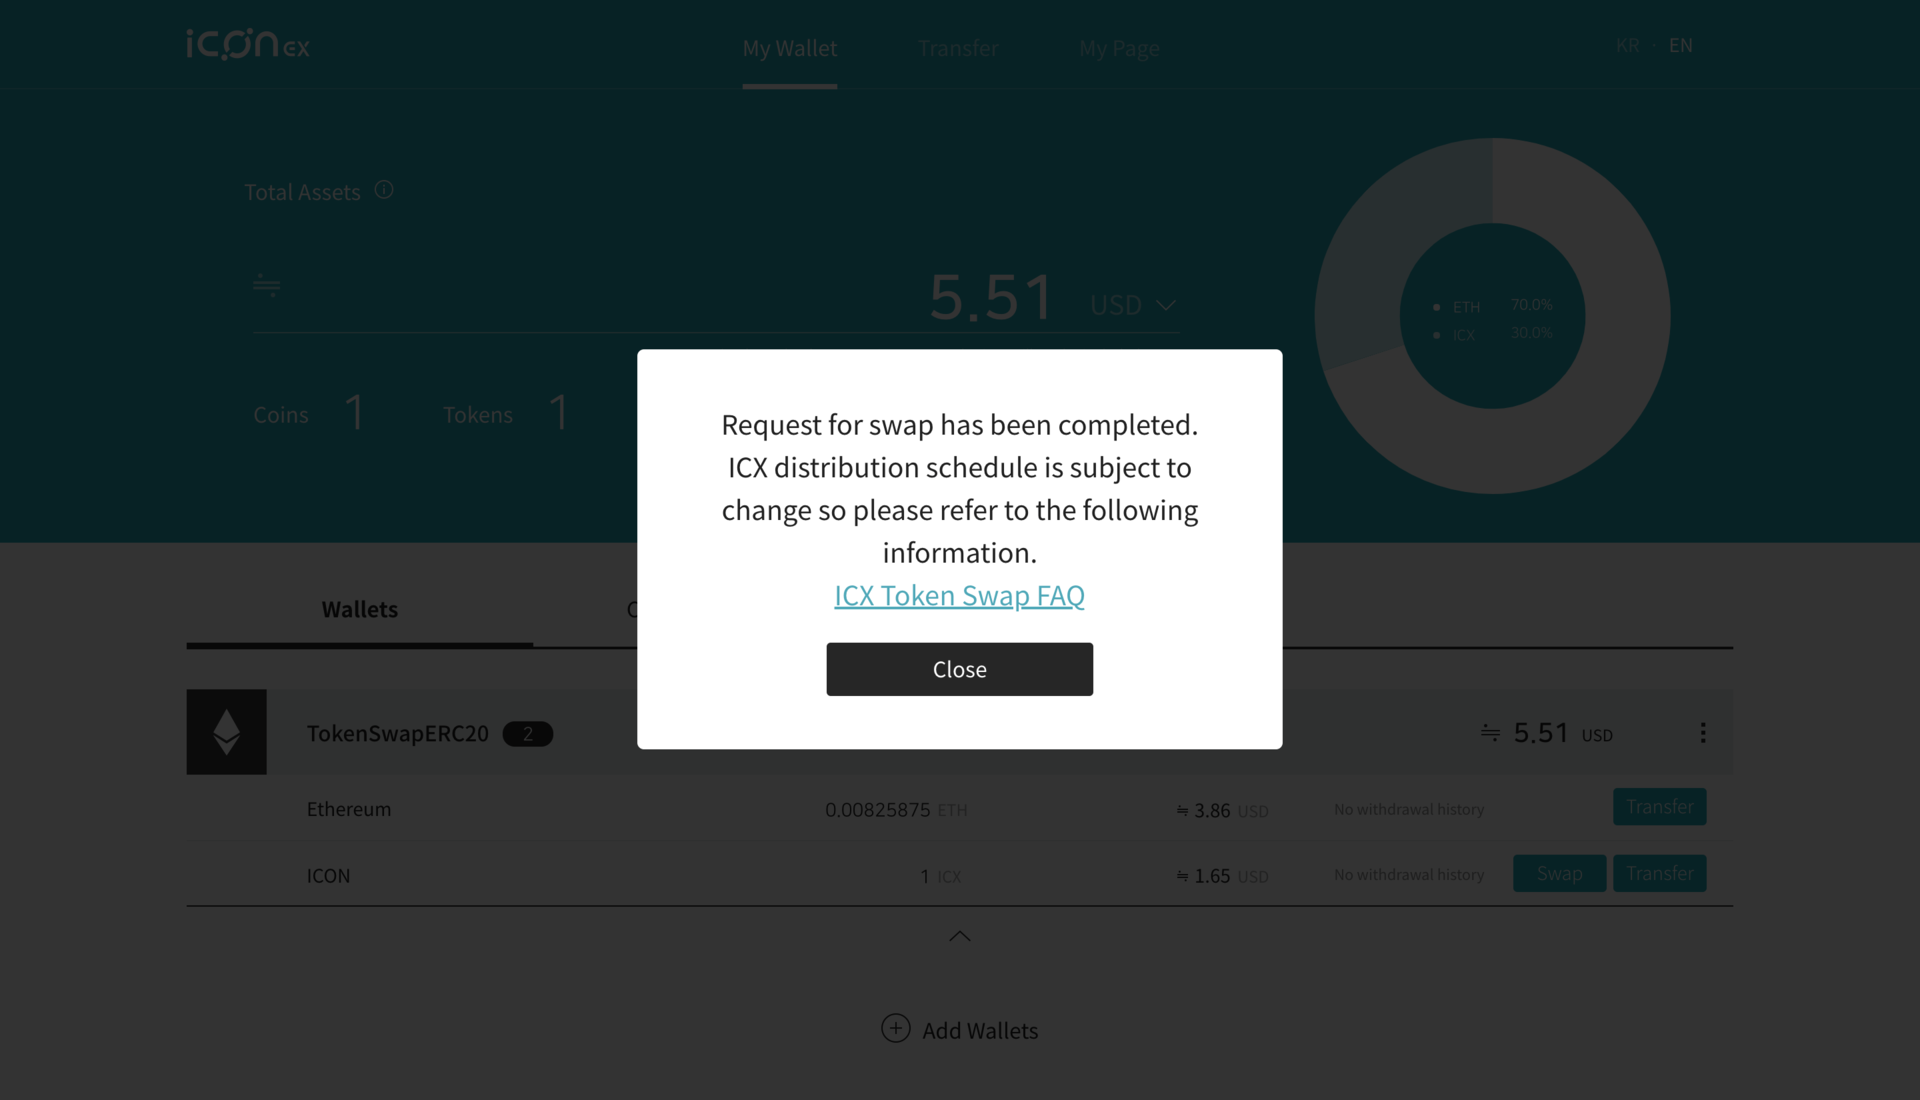
12 hours later, I’ve received my mainnet ICX.