Recently, I started researching how to integrate an email newsletter signup form on my site. A few of my colleagues at work use HubSpot heavily, so I decided to check that out first. After creating an account and going through a few tutorials, I realized it was too complicated for my use case. I ended up reverting to MailChimp, which I’ve used on sites in the past.
After a little hacking, I was able to add a signup form to my Hugo-generated site. One requirement I imposed on the signup form was the ability to track the topic and URL slug of the post containing the form. In this post, I’ll show you how I was able to accomplish this using a hidden HTML element in my form.
In the past, I shied away from capturing emails because I didn’t want to commit to writing a newsletter and keeping in constant contact with readers. The main reason for this is the sheer variety of topics I write about – music technology, photography, blockchain, website performance, etc. A newsletter that covers all these topics seems silly. On the other hand, writing individual newsletters for each topic sounds like a waste of time.
After some back and forth, I decided to add a signup form to my posts about MainStage – probably the topic I write about most frequently. Depending on how this trial run goes, I may expand the signup form to other music technology topics, and maybe even photography in the future.
The need to segment my audience is the precise reason why I wanted the signup form to track the topic and URL slug of the post. If a reader subscribes to my mailing list while reading a MainStage post, I don’t want to send them a newsletter or offer about an entirely different topic.
Create Two Hidden Form Fields
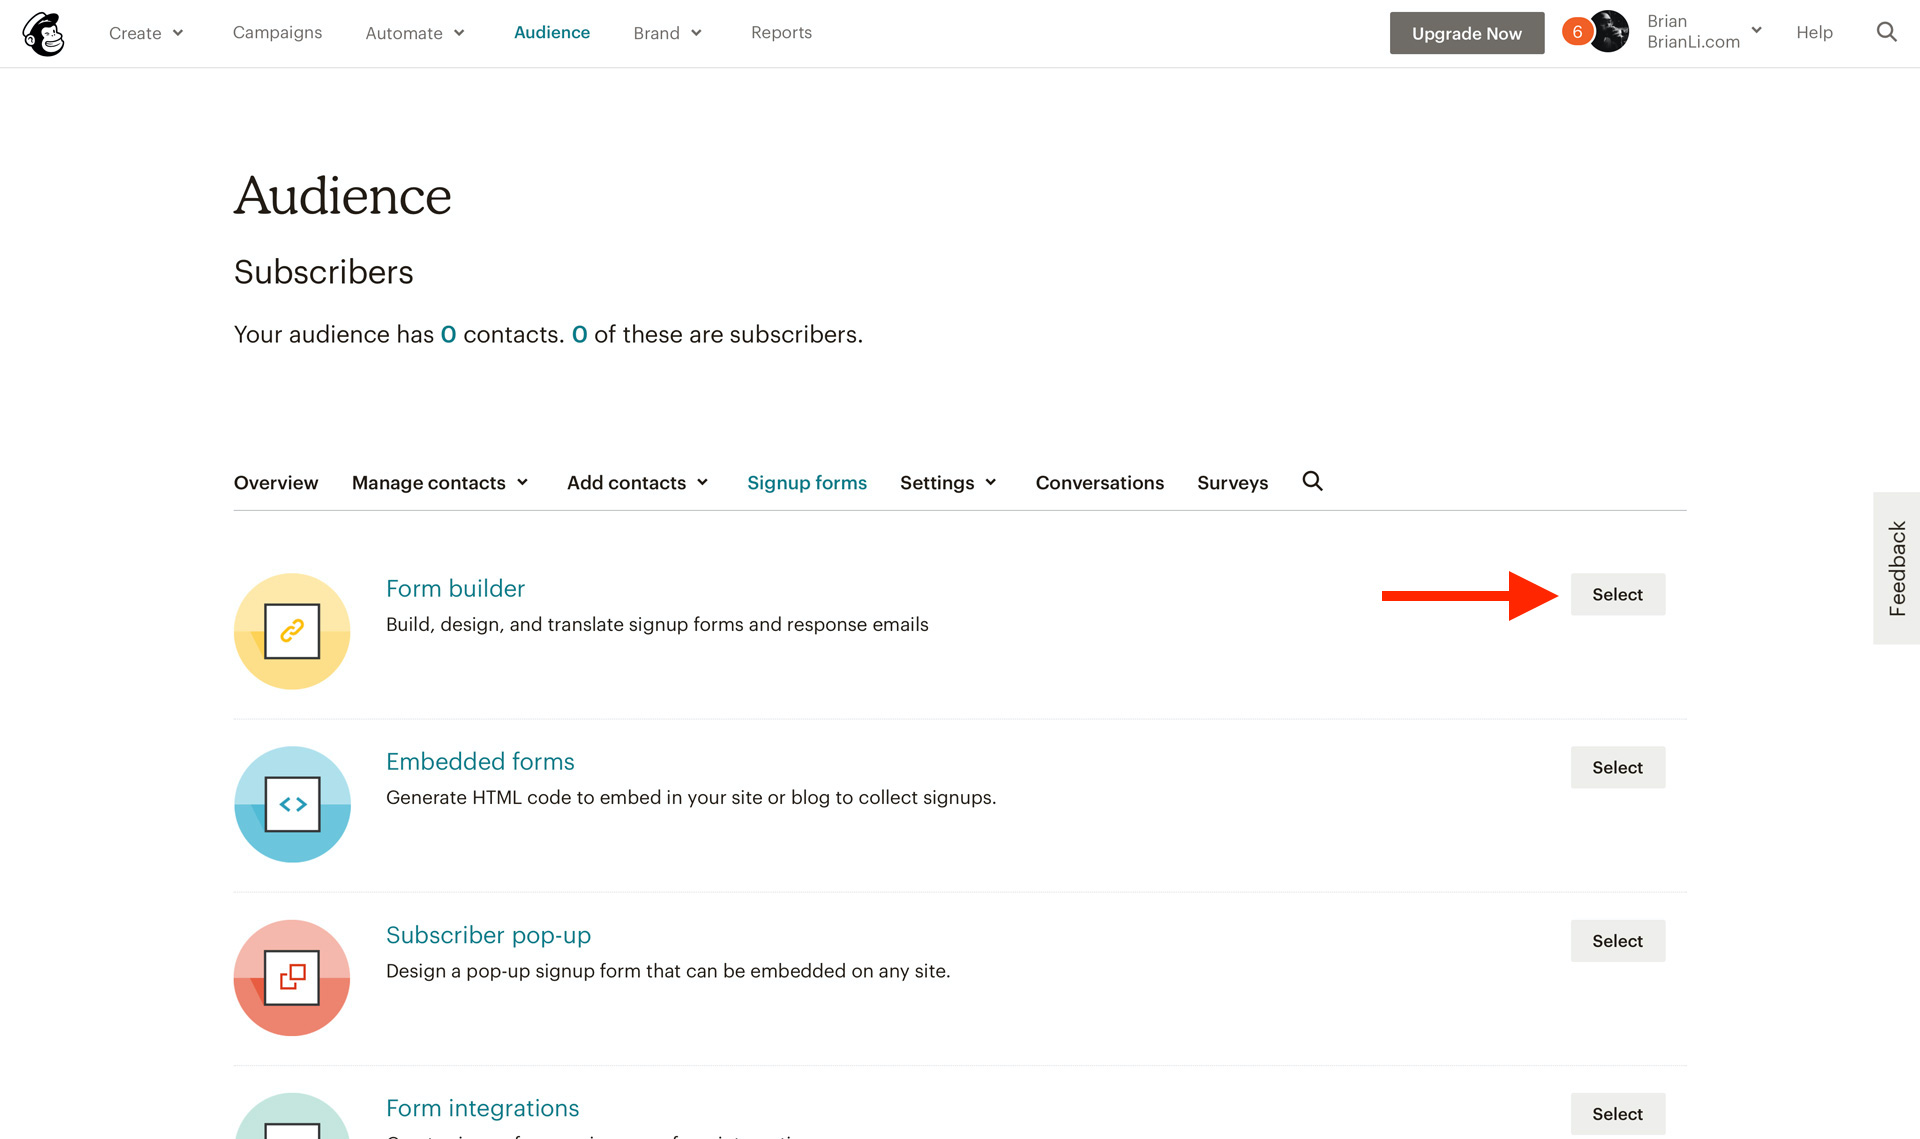
First, create two hidden fields in your form with the Mailchimp form builder, which can be accessed by going to Audience > Signup Forms > Form Builder.
Create two text fields with the following settings. The “Topic” text field will be used to store the topic of the post, while the “Source” field will be used to the store the URL of the page a visitor subscribes from.
Text Field #1
- Field Label - Topic
- Field Tag - TOPIC
- Field Visibility - Hidden
Text Field #2
- Field Label - Source
- Field Tag - SOURCE
- Field Visibility - Hidden
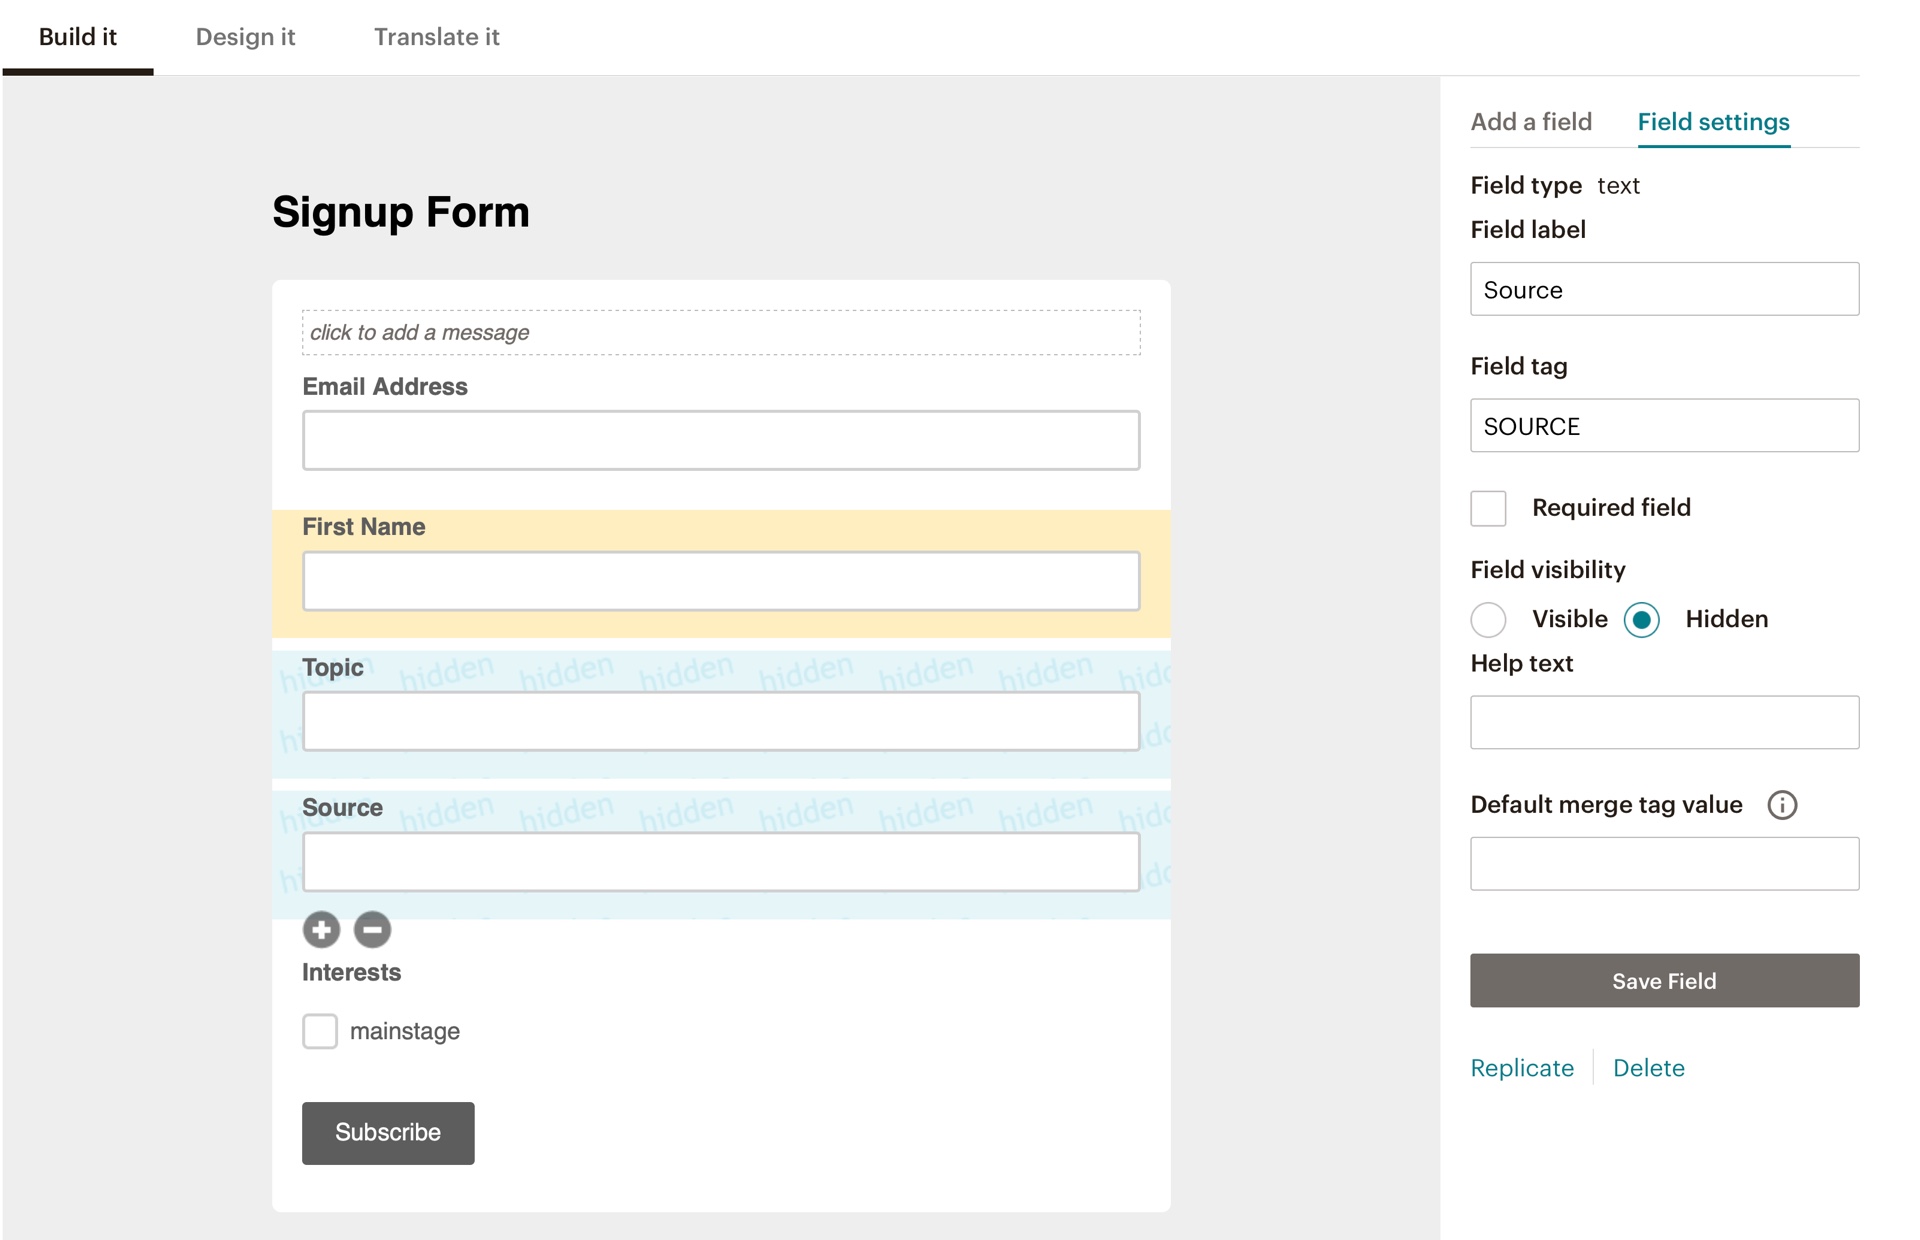
Create hidden text fields in Mailchimp.
Add Hidden Inputs to the HTML Form
Next, add two hidden input elements above the subscribe button in your HTML form. The type should be hidden, and the name and id should match the field tag specified in the Mailchimp form builder. The HTML I’m using can be seen below.
<input type="hidden" name="SOURCE" id="SOURCE" value="URL-SLUG">
<input type="hidden" name="TOPIC" id="TOPIC" value="TOPIC-VALUE">
The value parameter will have to be specified by you, and will likely require some sort of CMS-dependent dynamic templating. Since I am using Hugo, I am using the code below to fetch the URL-SLUG and TOPIC-VALUE.
<input type="hidden" name="SOURCE" id="SOURCE" value="{{ trim (.Page.Permalink | relURL) "/" }}">
<input type="hidden" name="TOPIC" id="TOPIC" value="{{ if in .Page.Params.tags "MainStage" }}mainstage{{ end }}">
Generally speaking, you’ll need to find your CMS’ functions for fetching the page slug and post category or tag.
Conclusion
With the above configuration, a form submission will look like this in Mailchimp.
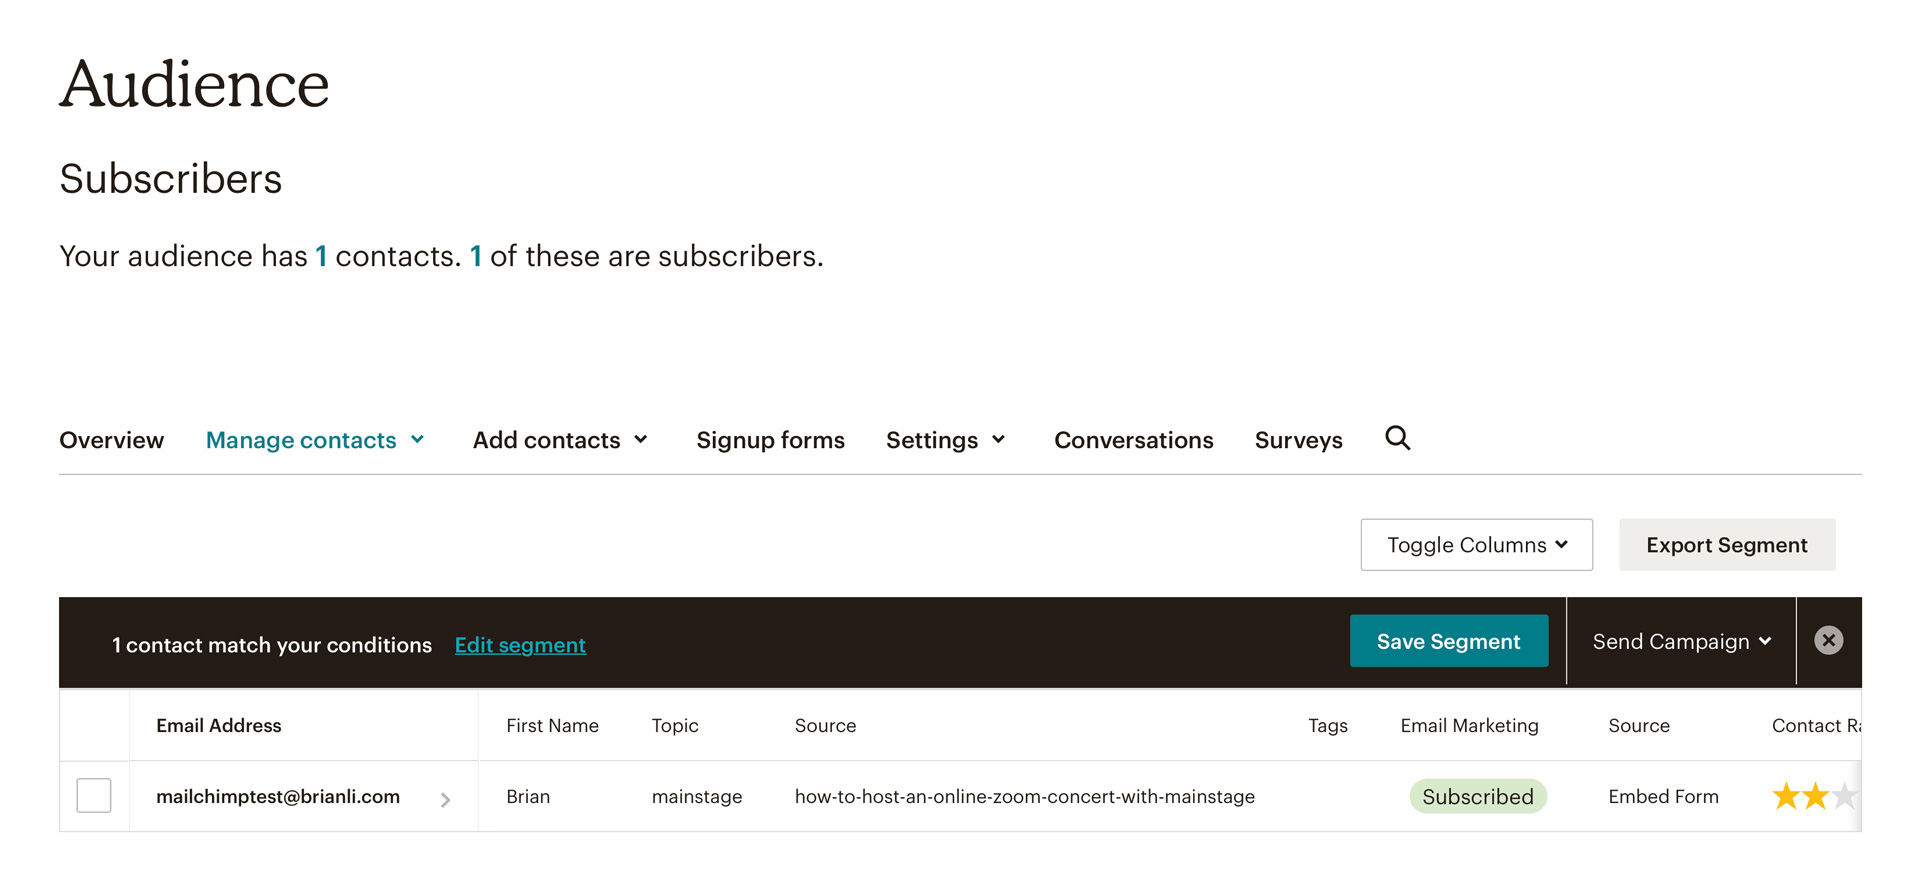
As you can see, the contact information contains two columns for “Topic” and “Source”. Leveraging this additional metadata will allow you to create targeted campaigns to inform and educate your audience. If you have any questions about how to create hidden Mailchimp form elements to track a submission’s origin details, feel free to reach out to me on Twitter or send me an email.