In the context of music production, quantization is the process of snapping sounds to a musical grid. In most cases, quantization is used to line up transients with the beat. When used correctly, and with taste, quantization can help boost the production quality of your projects. In this article, you’ll learn how to quantize both audio and MIDI in Logic Pro X.
How to Quantize MIDI in Logic Pro X
First, let’s discuss how to use Logic Pro X to quantize MIDI notes. To get started, double click the MIDI clip and select the notes you want to quantize. If you want to quantize the entire MIDI clip, go ahead and select all the notes. Otherwise, just select the notes you want to quantize. In the screenshot below, there are four notes that are not lined up with the musical grid.
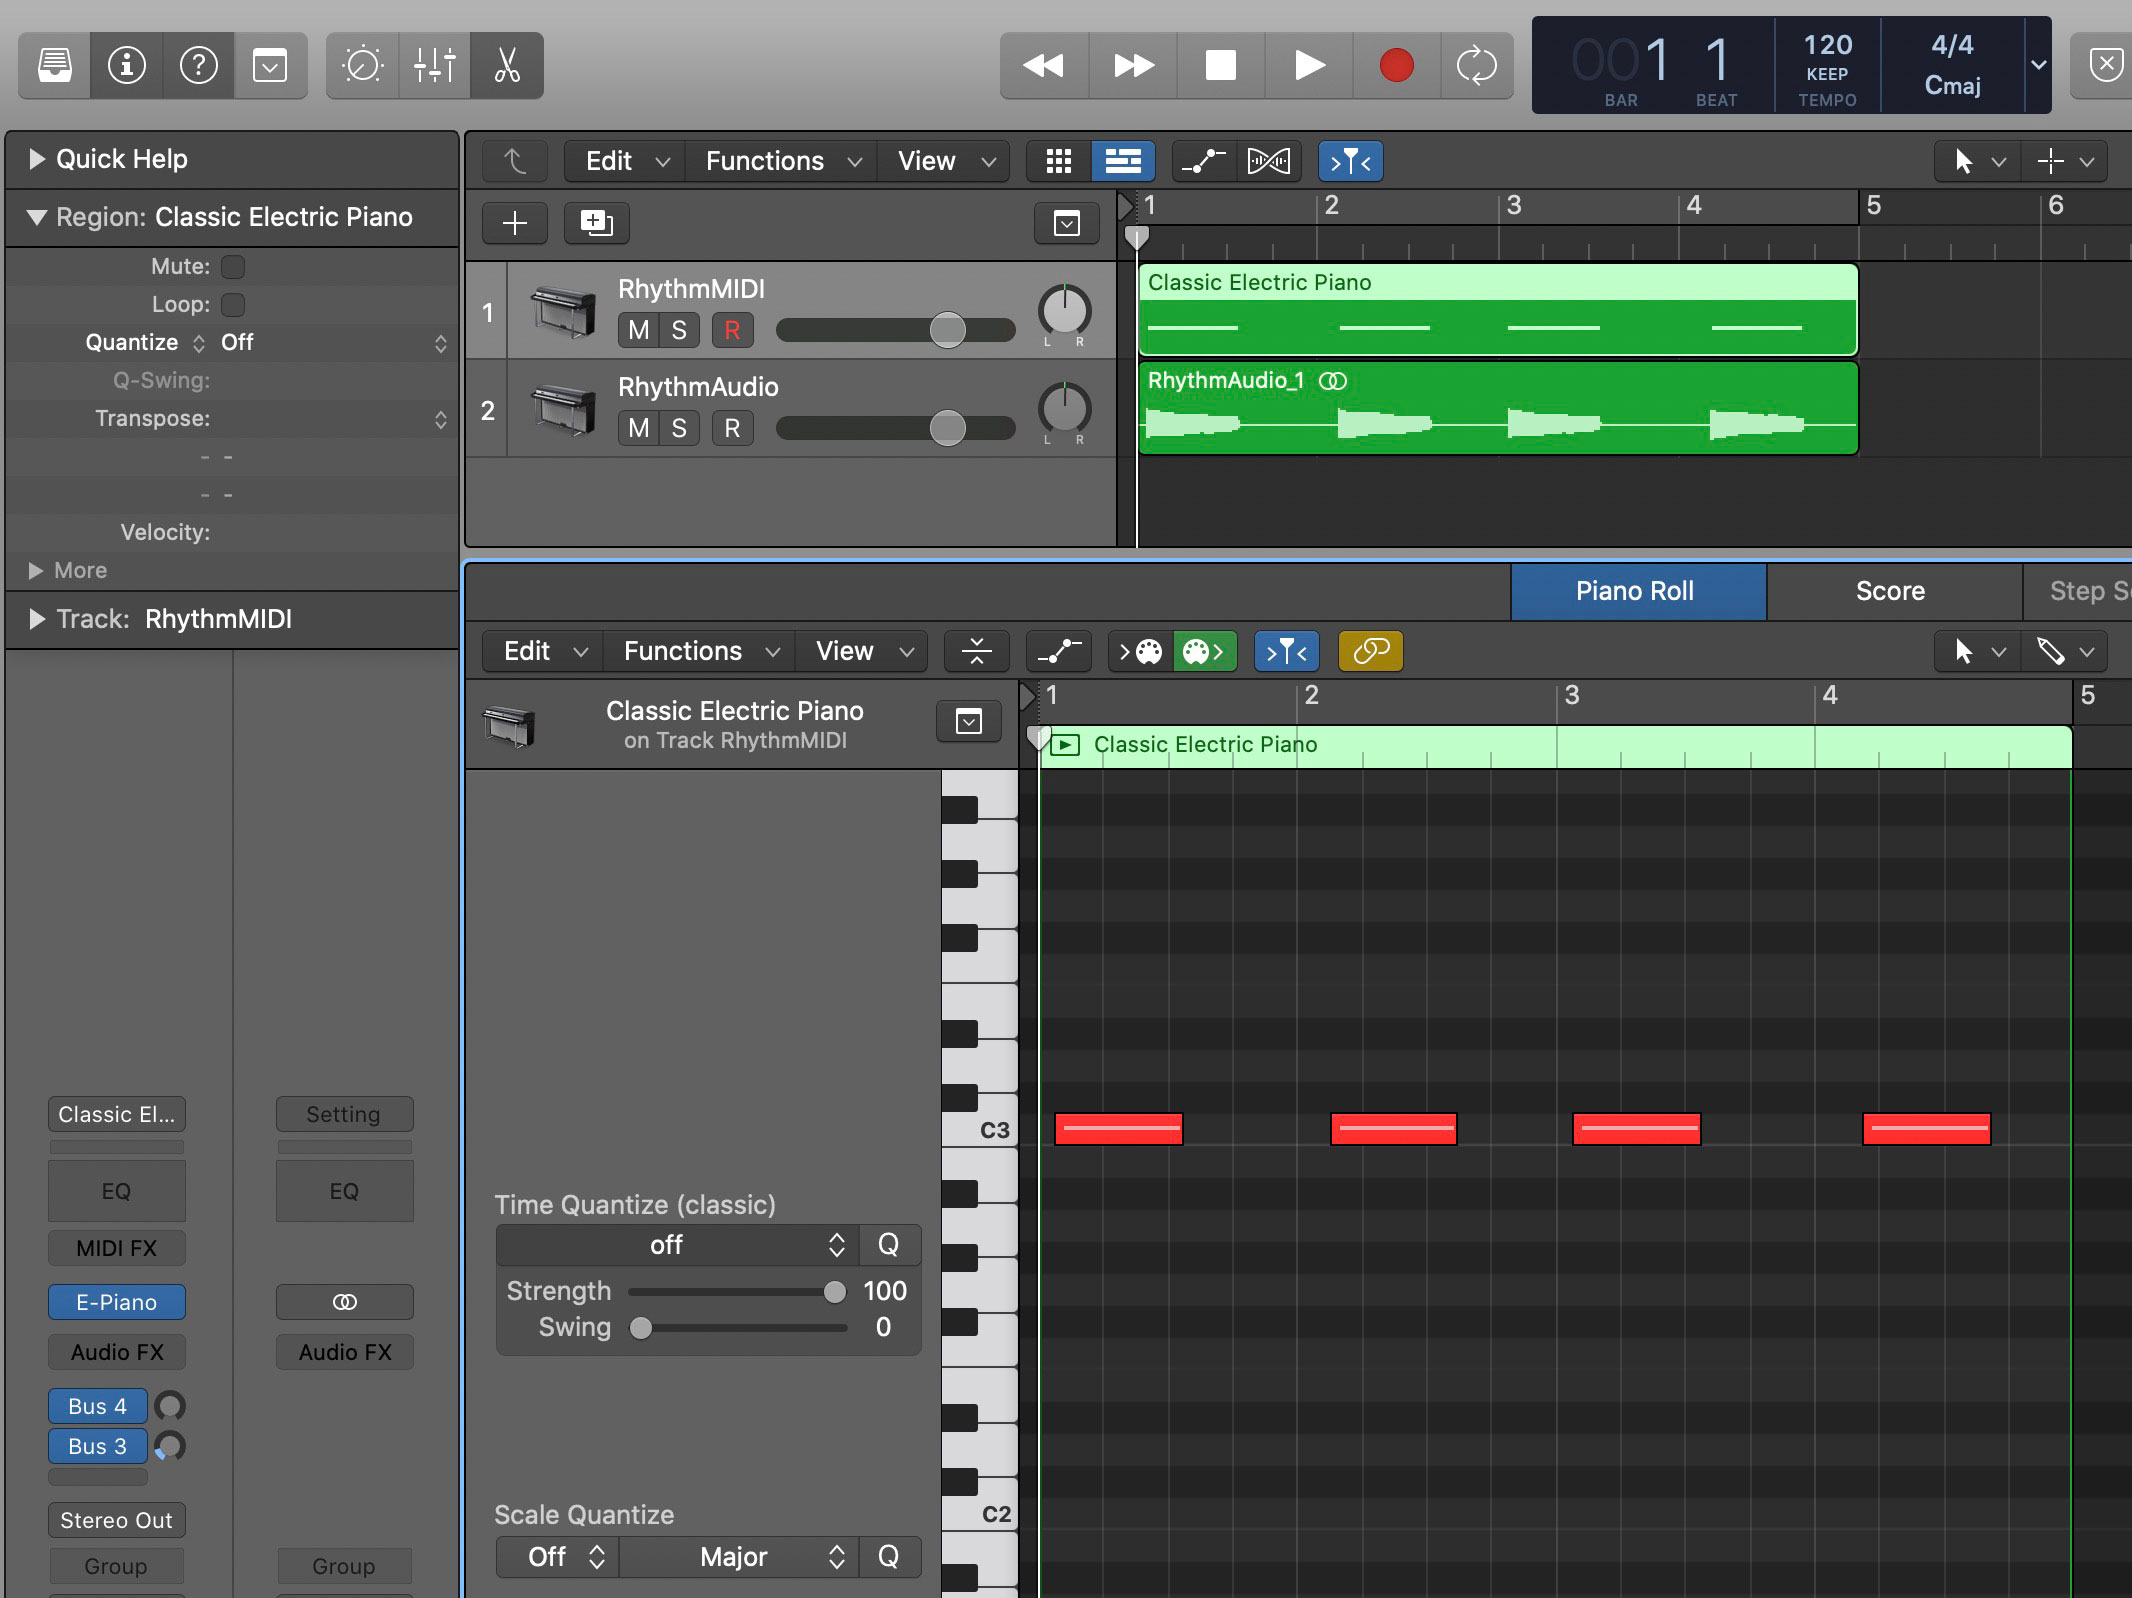
Unquantized MIDI notes in Logic Pro X.
To quantize these four notes, I’ve selected them. Next, it’s just a matter of clicking on the “Time Quantize” dropdown in the piano roll and selecting the desired quantization option. Since I wanted to quantize to the nearest whole note, I chose the “1/1 note” option. Logic Pro X supports a variety of quantization options from “normal” note values (quarter note, half note, etc.), to triplets, to swing grooves.
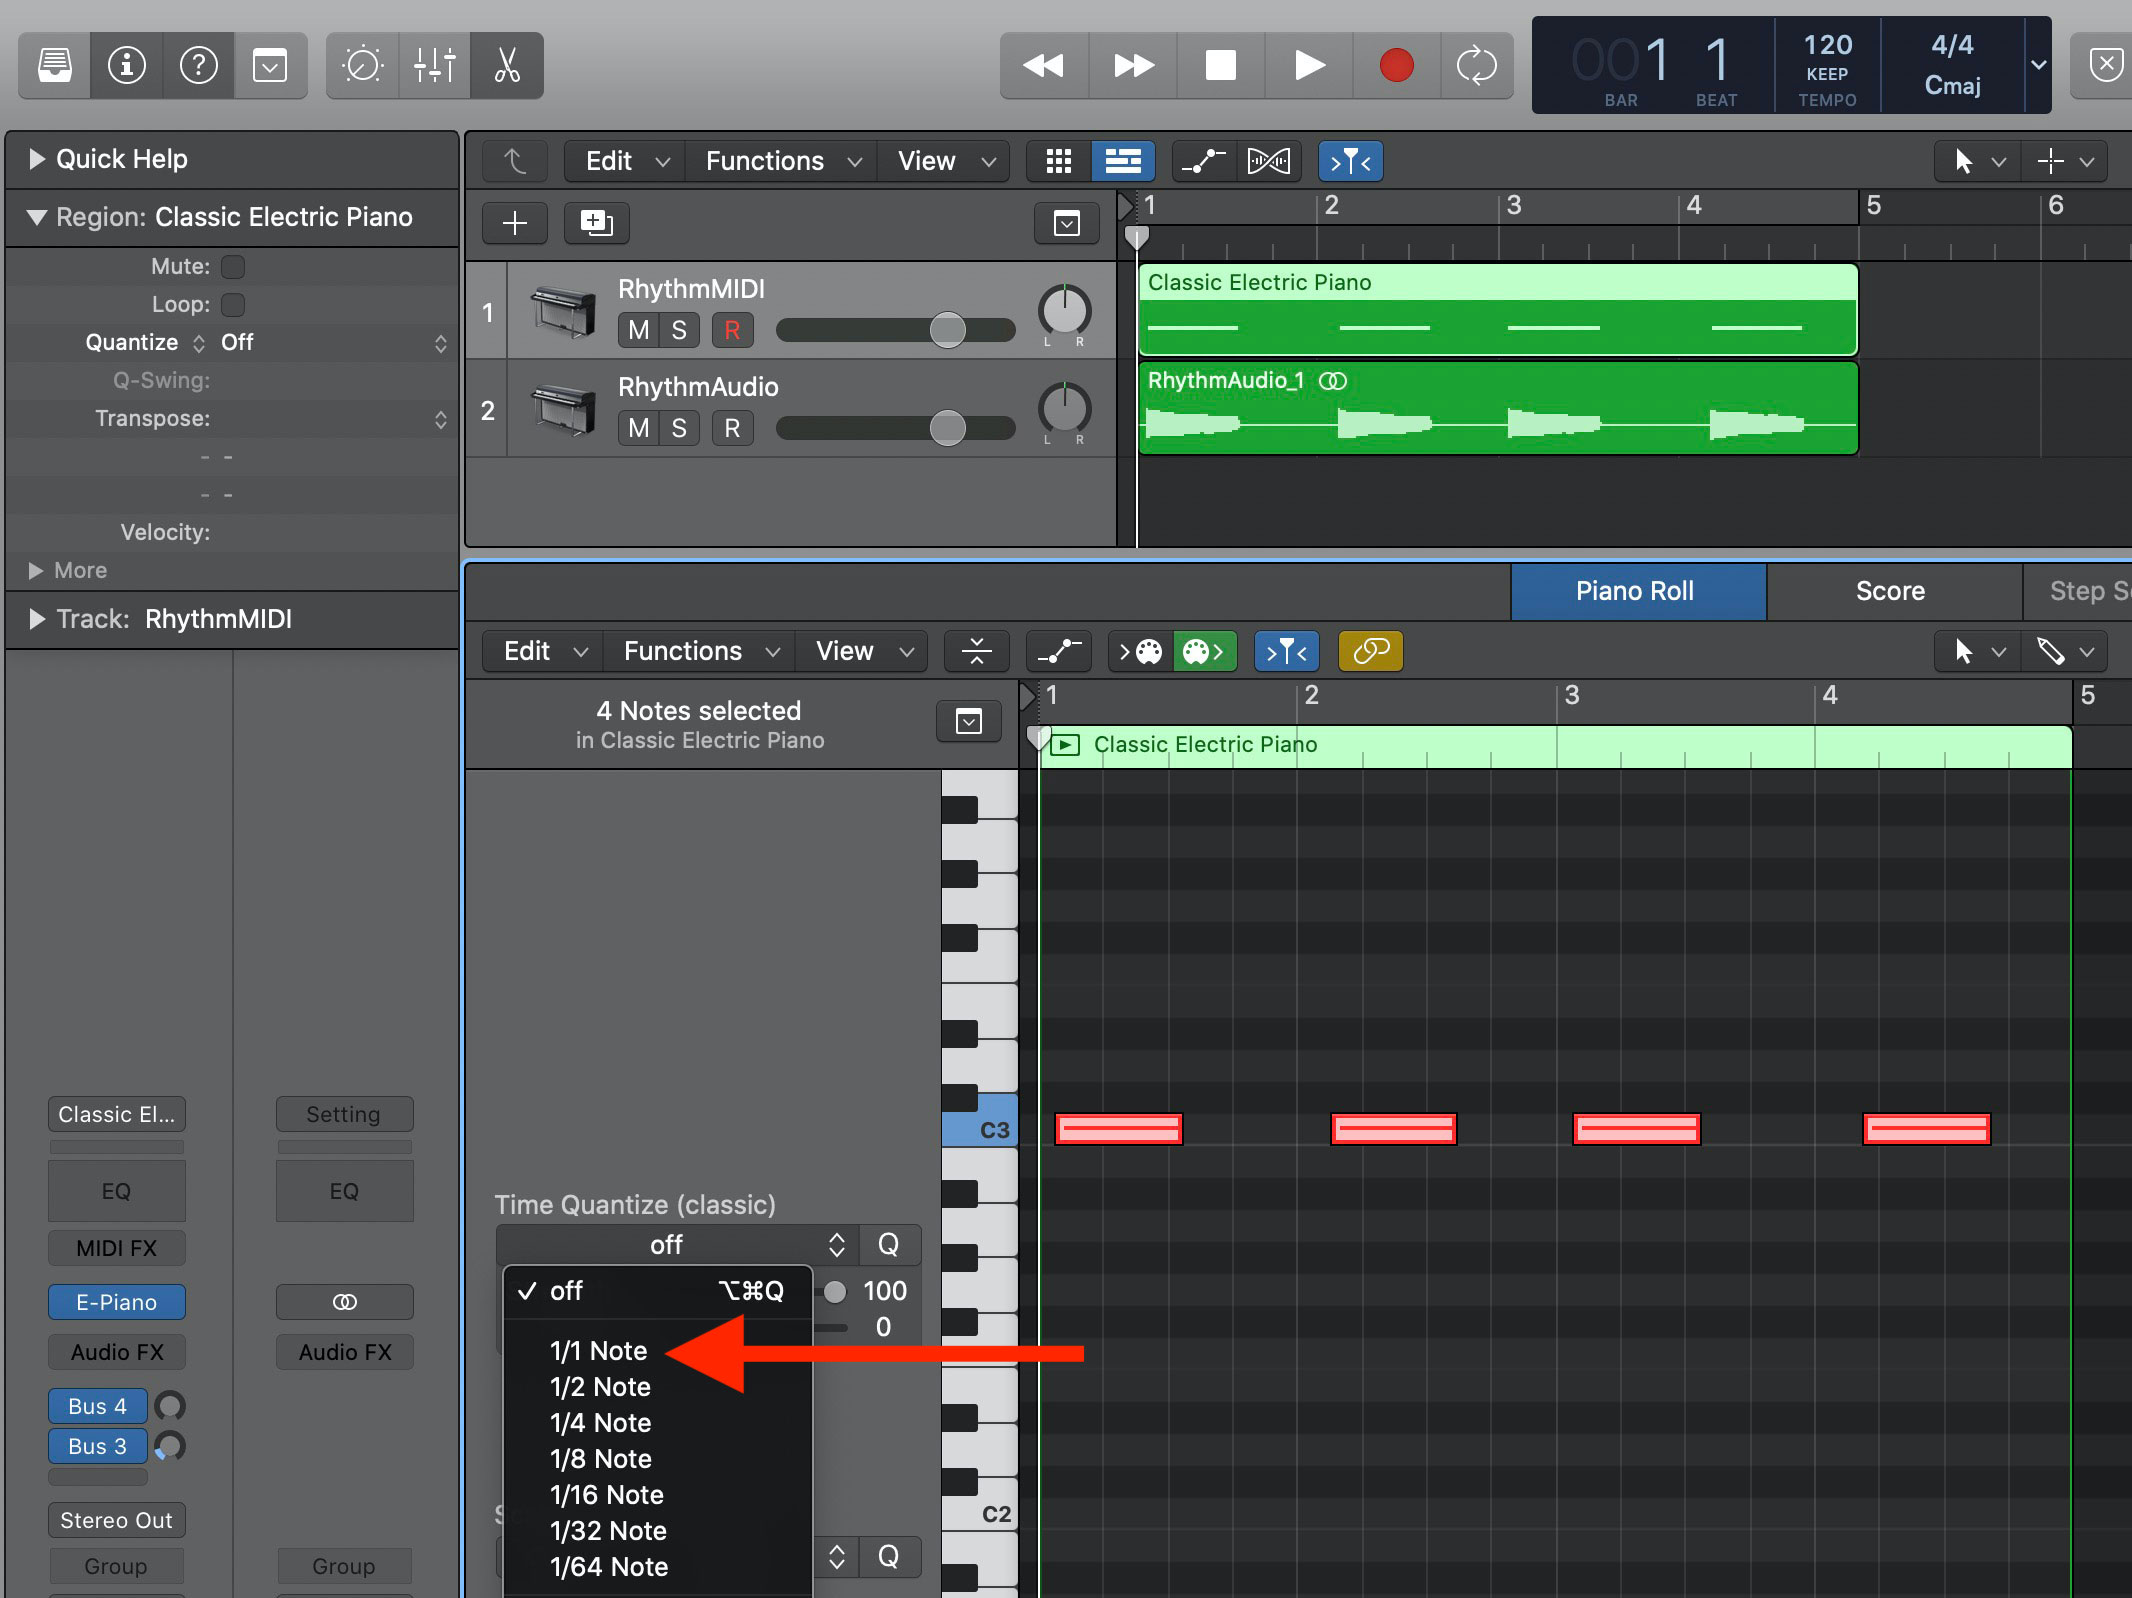
Quantizing MIDI notes to the nearest whole note (1/1 note) in Logic Pro X.
Post-quantization, you can see the four notes have been shifted to line up with the nearest whole note. Depending on the type of musical feel you’re looking for, I’d recommend playing around with the “Strength” setting, which ranges between 1 and 100. The “Strength” setting basically determines the amount of time shift between the note’s initial location and the fully-quantized location.
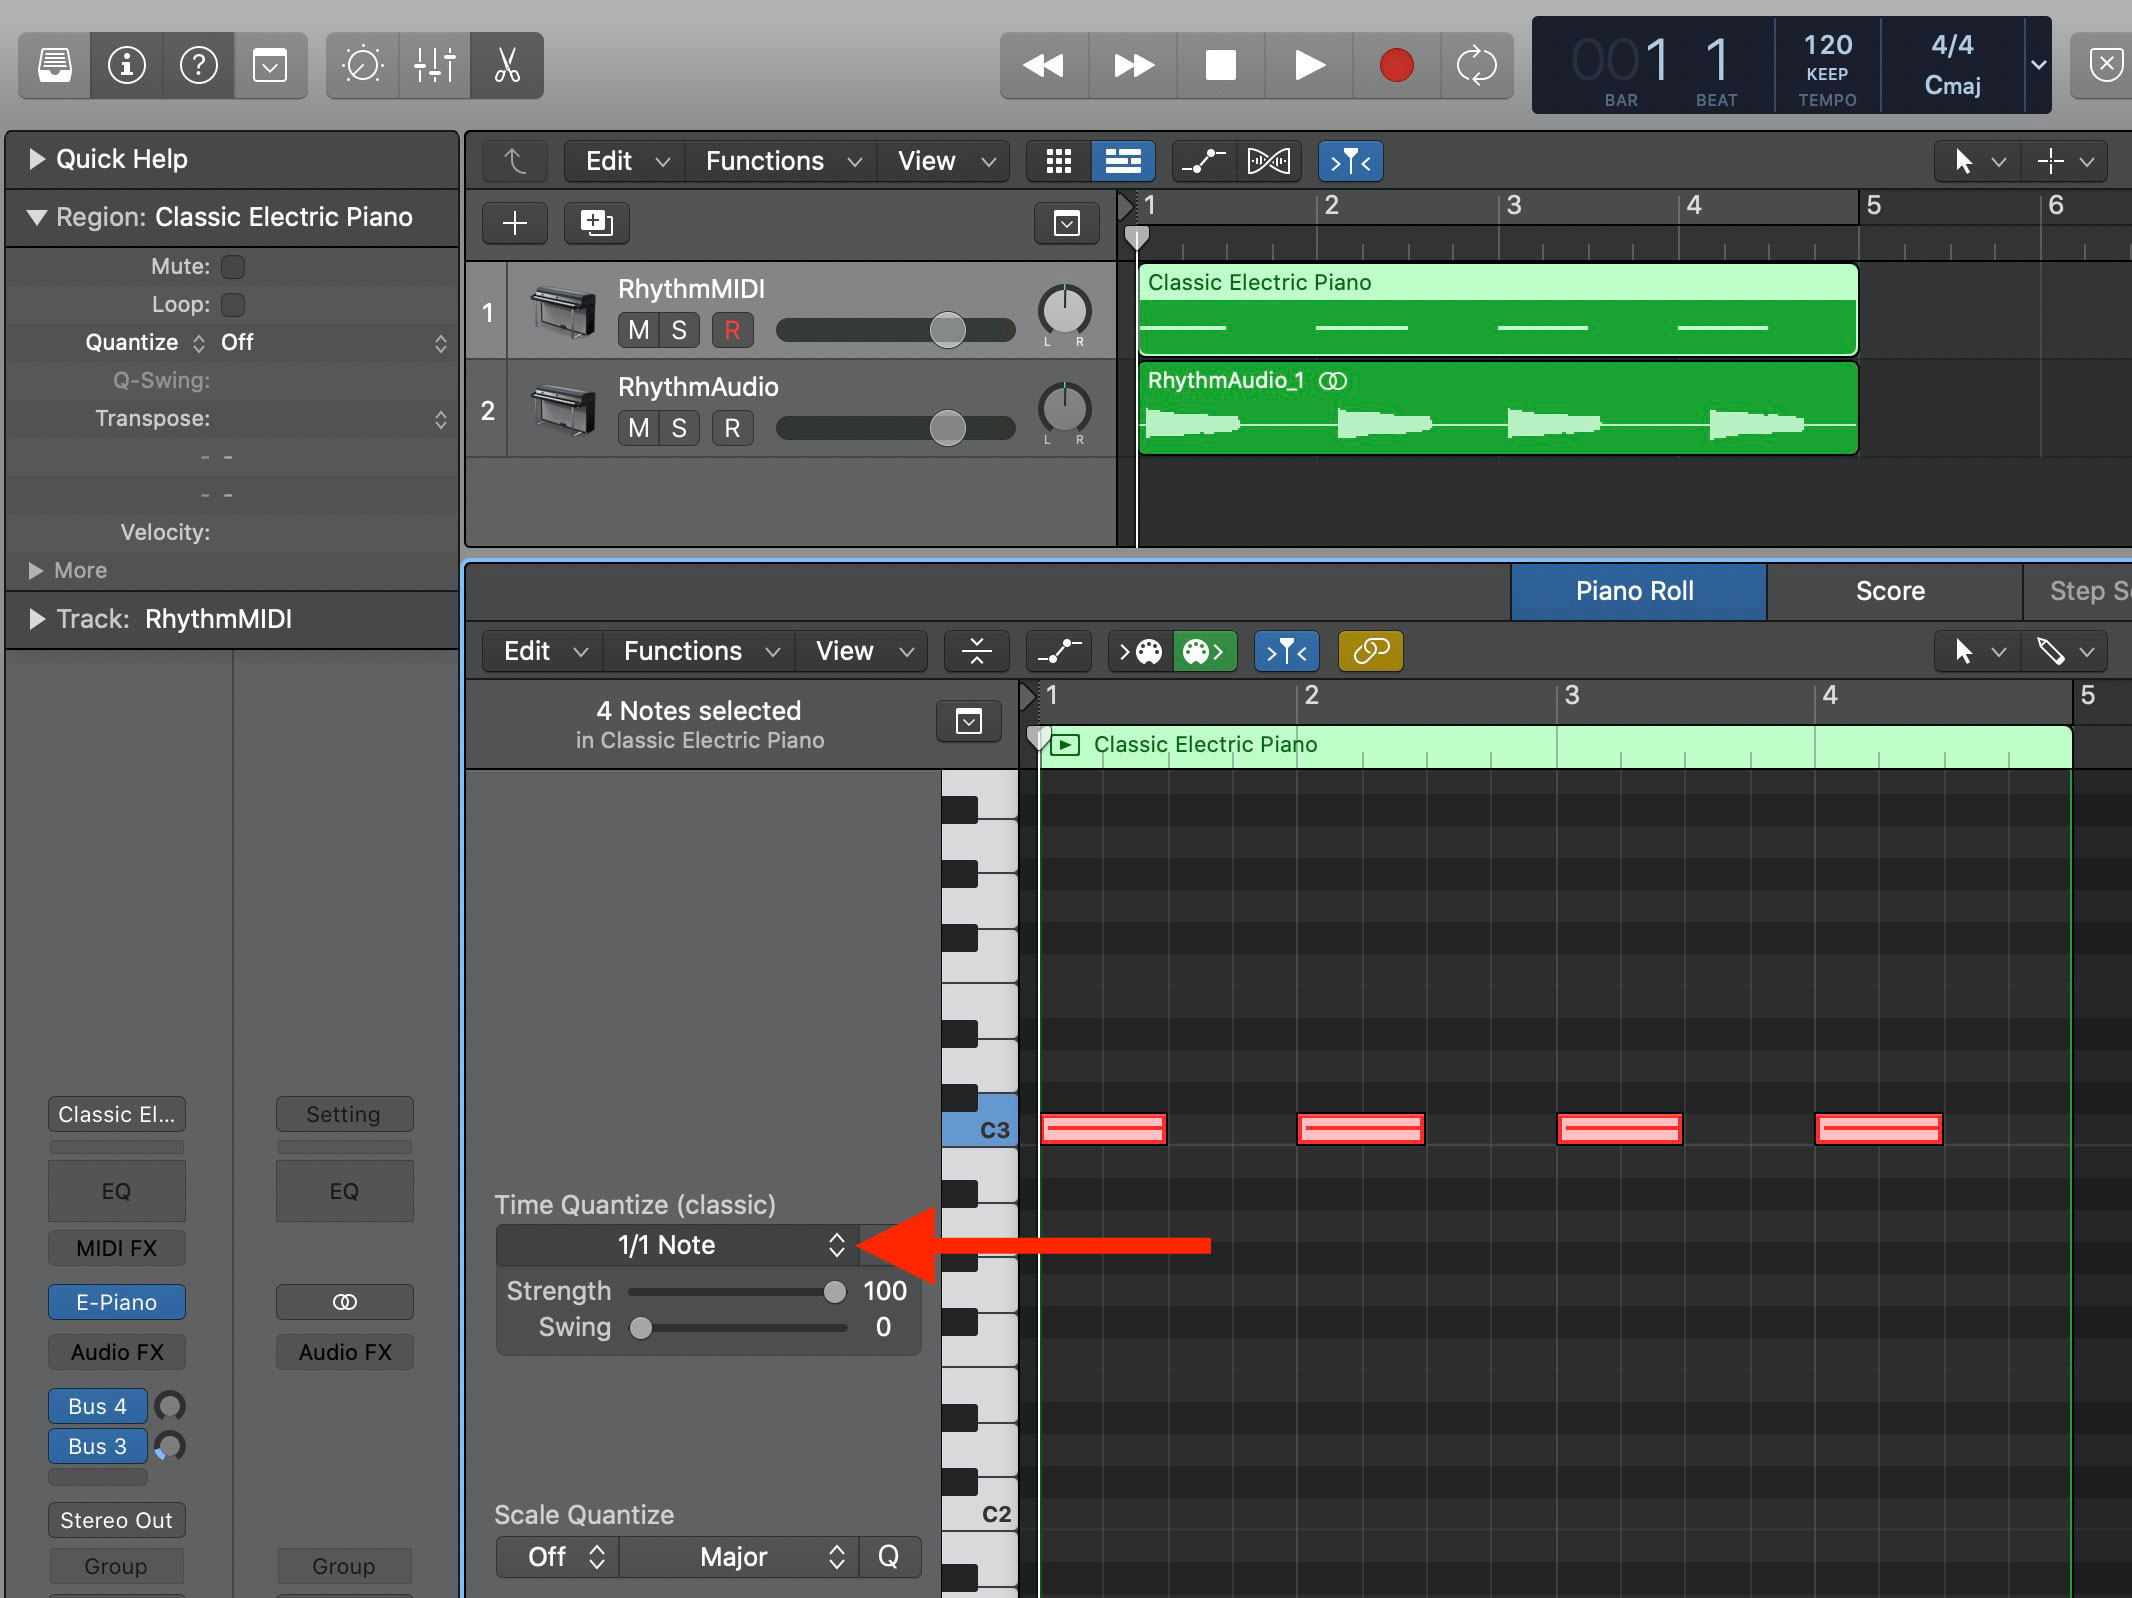
Quantized MIDI notes in Logic Pro X.
MIDI quantization is very useful for lining up drum samples, automation triggers, and other “pre-audio” scenarios. Now that you know how to quantize MIDI in Logic Pro X, let’s go over how to quantize audio in Logic Pro X.
How to Quantize Audio in Logic Pro X
Quantizing audio in Logic Pro X is a little trickier than lining up MIDI notes. The main reason for this is MIDI quantization is the process of lining up event triggers (e.g. notes that trigger a sampler), while audio quantization involves lining up sounds that already exist. Thus, audio quantization requires a DAW like Logic Pro X to analyze the sound file in search of transients to line up.
Before beginning the audio quantization process, I’d recommend ensuring there is no silence at the start of the audio file. From my experience, I’ve found that it can be difficult to quantize the first “beat” of an audio file if there is a little silence at the start of the file – this is just my personal experience so YMMV.
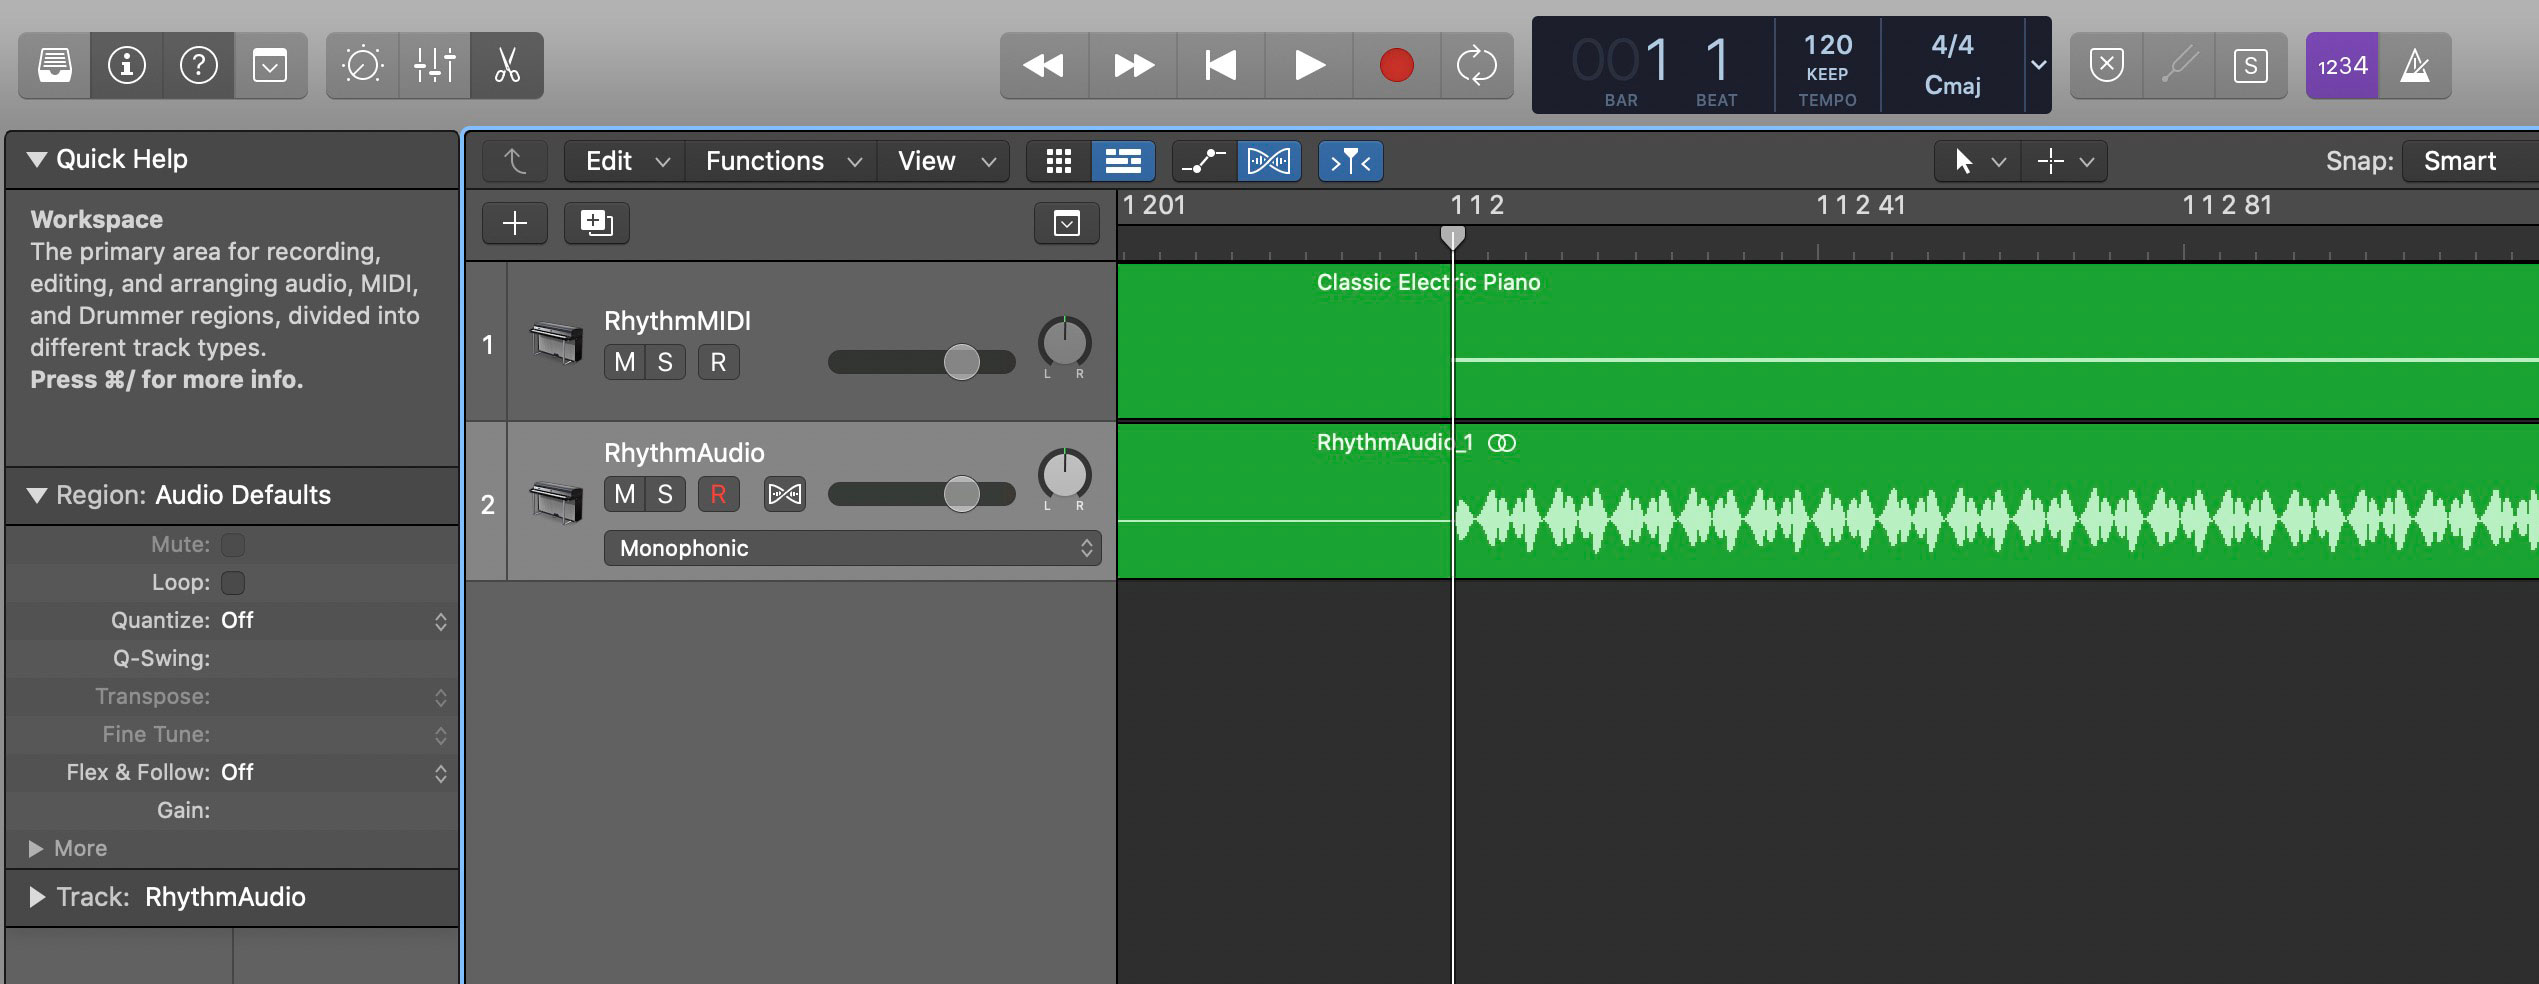
In the audio file below, you can see there is a little silence at the start of the file. Let’s go ahead and trim this silence before continuing.
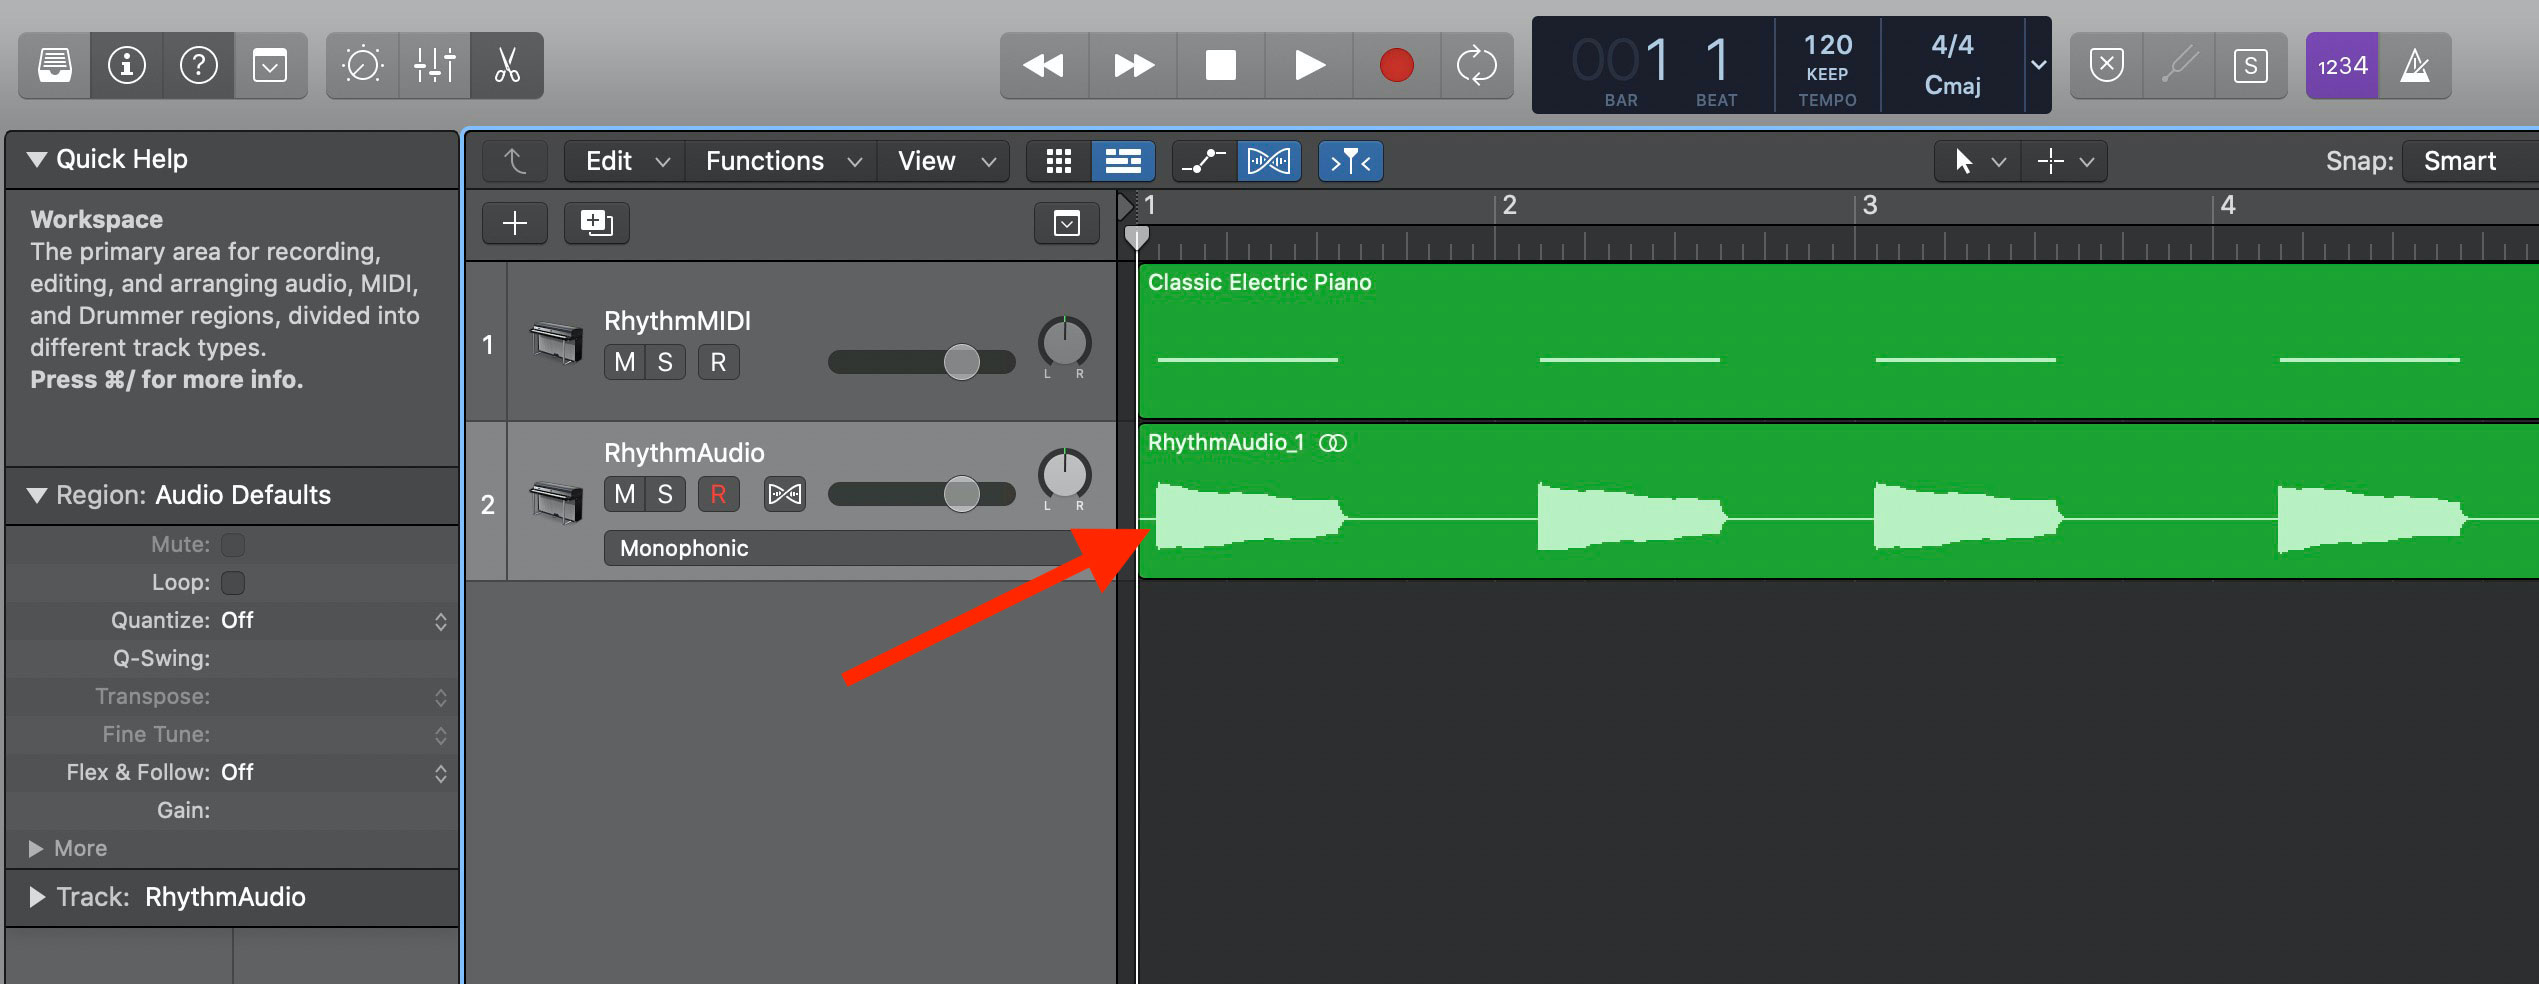
Quantizing an audio file in Logic Pro X
To get rid of the silence, we can just zoom in, cut the silence with the built-in trim tool, and drag the audio file to the starting point of the Logic Pro X session.
Trim silence at the beginning of the audio file.
Next, enable Flex Mode by clicking on its corresponding icon in Logic Pro X’s menu bar. Flex Mode, as the name implies, makes an audio file flexible and allows you to manipulate its time and pitch.
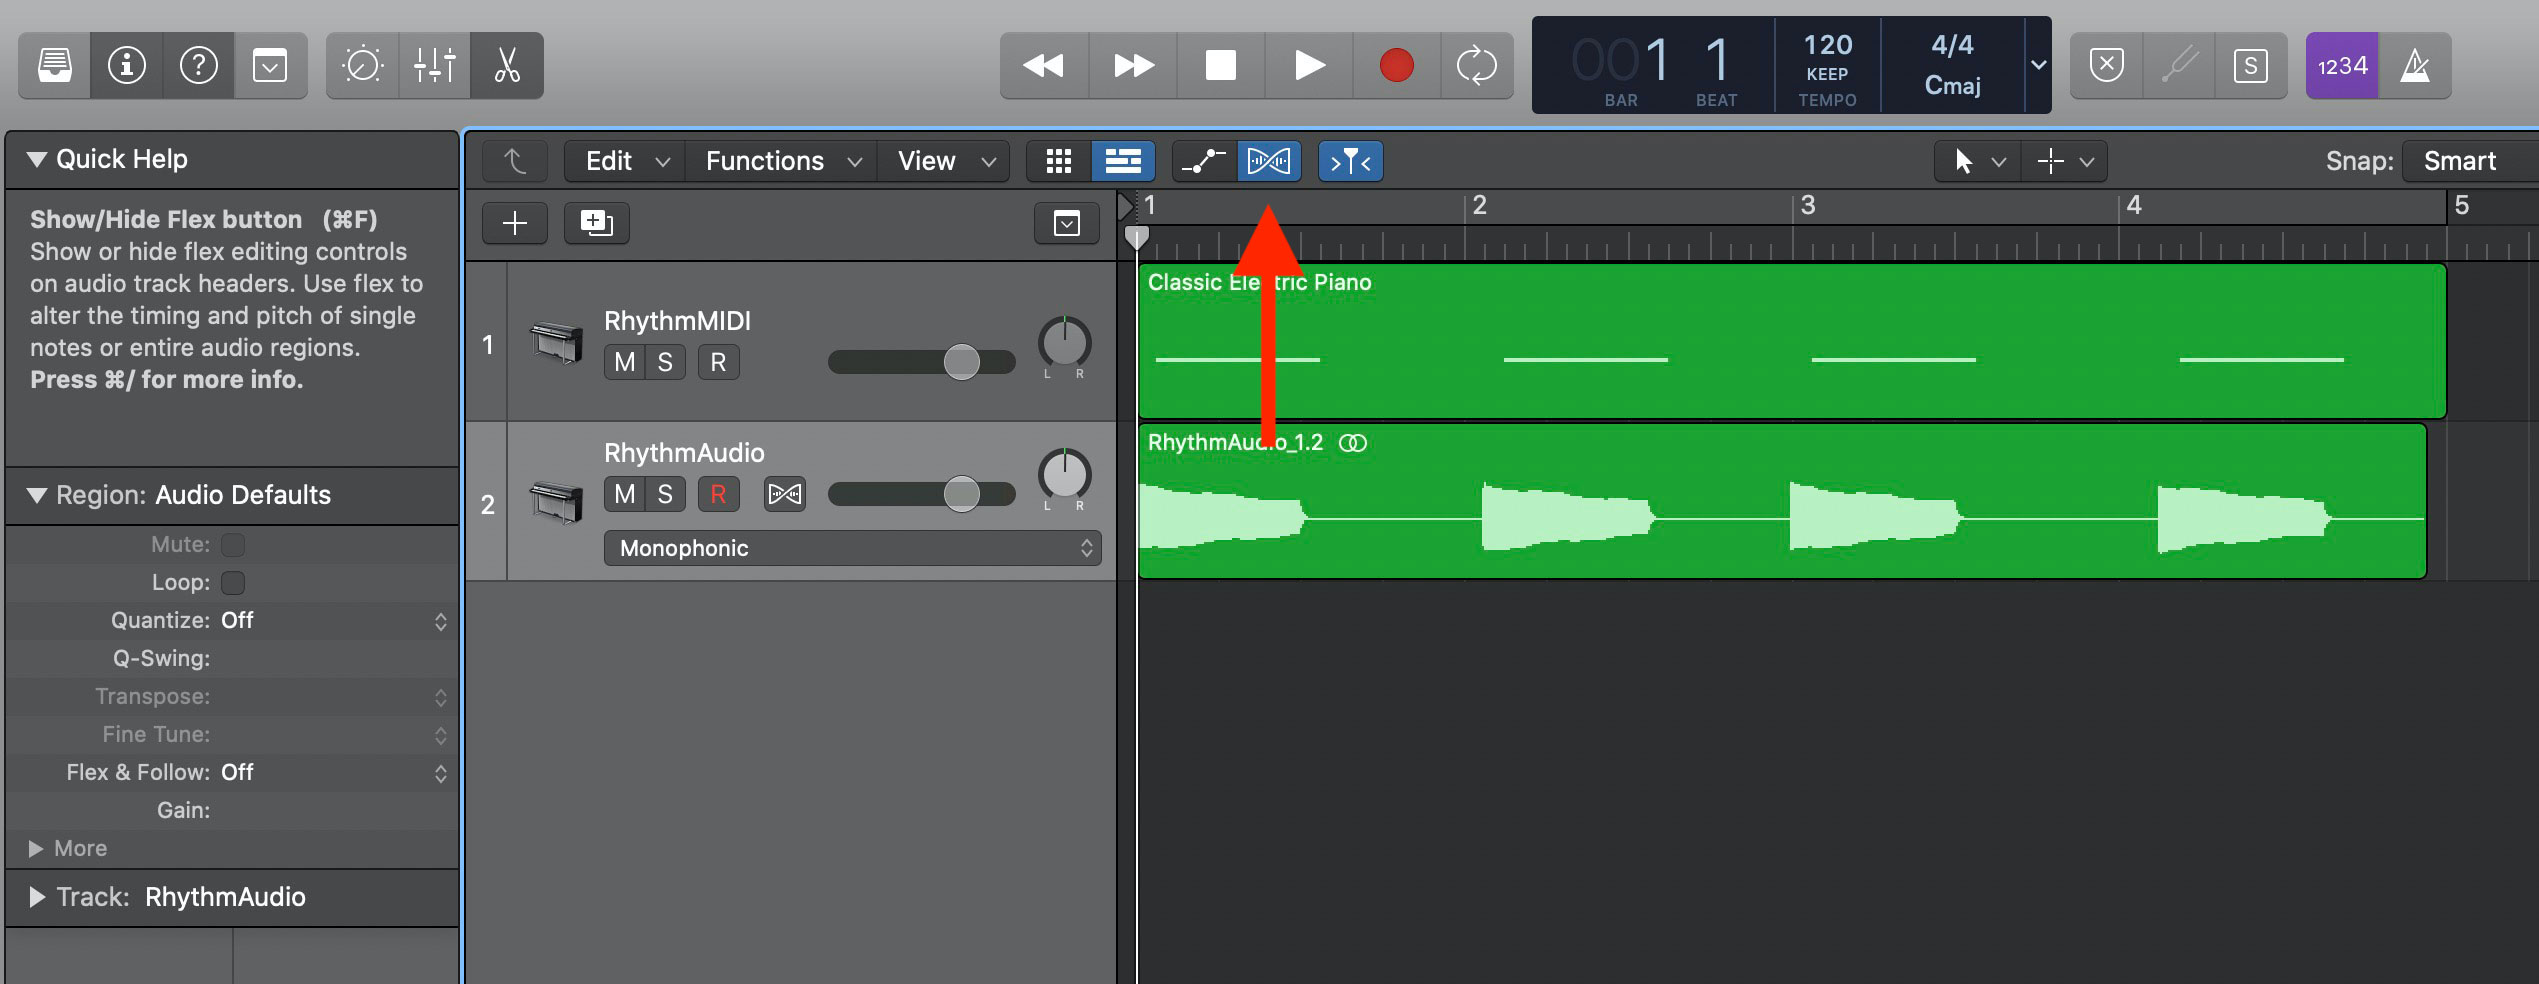
Enable flex mode in Logic Pro X.
With Flex Mode enabled, click the Flex icon on an audio track to enable Flex manipulation. You’ll also need to select a Flex Mode algorithm that correlates with the audio material you are quantizing. In the example screenshot below, I’ve selected “Slicing (Auto)” for the Flex Mode algorithm. I’ve found that this mode works well for a variety of audio sources. If you’re manipulating something very specific, you can choose a more specific algorithm like “Flex (Monophonic)” for monophonic sources or “Flex (Rhythmic)” for percussive audio like drum loops.
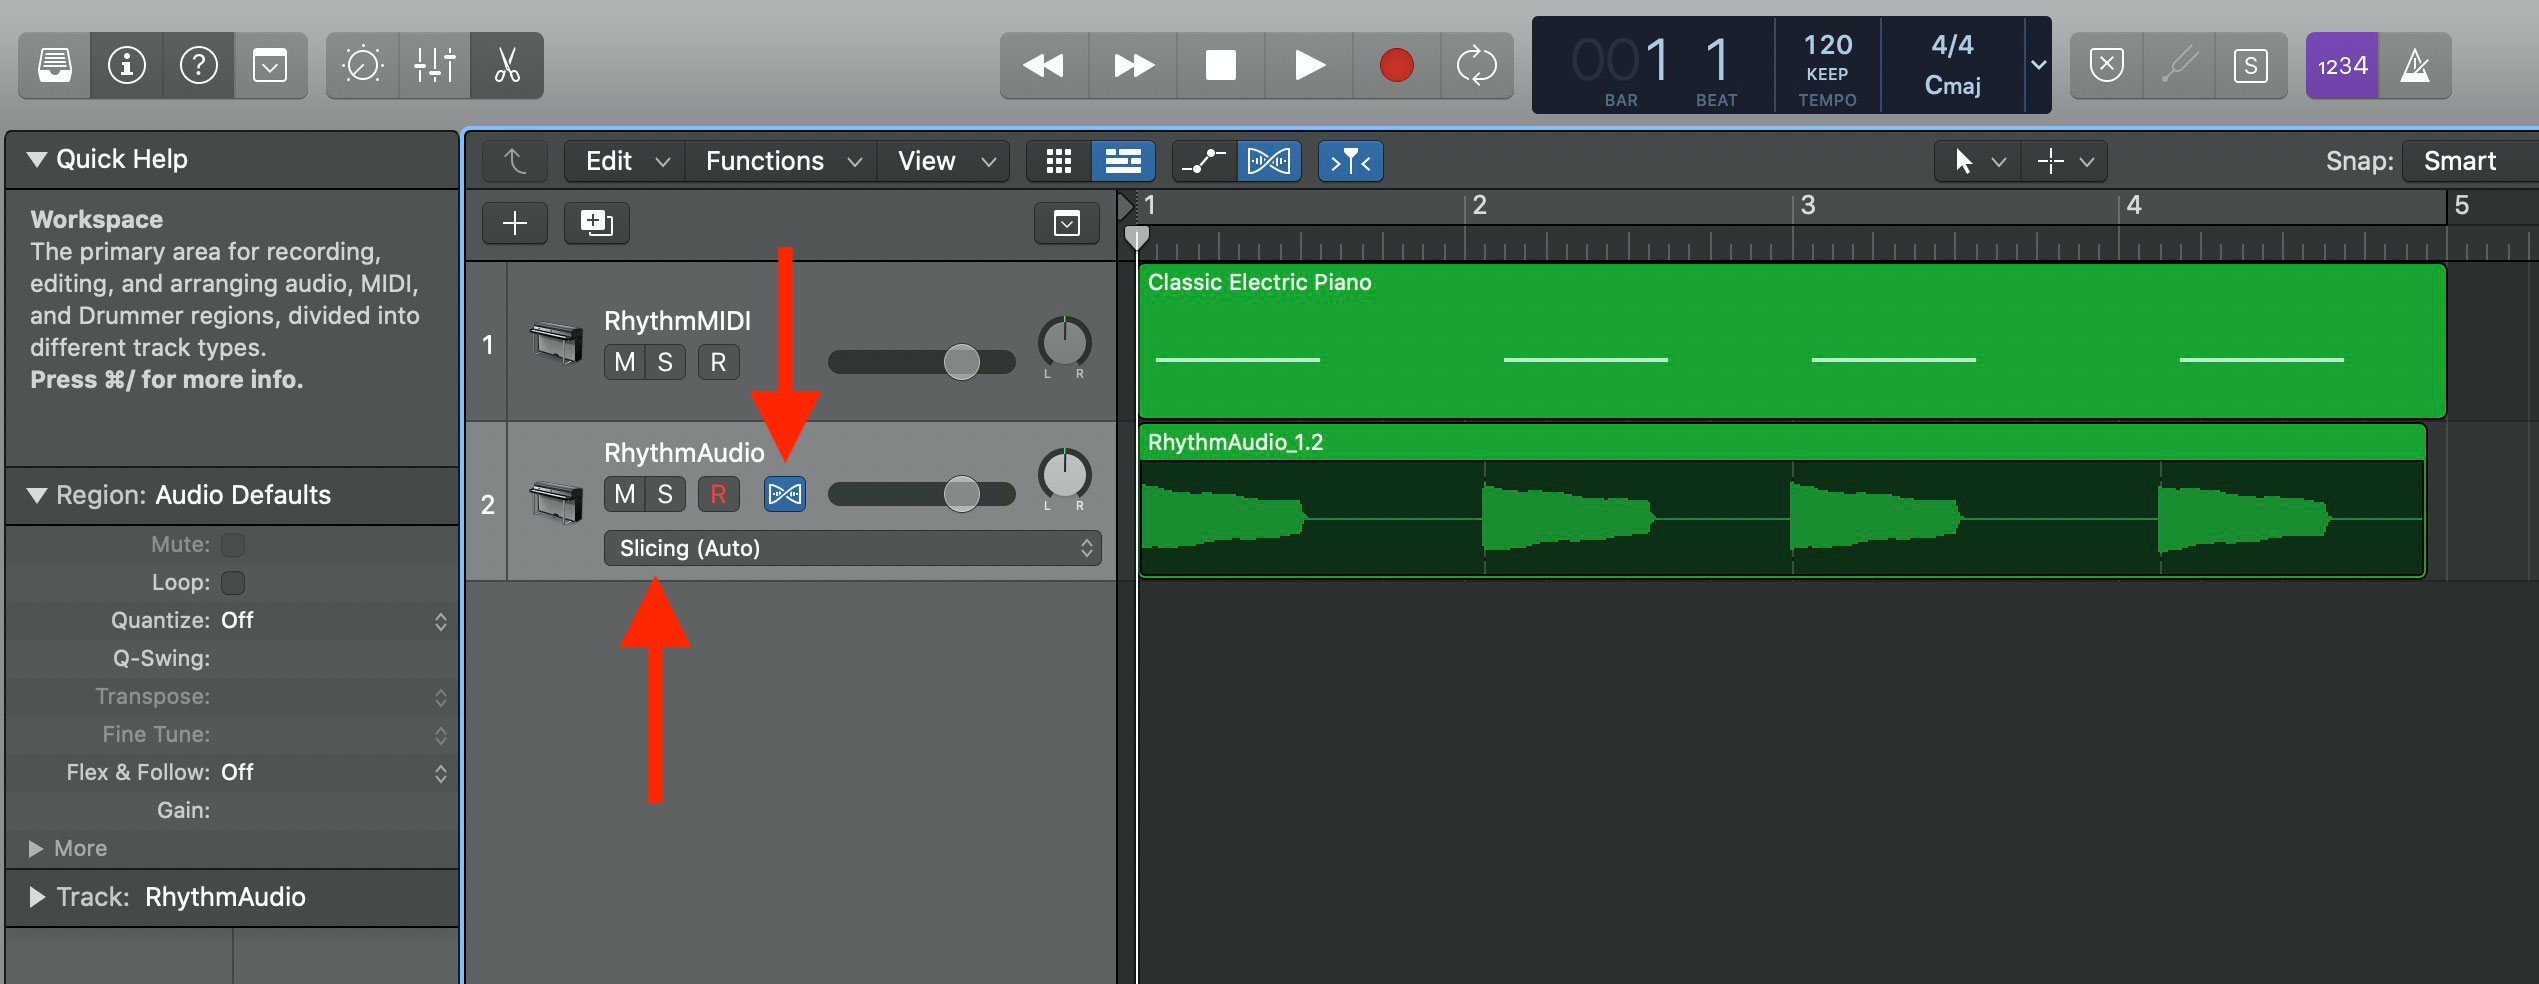
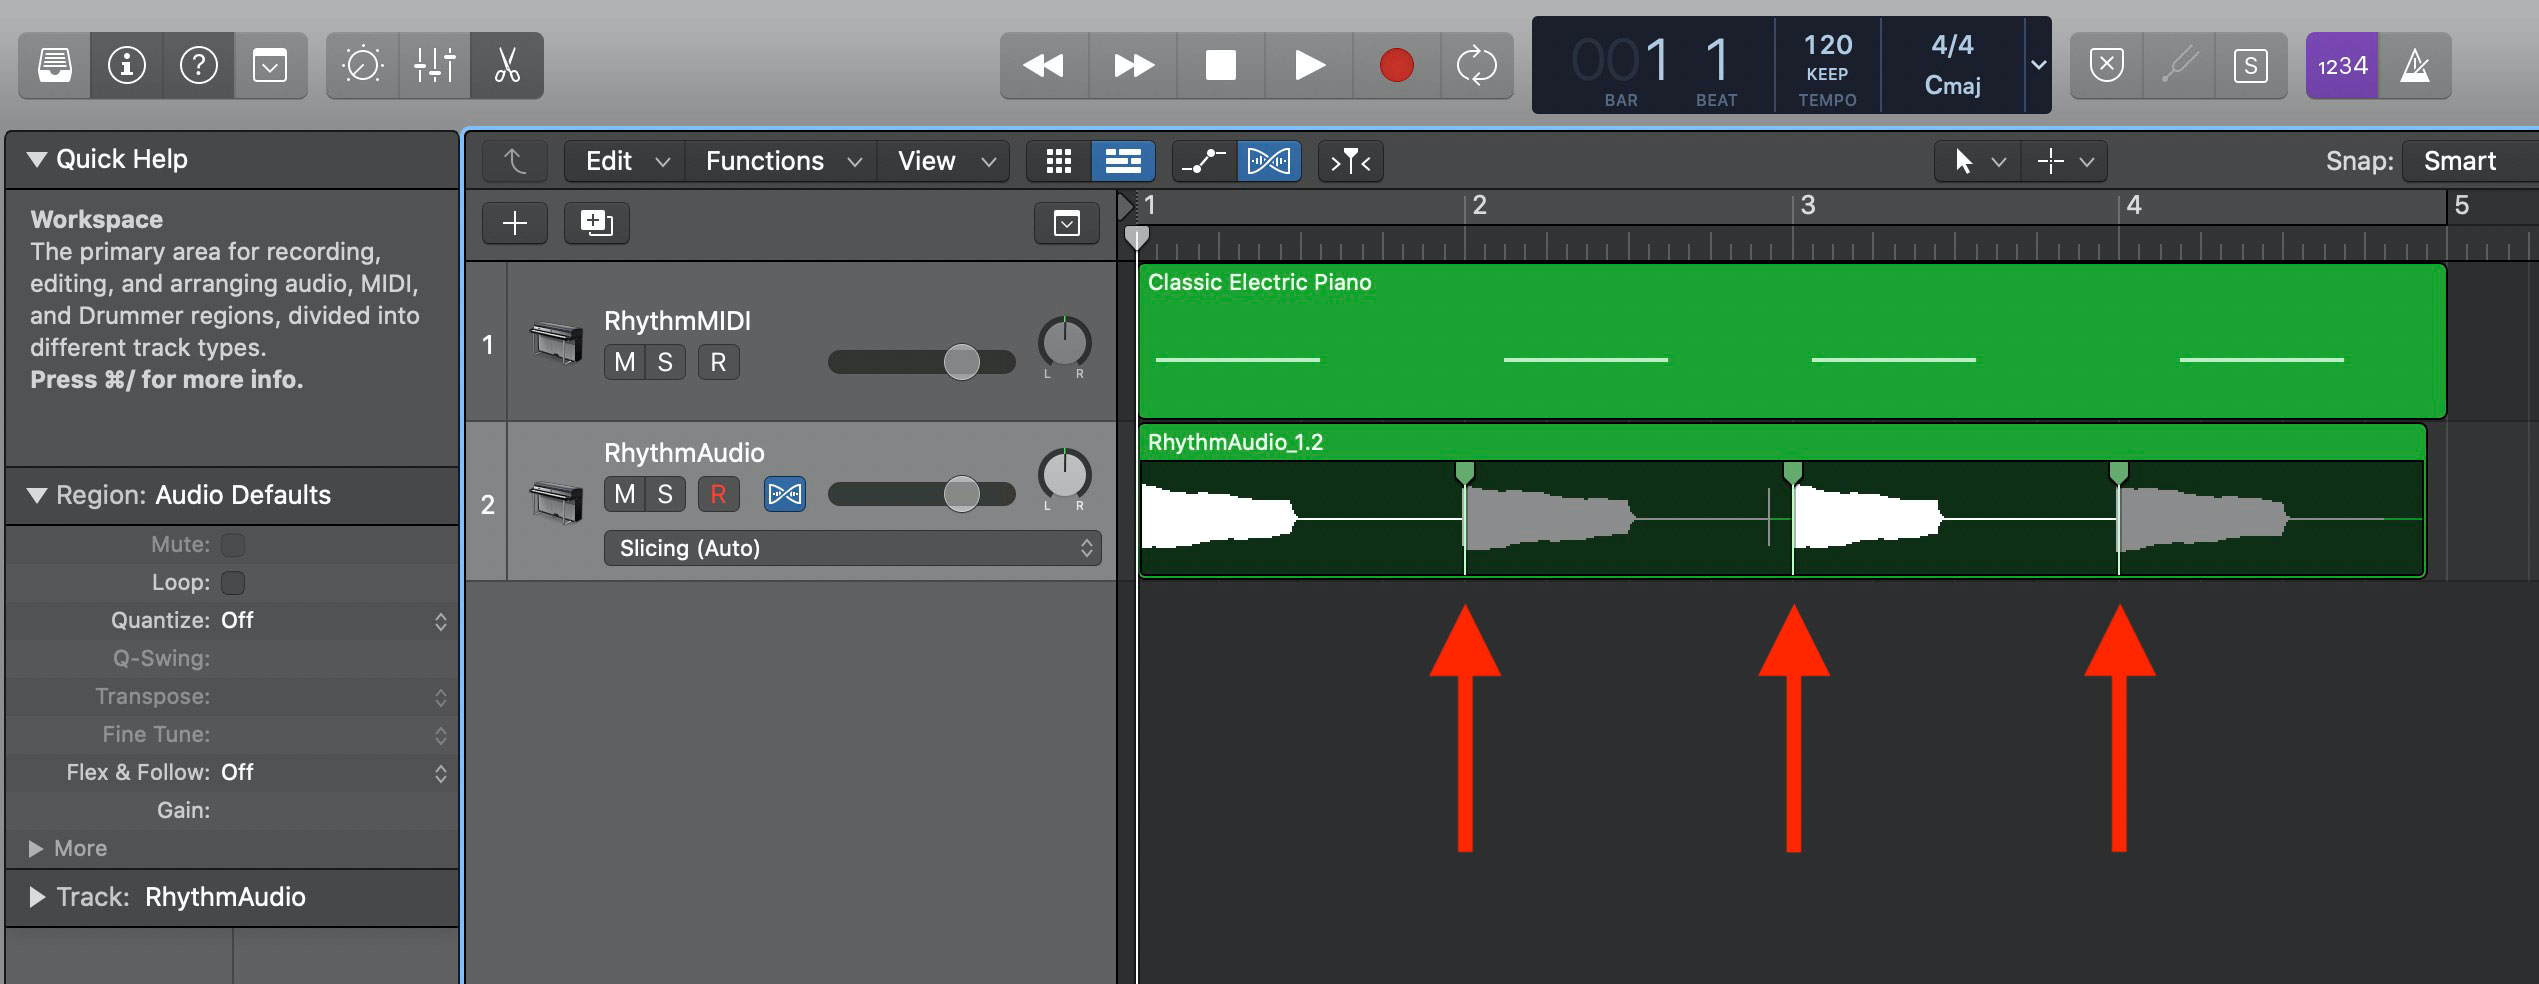
Select a Flex Mode algorithm in Logic Pro X.
After selecting a Flex algorithm, Logic Pro X will automatically print lines (flex markers) on top of transients in the audio file. To manipulate a flex markers, click on them – this will make them draggable.
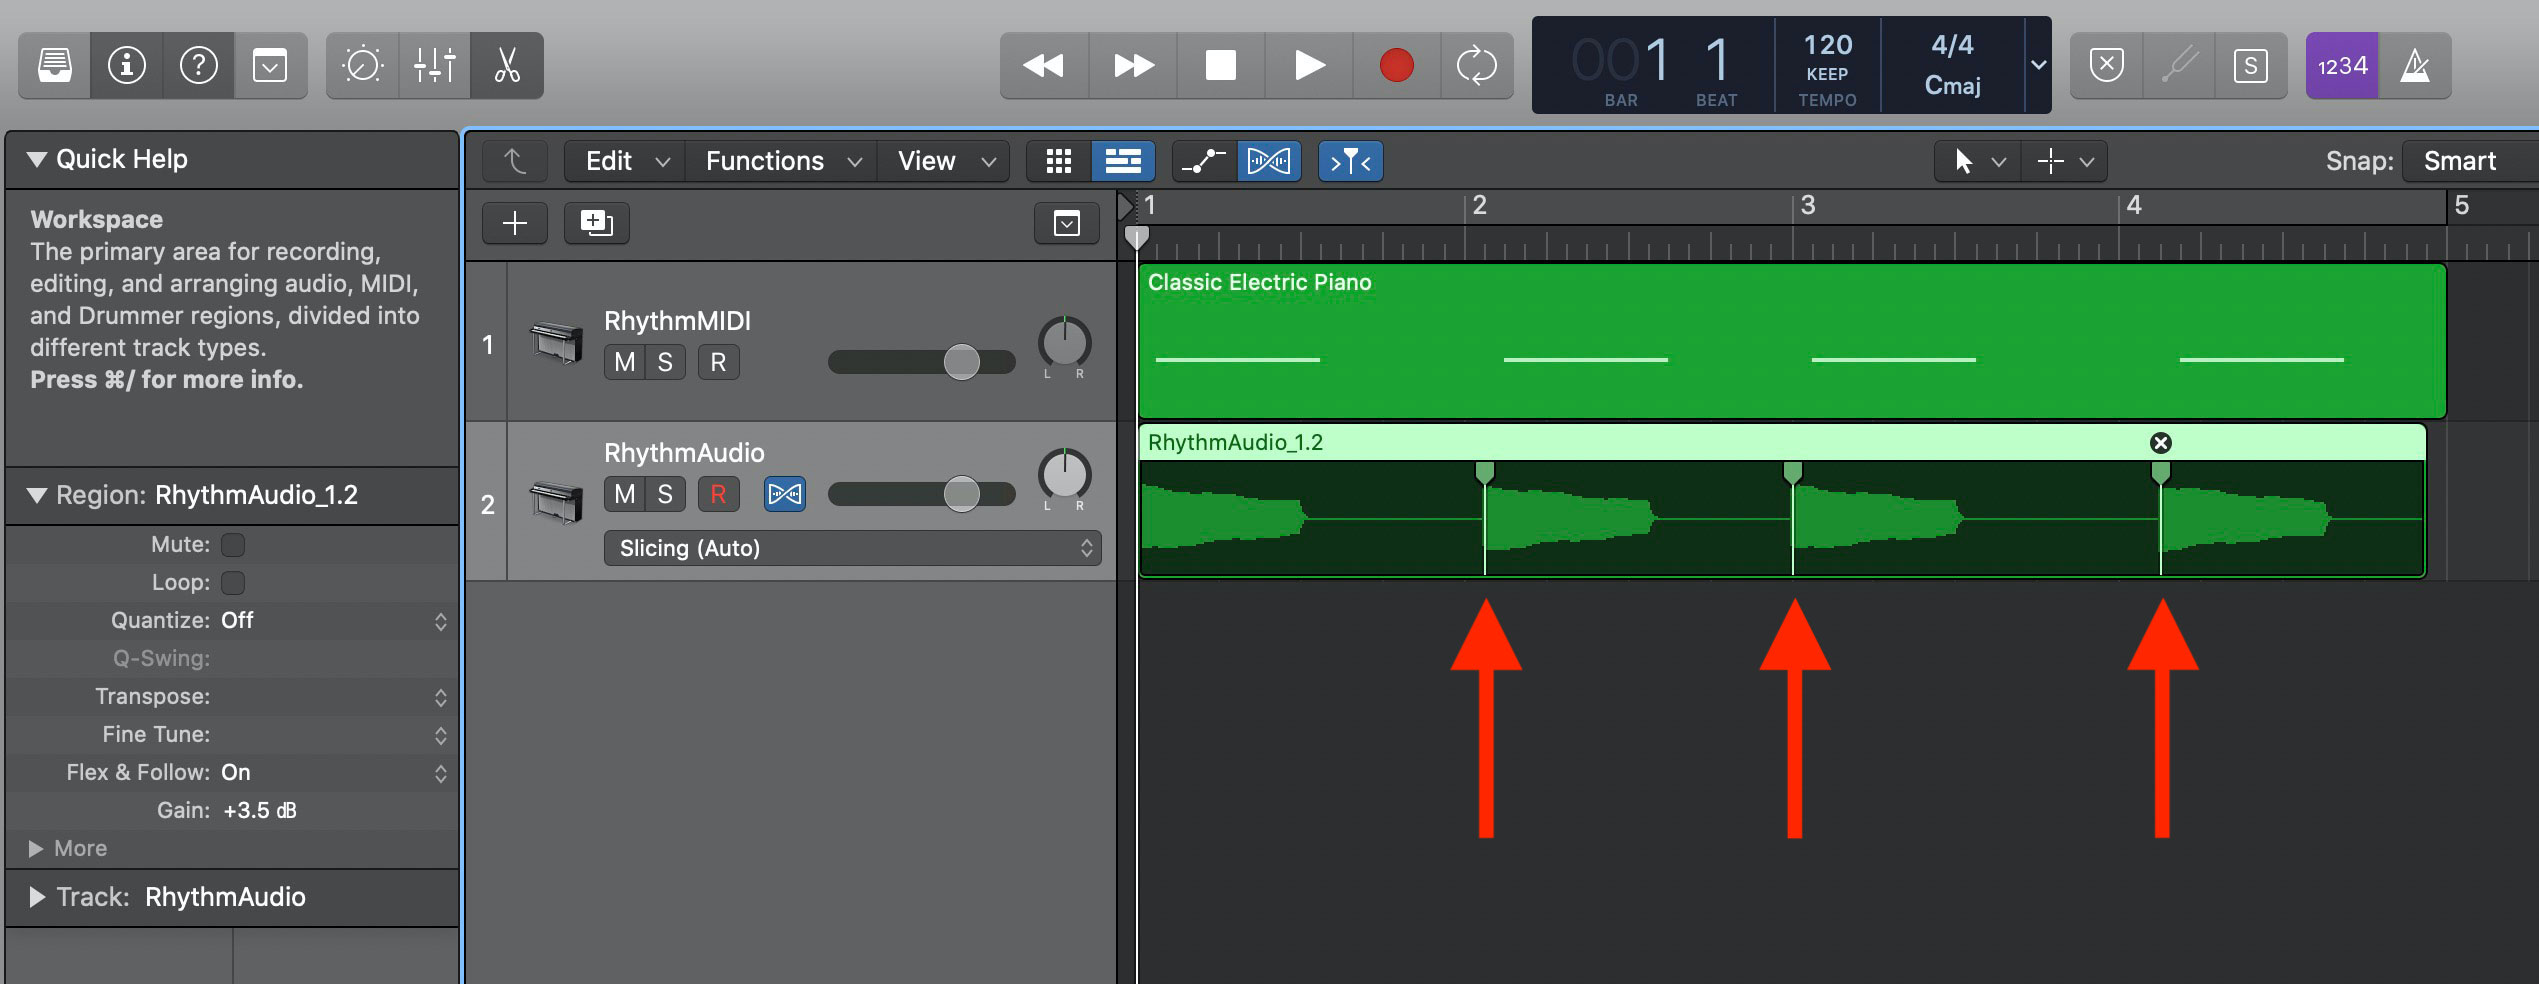
Create flex markers in Logic Pro X.
With the flex markers selected, the last thing to do is to quantize the audio clip by dragging the transients to line up with the musical grid. In the screenshot below, I’ve dragged the flex markers to line up with the first beat of each bar.
Drag flex markers in Logic Pro X.
Summary
As you can see, quantization in Logic Pro X is a fairly easy process. Whether you’re trying to quantize audio files or MIDI clips, Logic Pro X has got you covered. If you have any questions about how to quantize in Logic Pro X, feel free to send me an email or reach out to me on Twitter.