Earlier this month, Google published an official blog post detailing how "page experience signals" will start factoring into SEO page rankings in May 2021. In the past, Google has been notoriously tight-lipped when it comes to how its search algorithm functions. Thus, this announcement is great news for WordPress users who care about SEO. In this post, you'll learn how to optimize your WordPress site for "page experience" and Core Web Vitals!
Before we dive in to the technical stuff, let's analyze what Google published in its blog post. Here are two most important sentences from the blog post below.
Today we’re announcing that the page experience signals in ranking will roll out in May 2021. The new page experience signals combine Core Web Vitals with our existing search signals including mobile-friendliness, safe-browsing, HTTPS-security, and intrusive interstitial guidelines.
Now let's discuss how to optimize your WordPress site for each of these items.
How to Optimize for Mobile-Friendliness
Optimizing WordPress for mobile-friendliness mostly comes down to your theme. Luckily in 2020, most themes are designed with mobile browsing in mind. To check if your site is mobile-friendly, you can use Google's verification tool here.
Here are a few tips for optimizing your site for mobile-friendliness.
18px or 20px Font Size
Make sure your font sizes are large enough! I can't tell you how many sites I've seen with 14px or 16px font sizes on mobile. To make your site easy to read, I recommend using a font size between 18px and 20px.
Do you need help improving your WordPress site's page experience? Check out my WordPress optimization and maintenance packages to take your site's performance to the next level.
On BrianLi.com, the body font size on mobile renders at 19px. Don't make your visitors squint just to view your site! Think about how ridiculous that is, especially when increasing your site's font size is usually a very easy fix.
Optimize Images for Mobile
Another aspect of mobile-friendliness is respecting your visitors' data plans. Most people don't have unlimited data plans, so it's important to always serve optimized images. If you're using a service like Cloudflare Polish or a plugin like ShortPixel or Imagify to compress your images, you're halfway there!
If you're not compressing images, I recommend the first option (Cloudflare Polish) because it supports WEBP with AVIF support coming soon, and doesn't require you to store image files in multiple formats on your origin server.
In addition to compressing images, be sure to provide properly scaled images via srcset as well. If a visitor is viewing your site on a mobile phone with a 320px viewport, there's no reason to serve them a 1920px-wide image – that's just a waste of bandwidth with zero visual benefit. Instead, it's better to serve either a 320px-wide image, or 640px image if the device has a 2x DPI display.
Remove Unnecessary CSS Padding on Mobile
Removing unnecessary padding is more of a general UX design tip, and I'm not sure if Google takes this into consideration. With that said, it's something that detracts from a site's mobile viewing experience, so I think it's important to bring up. Instead of trying to describe what I'm referring to, here's a screenshot.
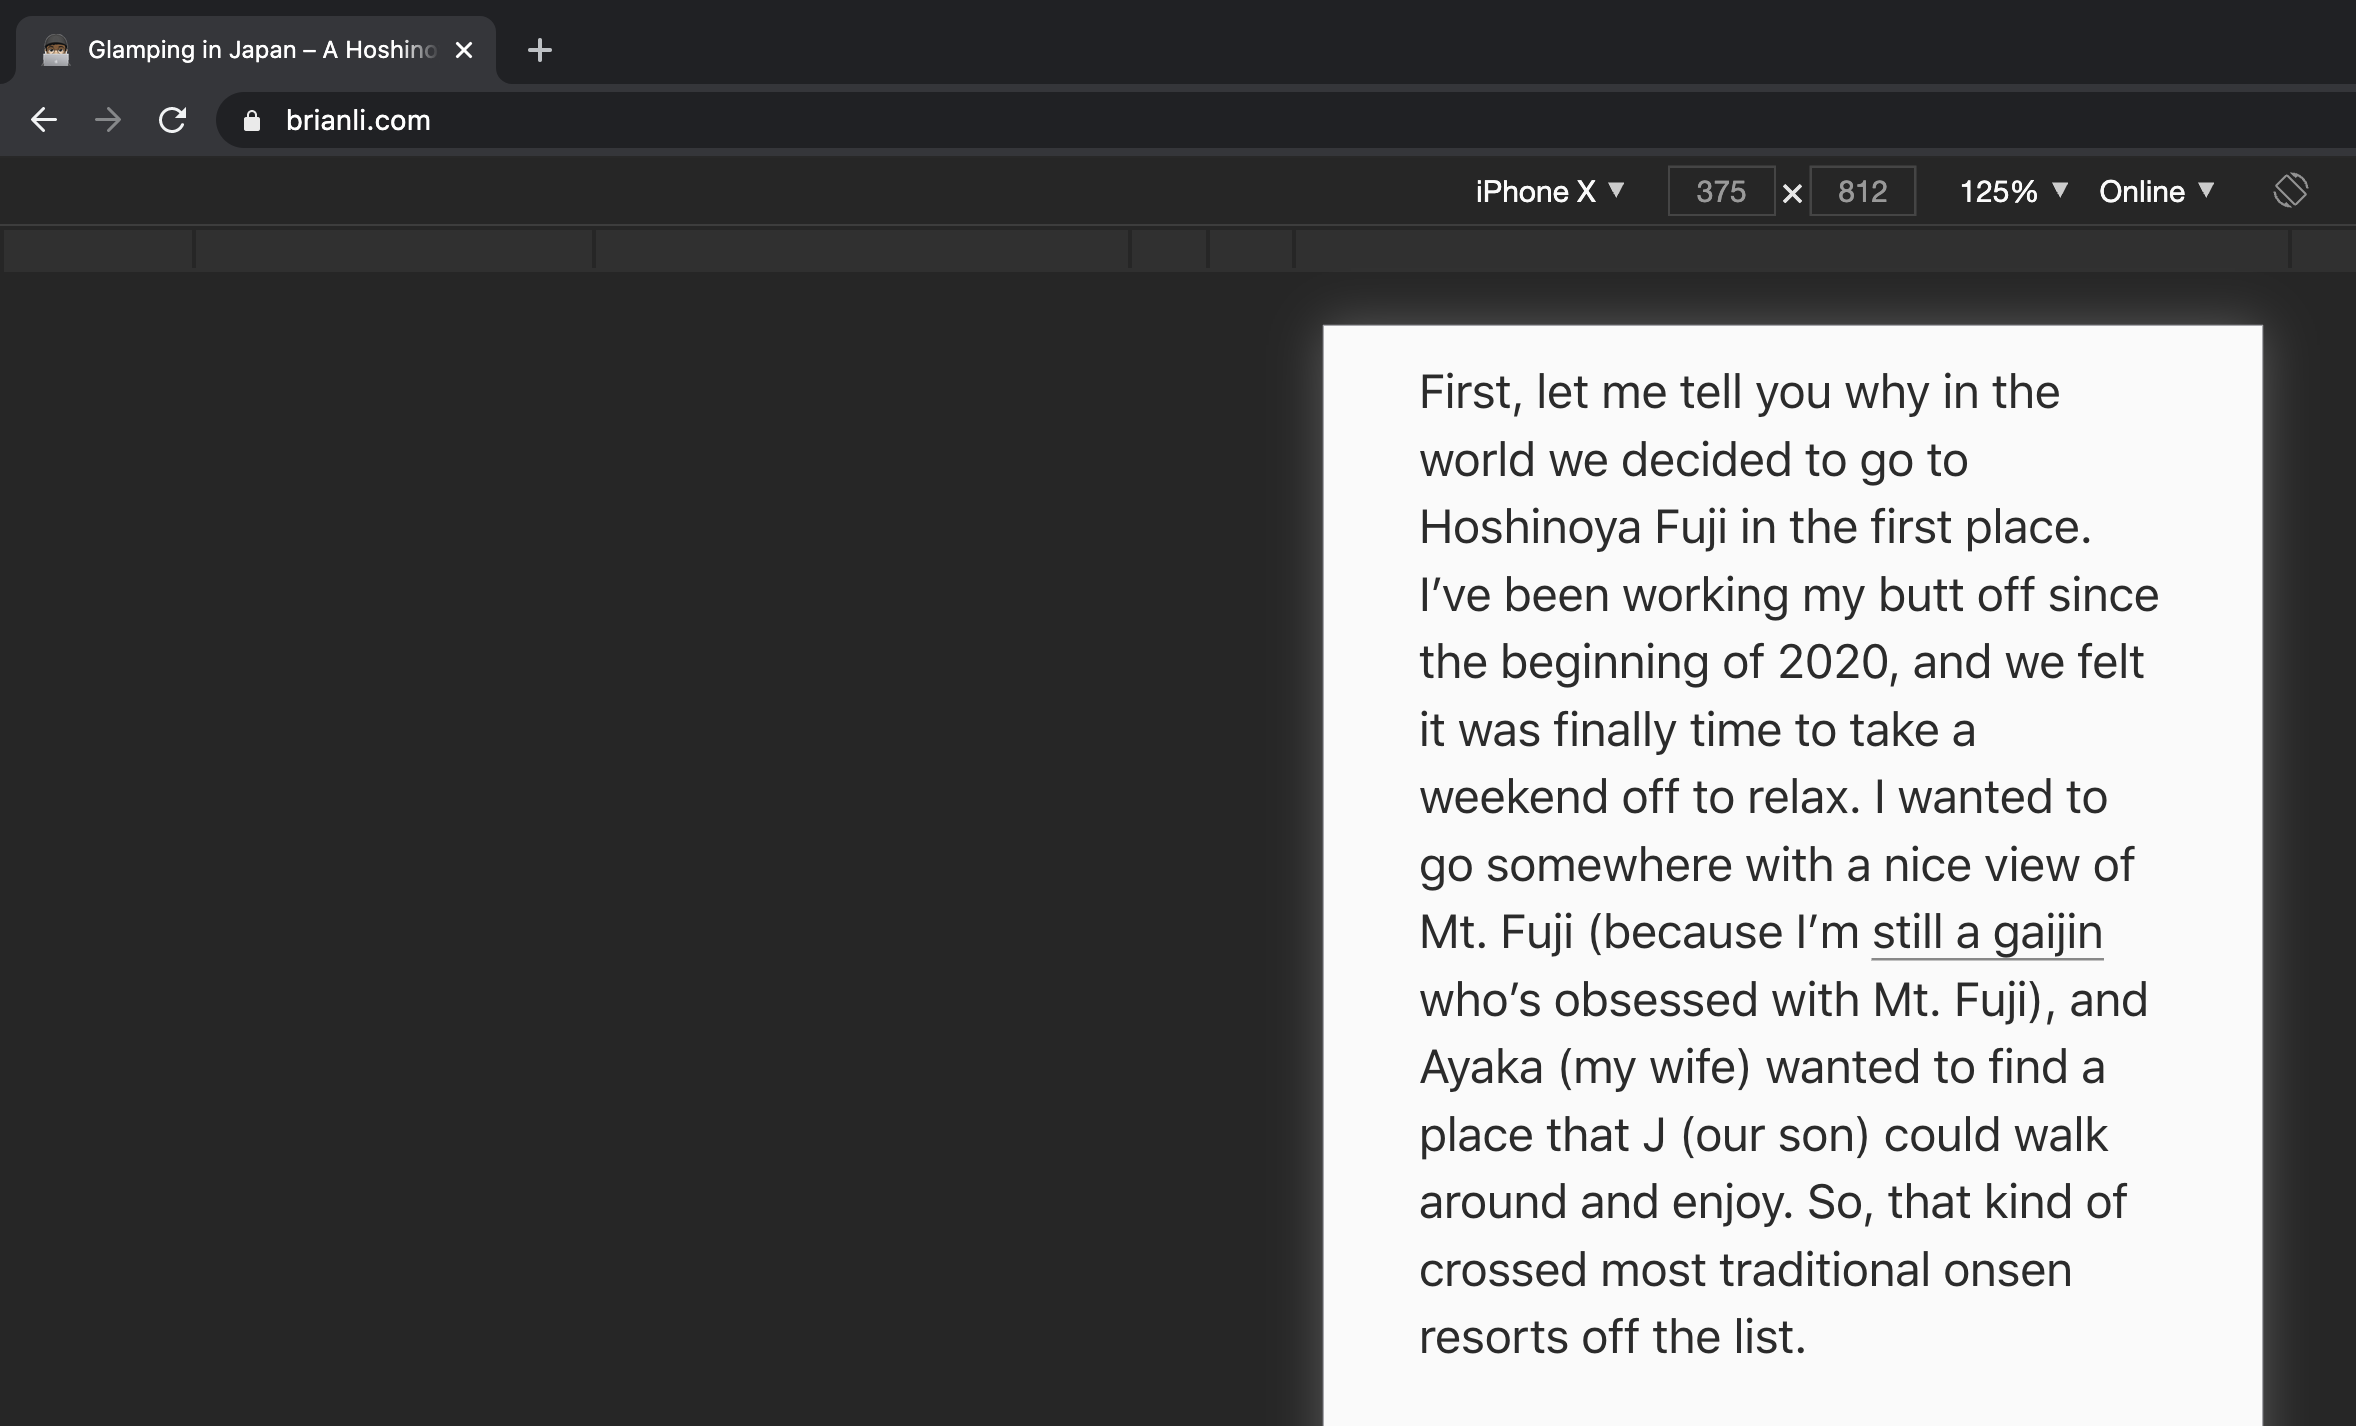
On mobile, horizontal width is a scarce resource because most people use their devices in portrait mode when browsing websites. The natural behavior for consuming content is to scroll up in order to move the page down. In other words, reading a blog post or news article is dependent on vertical interactions. Thus, it makes sense to maximize the usage of horizontal space when writing CSS media queries for mobile. This has the added benefit of maximizing the amount of above the fold content to capture the attention of visitors.
If your site on mobile looks like the screenshot above, I highly recommend editing your CSS to remove as much of the unnecessary padding or margin as much as possible. On BrianLi.com, I maintain 10px of left and right margin.
How to Optimize for Safe Browsing
To optimize WordPress for safe browsing, make sure your site is malware and phishing-free. To do this, you'll need to be both proactive and reactive when it comes to the security of your site. The first step in optimizing for safe browsing is to run a malware scan on your site.
There are a variety of malware scanning tools and services, but the most popular option is the "WordFence Security" plugin. After running an initial scan to establish a baseline profile for your site, you can move on to designing a security strategy that is both proactive and reactive.
Reactive Security
If the initial malware scan comes back positive, you need to take immediate action on your site! Depending on the exact type of malware, it's possible for sensitive data in your database to be at risk. On the other hand, if the malware injects HTML, CSS, or JavaScript into the frontend of your site, visitors to your site may encounter phishing and other malicious scams.
If you're unsure about how to remove malware on your WordPress site, I'd recommend reaching out to either WordFence or WP Buffs to clean your site!
Proactive Security
If the initial malware scan comes back negative, or if you've successfully cleaned up an existing malware infection, it's important to think about how to proactively secure your WordPress site from future hacks and infections.
Choose a Secure WordPress Host
The first step I'd recommend is moving to a WordPress host that includes malware scanning and cleanup. In 2020, the majority of reputable managed WordPress hosts have some kind of malware mitigation services in place.
For example, Kinsta's security guarantee includes free malware scans and cleanup for all sites hosted on its infrastructure. This means if your site is hosted on Kinsta, you won't have to install a plugin just to run malware scans, and you won't have to pay someone to clean your site after every malware infection. Kinsta also has robust firewalls in place, which will help protect your WordPress site from certain types of malicious attacks.
Audit WordPress Core, Plugins, and Themes
A large portion of successful hacks on WordPress sites are a direct result of outdated or nulled plugins and themes. WordPress themes and plugins are written in PHP, which is a dynamic server-side language. This means if PHP code is written in an insecure fashion, it's possible for hackers and malicious actors to leverage this to cause harm on WordPress sites. Therefore, it's very important to keep WordPress Core, as well as plugins and themes, updated.
Secondly, you should never used nulled themes and plugins. A nulled plugin is a premium or paid plugin that's made available for free by malicious actors. These "free" versions typically have additional PHP or JavaScript code injected into various plugin or theme files. The injected code can then be used by a hacker to snoop on your site, change the content in your WordPress database, redirect visitors to scam sites, take down your site completely, and more.
There's a reason why premium plugins cost money. They take considerable time and resources to develop and support – that's the value. Now, why would someone make a premium plugin – that normally costs $99/year – available to download for free? As they say – if it sounds too good to be true, it probably is. Stop using nulled plugins and themes, and you can kill two birds with one stone by supporting developers while keeping your site secure at the same time.
Do you need help auditing your WordPress site's plugins and themes? Check out my WordPress optimization and maintenance packages to take your site's performance to the next level.
How to Optimize for HTTPS Security
HTTPS is the secure version of HTTP, one of the fundamental underlying protocols of the Internet. Unlike HTTP, HTTPS encrypts traffic between the server and client, which makes man-in-the-middle and other malicious attacks more difficult to execute. HTTPS is also a requirement for newer performance-enhancing technologies like HTTP/2 and HTTP/3. There are three things to keep in mind when optimizing a WordPress site for HTTPS.
Configure an SSL Certificate
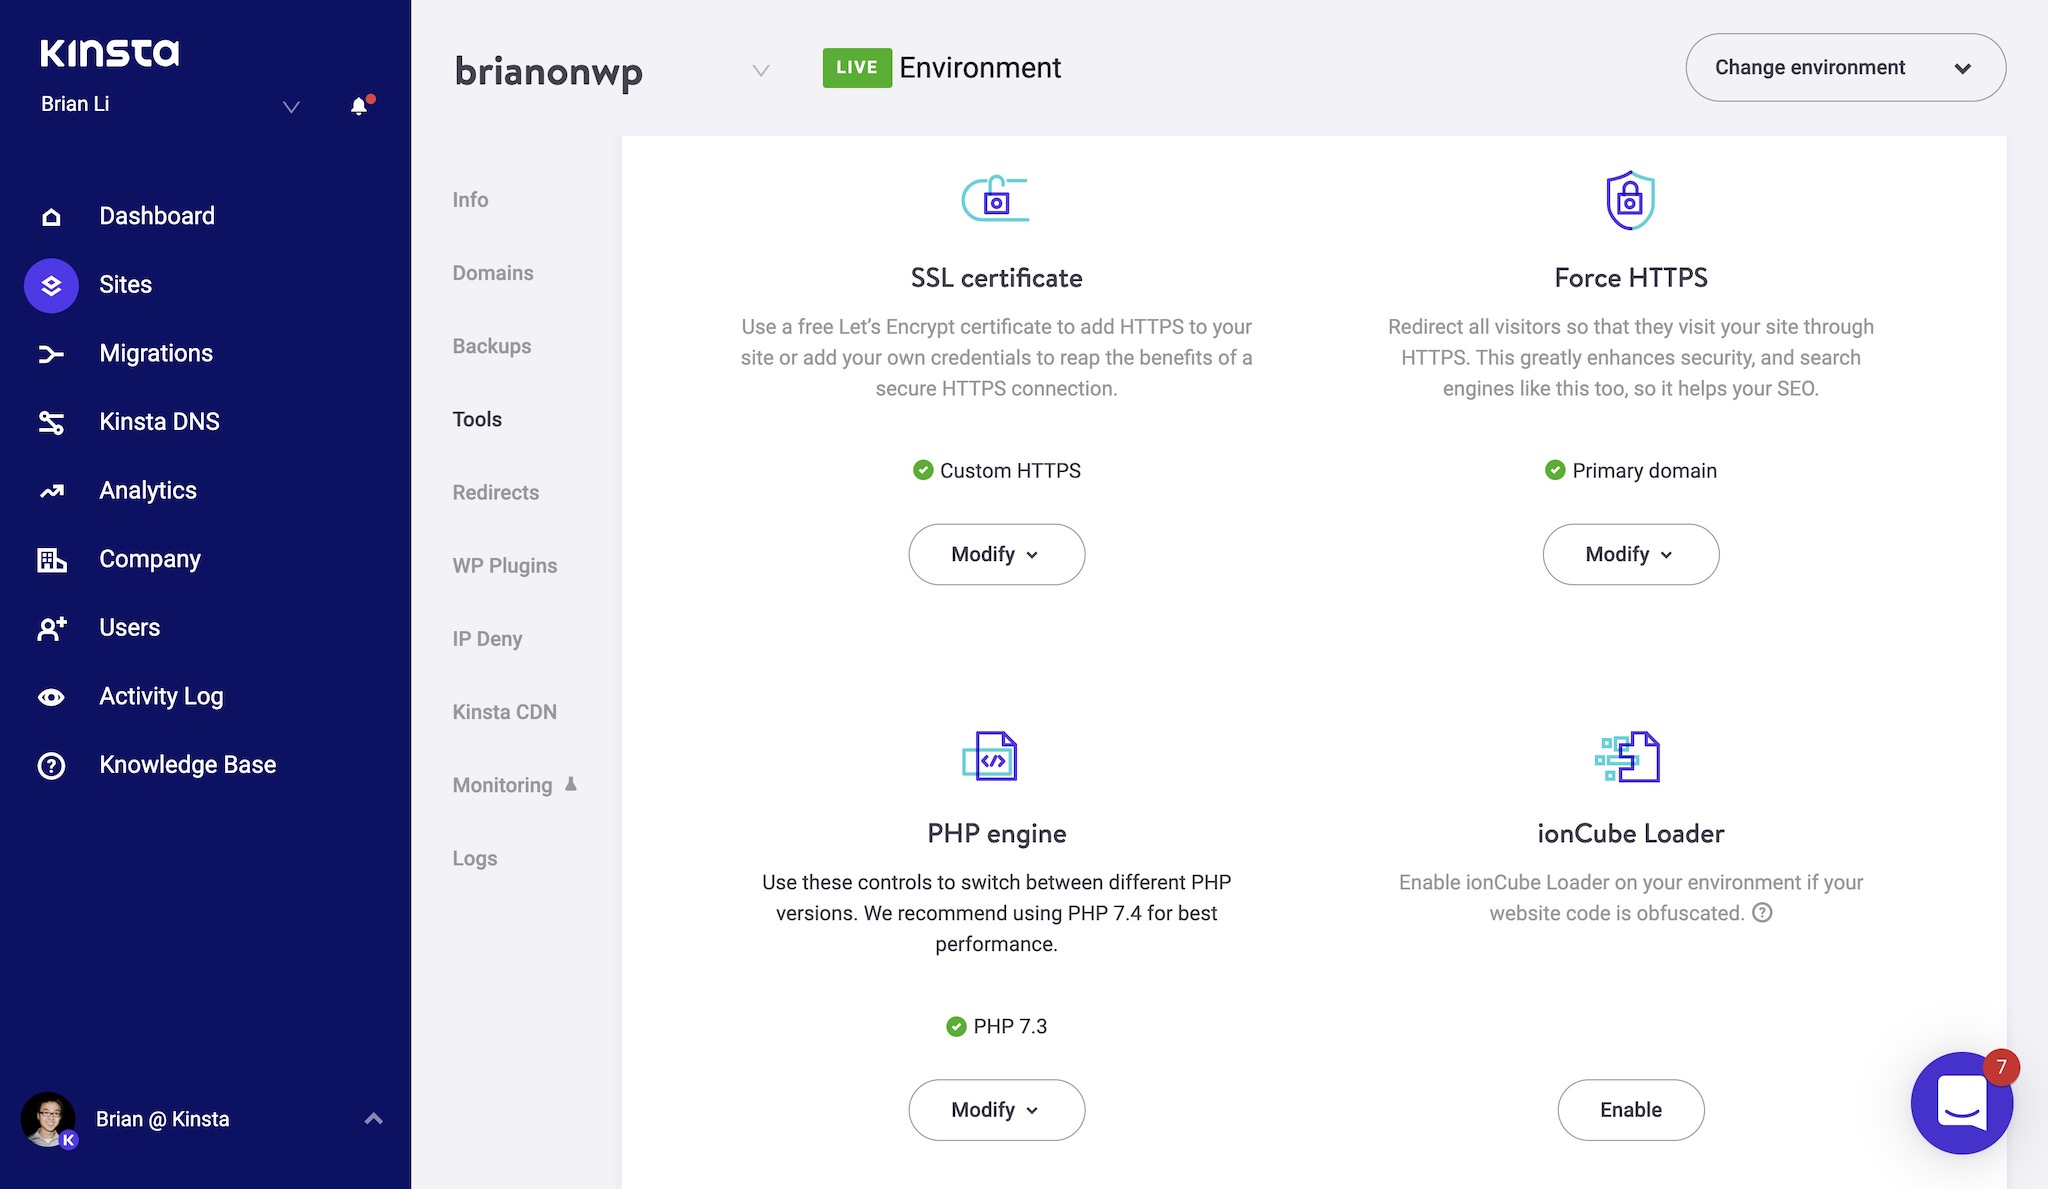
In order for your site to use HTTPS, you'll need to install an SSL certificate on your server. If you're using a managed WordPress host like Kinsta, you should be able to install a free SSL certificate directly from your host's dashboard. If your host doesn't support free SSL certificates, you have two options.
- Move to a host that does. It's not 1999 anymore. Every host should have built-in support for free Let's Encrypt SSL certificates.
- Put Cloudflare in front of your site, and generate an origin certificate from Cloudflare's dashboard to install on your origin server.
301 Redirect HTTP to HTTPS for WordPress
Ensure all HTTP requests are redirected to HTTPS. This can be done with a proxy service like Cloudflare, or on the origin server with an NGINX or Apache rule. Some managed hosts like Kinsta even have a "Force HTTPS" tool built into the dashboard. Whatever you do, don't do the HTTP-to-HTTPS redirection at the application level with a WordPress plugin – it's a waste of PHP resources. Do it at the server level or with a proxy service like Cloudflare instead.
Fix WordPress Mixed Content Warnings
Mixed content errors occur when a page on an HTTPS domain includes HTTP URLs. For example, if the page /about/ requested an image from /image.jpg, a mixed content warning would be reported by the browser. Nowadays, web browsers will even block a page from loading sub-resources over HTTP. This means you should take mixed content reports very seriously because they can directly impact user experience.
For example, if your WordPress site is loading over https://domain.com, and your logo image is set to https://domain.com/logo.png, some browsers will block the HTTP request for the logo image. This means visitors to your site won't be able to see your logo, which in turn reflects poorly on your brand.
Luckily, fixing mixed content errors on a WordPress site is a fairly simple process. WordPress stores data in two places – the database and the filesystem. In most cases, all you have to do is run a search and replace in both locations to replace https://domain.com with https://domain.com.
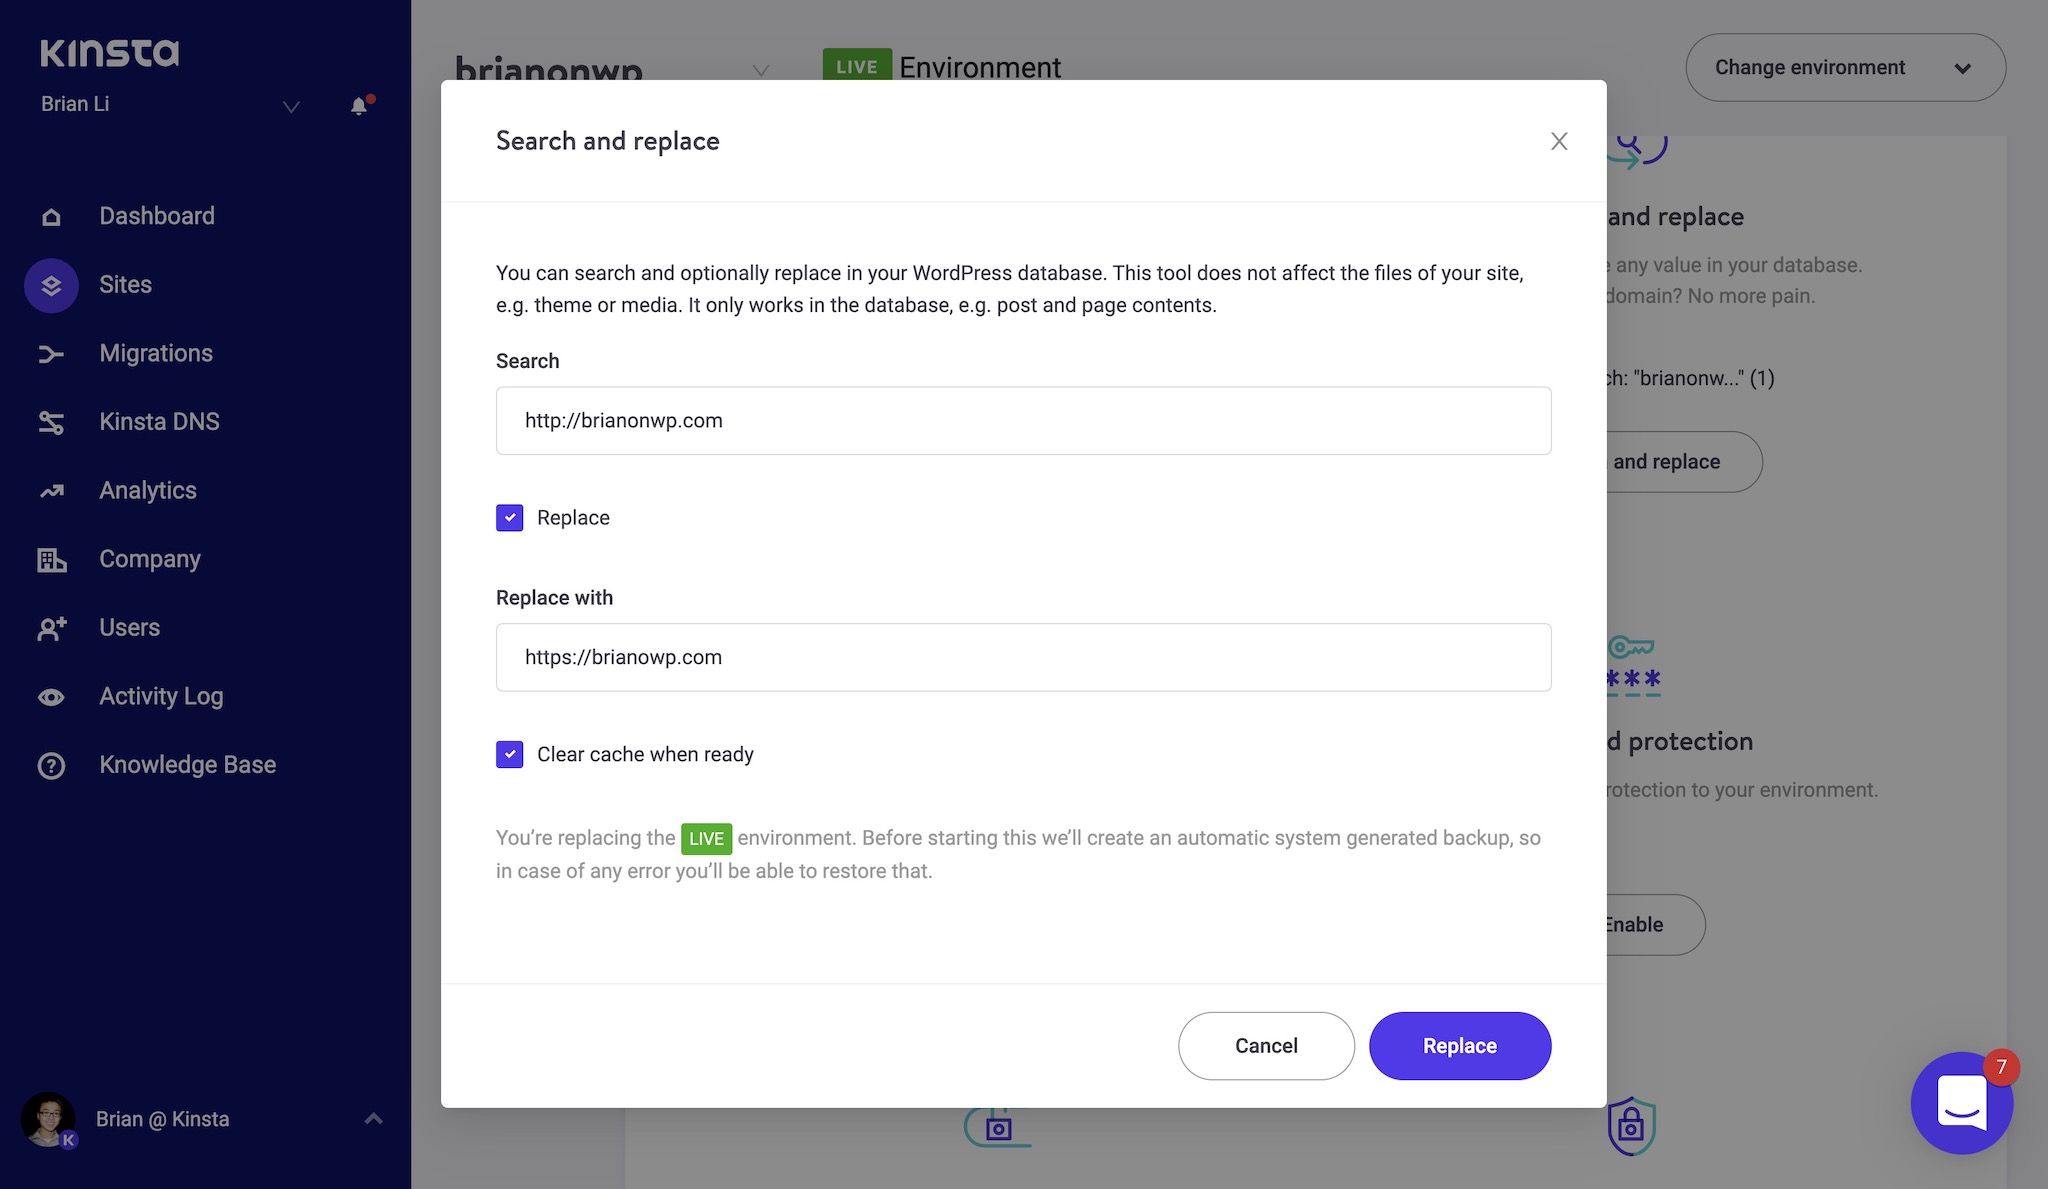
To run a search and replace on your WordPress database, I'd recommend checking with your host to see if they have this functionality built into the dashboard. On Kinsta, you can run a search and replace straight from the dashboard with just a few clicks. If your host does not have a search and replace feature, I'd recommend using either the Interconnect IT PHP script or a WordPress plugin like Delicious Brains' "Better Search and Replace".
How to Optimize for Intrusive Interstitial Guidelines
I don't know about you, but "intrusive interstitial guidelines" sounds like some government protocol for dealing with aliens. Unfortunately, the reality is not that exciting. Optimizing for intrusive interstitial guidelines simply means removing intrusive popups from your WordPress site.
So, what exactly is an intrusive popup?
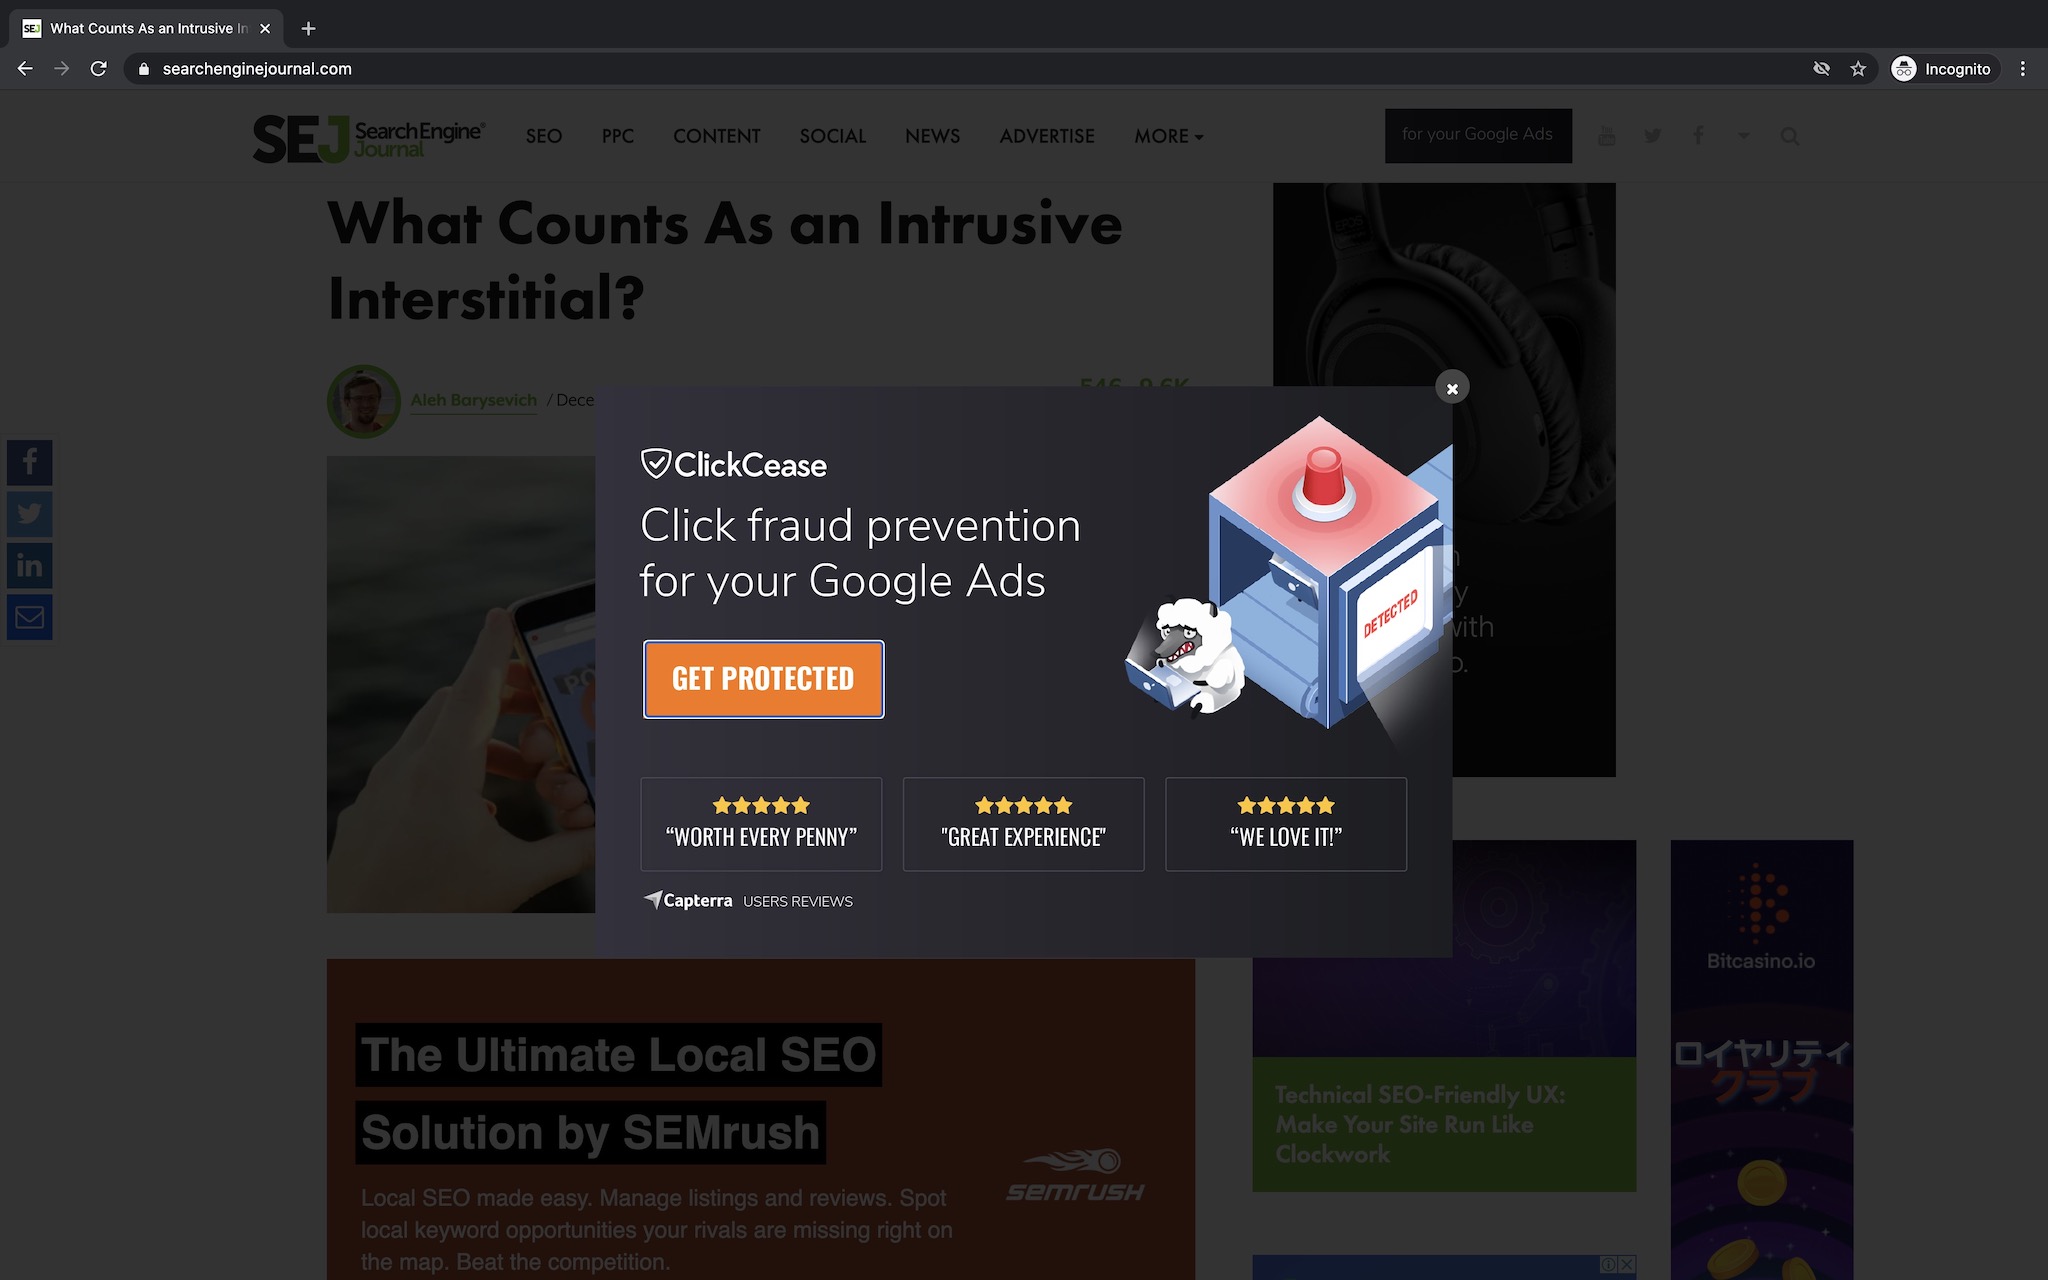
If someone visits your site, and is immediately greeted by a popup that obstructs the entire page, that's one extreme example of an intrusive popup. However, popups don't need to block the entire viewport to be considered intrusive. In fact, Google considers any kind of popup subscription box or ad as an intrusive element that harms user experience.
I completely agree with Google. Popup subscription boxes was a fad in 2010. It was a trend that should've died, but it didn't. Browsing the web today, there are few things more annoying than a popup subscription box or promotional ad, and I'm not the only one who thinks this. In preparation for this blog post, I asked 50 people (a mix of technical and non-technical) what they thought about popups on websites. Over 80% of them said they hated popups, while around 20% said they didn't mind them. Unsurprisingly, no one said they enjoyed popups.
If you're using intrusive popups to spam or catch visitors off guard, I have no respect for you and I think you should work on improving the user experience of your site as soon as possible. Instead of using a popup box for subscriptions, add a "Click to Subscribe" button somewhere on your site instead.
Trust me, if a visitor actually likes the content you're creating, they'll figure out a way to follow you – whether that's bookmarking your site, emailing you, subscribing to your RSS feed, following you on Twitter, or subscribing to your newsletter without being subjected to an annoying popup.
How to Optimize for Core Web Vitals
Over the past few years, the quantification of web performance metrics has migrated from time-based units like "milliseconds" and "seconds" to scores via initiatives like PageSpeed Insights and Web Vitals.
If you go to any online WordPress performance discussion group, you'll probably see people sharing tips and ideas on how to improve PageSpeed and Web Vitals scores for their sites. PageSpeed and Core Web Vitals are both initiatives developed by Google, and the latter is what Google and the web performance community will be zoning in on in 2021.
A frequent misnomer in the WordPress community is that performance scores don't matter, and that as long as your site loads in 2-3 seconds, you won't be penalized by Google. I think this advice is wrong and outdated because Google has confirmed that Web Vitals, which is a suite of performance scores, will be a factor in how it determines page experience signals in 2021. In other words, scores – in addition to page load time – do and will matter!
The idea behind Web Vitals is abstracting web design and hosting best practices into quantifiable scores. Thus, if you follow these best practices, you'll be given a high score. Google can then use this score to infer that your site is of a certain quality threshold in terms of performance, accessibility, and overall user experience. As a result, Google will be more likely to send organic traffic to your site because providing users of its search engine with high quality search results creates a positive feedback loop for Google.
It's really not that hard to figure out what's going on here. Google controls the overwhelming majority of search engine traffic routing. Thus, it has a huge amount of leverage in determining the future of the web. By creating score-based suites like Web Vitals, Google is using its power to increase the baseline quality of websites on the Internet. Without context, this monopolistic-enabled scenario may seem dystopian in nature – it sort of is. However, I think the way that Google is pursuing Web Vitals at this stage in the game is a win-win for all parties involved – users, websites, and Google.
To make things easier for site owners, Google has picked out a subset of Web Vitals metrics and given it the moniker of "Core Web Vitals". Core Web Vitals currently consists of three web performance metrics – Largest Contentful Paint (LCP), First Input Delay (FID), and Cumulative Layout Shift (CLS). Let's discuss how to optimize your WordPress site for these three Core Web Vitals.
Largest Contentful Paint (LCP)
Largest Contentful Paint, or LCP, refers to the render time for the largest image or text block in a given viewport. The viewport-based distinction is important because it means desktop and mobile devices (two classes of devices with contrasting viewports) can have different LCP scores.
Here are a few tips to optimize your WordPress site's LCP score.
Enable HTML Page Caching
In its stock form, WordPress is a dynamic CMS that uses PHP to generate HTML pages on demand. At scale, dynamically generating HTML for each request is inefficient and unnecessary for most sites. As a result, most modern WordPress hosts implement some form of HTML page caching to store and serve already-generated copies of HTML pages. Serving pre-made pages from a cache is much more scalable in terms of requests per second, and it also results in faster page load times because PHP no longer has to spend time on building pages.
In 2020, HTML page caching is a necessary part of every WordPress stack. There are two ways to implement HTML page caching on your site's server.
- Enable HTML page caching on the web server level. For example, if your server uses Nginx, you can use the FastCGI page caching module to serve HTML pages generated by WordPress. If your site is hosted on a managed WordPress host like Kinsta, it's likely that high-performance server-level page caching is already set up for you.
- Enable HTML page caching on the application level. If your host does not support server-level page caching and you don't want to move to a host that does, you can install an optimization plugin that supports page caching like W3 Total Cache or WP Rocket.
In general, it's more performant for page caching to be enabled on the web server level (Nginx, LiteSpeed, etc.) because it doesn't require PHP to do anything. However, if you're stuck with using a page caching plugin, that's still much better than not having any page caching layer at all.
In addition to enabling page caching on the origin server, I'd also recommend using a service like Cloudflare APO to cache HTML in over 200 Cloudflare data centers around the world. With Cloudflare APO, you can improve LCP even further because visitors are served HTML from a close-by data center.
Check out this episode of Brian On WP for a deep dive into the benefits of using Cloudflare APO for WordPress.
Optimize Hero Images
Large and colorful hero images are popular in modern web design. Throughout my career in WordPress, one of the most common performance bottlenecks I've seen is unoptimized hero images. If your WordPress site makes use of large hero images, here are a few things to keep in mind.
- Make sure your hero images are scaled properly. Deciding on a maximum width for your hero image can be tricky, and it's almost always going to be a compromise between file size and visual quality. In general, I think a maximum width of 2,560 pixels is fine for hero images – that's just my opinion, so YMMV. In either case, you'll want to make sure that the
<img>or<picture>tag for your hero image takes advantage ofsrc-setto serve responsive images based on screen size. - Serve your hero images in the correct format. If your hero image is vector-based, you should make sure it uses the SVG format instead of PNG or JPG. If you aren't able to source or create an SVG for your vector-based image, the next best option is PNG. For non-vector images like traditional photos, you should always use JPG instead of PNG.
- Always compress your images (this applies for all images on your site). As I mentioned earlier, WordPress users can use a plugin like ShortPixel or Imagify to compress images. However, my personal recommendation is to put Cloudflare in front of your site and enable the Polish feature, which automatically compresses and serves your images in WEBP format.
Use a Content Delivery Network (CDN)
If you're WordPress is asset-heavy, or even if it isn't, it's best to use a content delivery network, or CDN, to serve CSS, JS, images, fonts, and more. Similar to Cloudflare APO which caches HTML around the world, a CDN caches other static assets. Again, the benefit of this is pretty obvious – visitors are served assets from a data center that's close to them. This means elements like hero images can load faster, which in turn positively impacts a page's LCP score.
If your WordPress site is using Cloudflare APO, then you're already set up on Cloudflare's CDN. If you're not using APO and don't have a CDN integrated, then sign up for Cloudflare's free plan. I can't, in good conscience, recommend any other CDN provider because I really do think Cloudflare has the CDN market locked down – at least when it comes to consumer-oriented options.
Use HTTP Preconnect & HTTP/2 Server Push
HTTP Preconnect and HTTP/2 Server Push are two types of server-level configuration options that can help improve your WordPress site's LCP score. Preconnect and Server Push are essentially instructions that tell your browser to "do something" earlier than when it would normally be done.
Does that sound confusing? Let me explain.
How HTTP/2 Server Push Works
Let's say you have the following HTML document.
<head>
  <meta charset="utf-8">
  <title>HTTP Preload Example</title>
  <link rel="stylesheet" href="style.css">
</head>

<header>
  <img src="/images/hero.jpg">
</header>

<body>
  <h1>Some header here...</h1>
  <p>Some text here...</p>
</body>
In the <header> section of the HTML document, there is an <img> tag that loads an image at /images/hero.jpg. In this example, hero.jpg loads "above the fold", so its loading speed has a direct impact on LCP. By default, the browser won't make a request to /images/hero.jpg until it parses the line containing <img src="/images/hero.jpg">.
To maximize efficiency, we can use HTTP/2 Server Push to "push" hero.jpg to the visitor as soon as the server responds with an HTTP response. In other words, with HTTP/2 Server Push, the hero.jpg image will be pushed along with the HTML document, instead of after it. To configure HTTP/2 Server Push, you'll need to add a special header to your HTTP responses.
Below is an example showing how to push /images/hero.jpg.
link: </images/hero.jpg>; rel=preload; as=imageWith this HTTP header in place, the browser will start downloading hero.jpg as soon as it receives an HTTP response from the server.
When using HTTP/2 Server Push, it's important to keep in mind that pushing every single asset required for a page will typically lead to performance degradation instead of performance gains. This is because, relatively speaking, "pushing everything" is pretty much equivalent to "pushing nothing". I recommend only configuring HTTP/2 Server Push for critical assets.
How HTTP Preconnect Works
HTTP Preconnect is similar to HTTP/2 Server Push in that it helps reduce page load time by establishing early connections. Unlike HTTP/2 Server Push, however, HTTP Preconnect doesn't push assets to the client.
Instead, it works by establishing early connections to third-party domains that are present in the HTML document. For example, if your page includes an embed player from Spotify, you can configure HTTP Preconnect for the domain https://open.spotify.com (or whatever the domain of the player is).
By preconnecting to https://open.spotify.com early on in the HTTP request, you can bypass DNS resolution, SSL handshakes, and other connection negotiation steps later on. While HTTP Preconnect doesn't sound like a big deal, it can actually have a huge positive impact on page load time, especially if your site loads assets from a lot of third-party domains.
On BrianLi.com, I have HTTP Preconnect configured for a few third-party domains. Since all my images load from https://cdn.brianli.com, I use an HTTP Preconnect header to establish a connection to my CDN domain early on in the HTTP request. Similarly, I also have an HTTP Preconnect header for establishing early connections to https://share.transistor.fm because I occasionally embed podcast episodes hosted on Transistor.
To configure HTTP Preconnect for a third-party domain, add an HTTP header like the one below to your HTTP response.
link: <https://external-domain1.com>; rel=preconnectYou can also specify domains to preconnect to by adding a link tag in the <head> of your HTML document. However, I prefer to use the HTTP header method because it allows for preconnecting before the HTML is parsed.
<head>
	<link rel="preconnect" href="https://external-domain.com">
</head>
First Input Delay (FID)
First Input Delay, or FID, measures the responsiveness of a web page. Specifically, it refers to the amount of time that passes between a user's first interaction and when the browser is able to respond to said interaction. First Input Delay is important to optimize for because it essentially represents a visitor's first impression of your site. Similar to interviewing for a job or going on a first date, first impressions are very important here as well.
The most common cause for a poor First Input Delay score is heavy JavaScript execution. For example, if your site calls a large JavaScript file, visitors to your site may experience some initial delay before they can interact with your site. If your WordPress site has a low First Input Delay score, I'd recommend working with a qualified web developer to dissect your site's JavaScript usage to distinguish between critical and non-critical code.
By identifying the priority of your various JavaScript files, a web developer will be able to help you defer unimportant JavaScript to improve your First Input Delay score. Similarly, it's also possible to load JavaScript asynchronously (at the same time), and a developer will be able to set that up for you as well. If you're unable to work with a developer, I'd recommend trying out Cloudflare's Rocket Loader feature, which helps you defer JavaScript and speed up rendering.
Cumulative Layout Shift (CLS)
The final metric in Core Web Vitals is Cumulative Layout Shift, or CLS. Cumulative Layout Shift quantifies the visual stability of a page. Specifically, it refers to elements on a page moving around while a web page is being rendered. CLS is typically caused by slow-to-load images, video embeds, and ad widgets that push surrounding text downward or upward after they have loaded.
If your WordPress site is suffering from a poor Cumulative Layout Shift score, here are a few tips to consider. Keep in mind that some of these items may require assistance from a web developer to implement correctly.
- Always specify dimensions (width and height attributes) for images, embeds, ad widgets, and other media. When physical dimensions are specified in the HTML, the web browser will reserve the necessary space within the page's layout to prevent layout shifts.
- In some cases, web fonts can cause layout shifts if they're not loaded correctly. To prevent this from happening, I recommend using a system font stack because system fonts in 2020 look super nice. If you're absolutely married to a non-system font, try using HTTP Preload or HTTP/2 Server Push to request the font as soon as possible.
- If you use embeds from third-party domains like
youtube.comorspotify.com, use HTTP Preconnect to establish early connections to said domains. Every millisecond counts when optimizing your site for CLS!
Summary
Despite what people may tell you, maintaining good Core Web Vitals scores will be very important in 2021. In the past, there was a case to be made about the importance of PageSpeed scores because there was never any official confirmation from Google. However, things are different this time around – Google has confirmed that it will take "page experience signals" into account when ranking search results. Since Core Web Vitals is a part of Google's page experience signals, now is the time to start optimizing your WordPress site!
If you have any questions about optimizing your site for Core Web Vitals, send me an email or reach out to me on Twitter. Be sure to check out my WordPress optimization and maintenance packages as well if you need help with improving your Core Web Vitals scores before May 2021!