In this tutorial, you’ll learn how to use the Auto Sampler plugin in MainStage 3 to sample hardware synths (check out this post instead if you want to learn how to sample virtual instruments). Before we start, make sure you’re on the latest software version, as Auto Sampler is only available in and MainStage 3.1+.
Configuring MainStage
Before the sampling process can begin, MainStage has to be properly configured.
- Select the correct audio interface in MainStage Preferences.
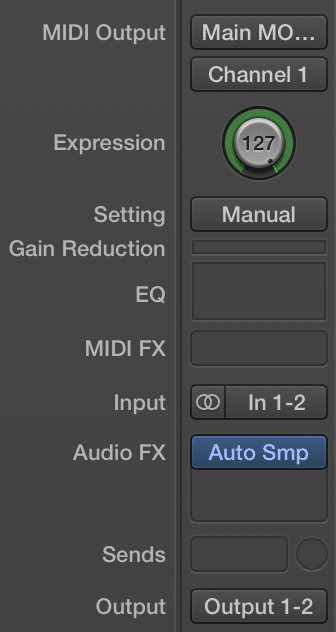
- Create an external instrument channel strip.
- Set the MIDI Output as needed.
- Change the Channel if needed.
- Set the audio input to whatever input you’re using. Remember to change it to stereo if you want to sample your synth in stereo.
- Bring up the Auto Sampler Audio FX plugin. By default, the plugin is located in Audio FX/MainStage/Utility.
My MIDI output is set to Main MOTIF XF8, the FireWire MIDI interface on my synth. My audio inputs set as Input 1 – 2, the stereo input on my RME Babyface.
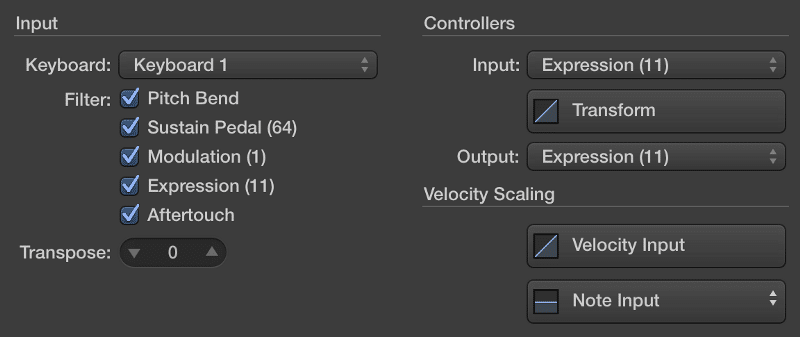
If you’re using Auto Sampler in MainStage, I recommend filtering out all the controllers under MIDI Input. This will ensure the sampling process won’t be affected by accidental controller movement.
Configuring Your Hardware Synth
Now that MainStage is all set up for sampling, make sure your hardware synth is configured correctly. Here’s a list of a few important things to check.
- MIDI Input and Channel are configured correctly. More often than not, the input channel will be set to Channel 1. On higher end workstations like the MOTIF XF8, MIDI data can be sent via MIDI, USB, or FireWire, so it’s important to make sure you’re using the same input you set in MainStage settings.
- Master/global effects are turned off. You don’t want to sample with reverb turned on.
Sampling Your Synth

Open up the Auto Sampler plugin, and press any key on the onscreen keyboard. If you don’t hear sound coming from your synth, make sure all your connections and settings are correct. Now is also a good time to set your gain structure for a good signal to noise ratio.
The onscreen keyboard triggers a velocity of 127, so that’s the loudest a sample will ever get. I recommend maxing out somewhere between -6 dB and -3 dB to ensure proper headroom.
If you’re using an analog connection between synth and audio interface, set gain on your interface. If you’re using a digital connection like S/PDIF or FireWire, use the onscreen input gain to amplify the signal if necessary.
Auto Sampler has many settings to customize the sampling process.
- Range Start is the lowest note that will be sampled.
- Range End is the highest note that will be sampled.
- Sample Every is the sampling interval. Every note between sampled notes will be stretch tuned.
- Sustain is the amount of time before note release.
- Velocity Layers is the number of layers that will be sampled.
- Velocity Response is the curve that will determine the velocity layers.
- Auto Loop is the looping algorithm that will be used.
- Auto Loop Start is the point in the sample where looping starts.
- Auto Loop End is the point in the sample where looping ends.
- One Shot should be turned on when sampling drums, one-shot sound effects, etc.
There is no way to create a custom velocity curve in the Auto Sampler plugin. While this is definitely a flaw in the new plugin, it’s something we’ll have to live with for now. Instead, there are seven preset curves to choose from. Unfortunately, there is no way to tell exactly what velocities these curves cover. With that said, I assume Apple is using the same curves as the original AutoSampler. Here’s a chart with specific velocities for all curve variations.There’s a lot of room for experimentation here, but here are some general guidelines I follow when sampling…
- A minor third sampling interval is good enough for most things. There’s no need to sample every single note.
- For sustained instruments like strings, brass, and synth pads, I typically use Penrose Machine looping. This algorithm was developed by Redmatica, the creator of the original Auto Sampler software, and it’s great at determining where the best loop point is. It doesn’t always work for super complex sounds, but it’s definitely the best algorithm for more standard sounds.
- A sustain length between 4 and 6 seconds is usually fine for pads and other sustained sounds. If you’re sampling something like a piano sound, a longer sustain length is needed to capture the decay and tail.
- Experiment with different looping methods. What works for one sound might not work for everything.
- Setting the loop start and end to 20% and 80%, respectively, usually gives good results.
- Set the note range to the range of an 88-key keyboard. There’s no need to sample past A-1 and C7.
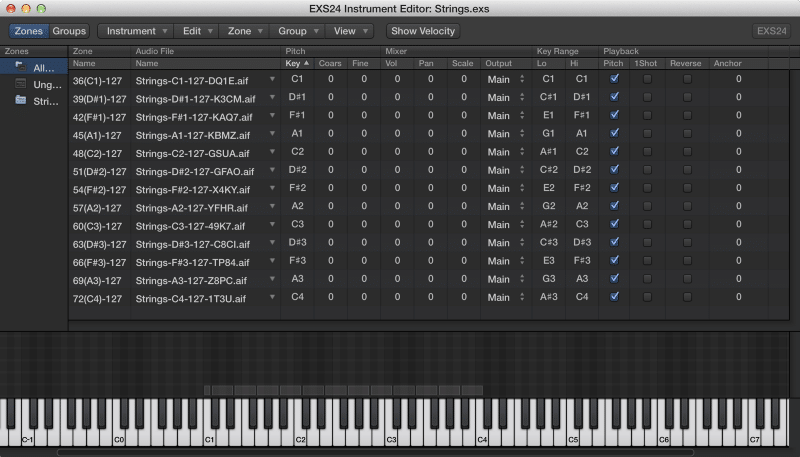
When you’re finished configuring your settings, click Sample and select a directory to store the EXS file. During the sampling process, it’s best to not do anything resource-intensive on your computer. When sampling is done, you will have an EXS instrument file and its corresponding samples.
Instrument files can be found in ~/Music/Audio Music Apps/Samples/Auto Sampled
Samples can be found in ~/Music/Audio Music Apps/Sampler Instruments/Auto Sampled
- Refresh EXS24’s menu, and there will be a new Auto Sampled folder with your new instruments.
That’s how you sample a synth with the new Auto Sampler plugin in MainStage 3! Be sure to leave a comment below if you have any questions or concerns.