When you’re finished programming a MainStage concert, it’s important to consolidate all the important data into one package. In this chapter, you’ll learn how to properly save and transfer a MainStage concert.
How to Save Properly
When you save a new MainStage concert for the first time, you’ll be presented with the following dialog box.
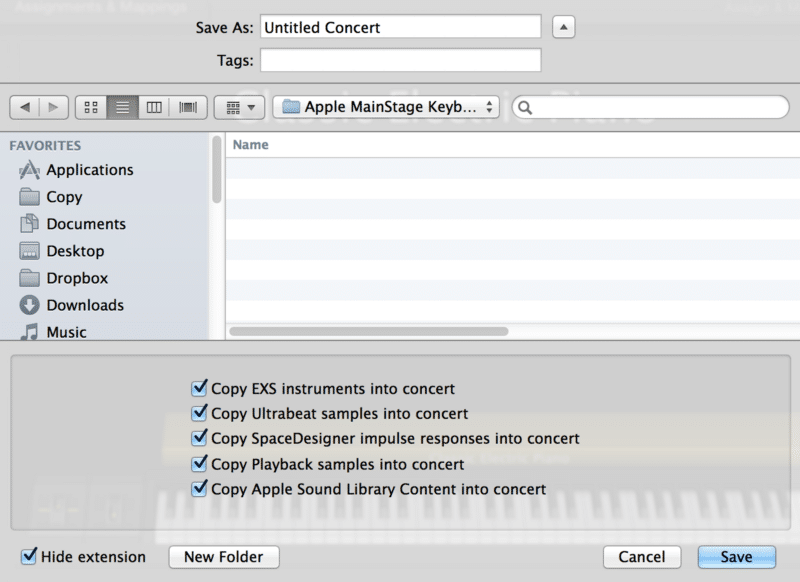
By default, all the options starting with “Copy EXS instruments into concert” are unchecked. You’ll want to check these options, and here’s why. When you load up an EXS24 instrument, the sampler searches your computer for the necessary samples. If you move the concert to another computer that doesn’t contain all the necessary samples, you’ll encounter missing sample errors.
The same concept applies to Ultrabeat samples, Space Designer impulse responses, Playback samples, and the Apple Sound Library Content. Copying all the necessary data required by the MainStage concert results will minimize the chance of encountering missing samples. Lastly, there are a few things to keep in mind when copying sample content.
- File size will increase as you use more instruments, and multi-gigabyte concerts are not uncommon.
- Only EXS24 instruments and samples will be copied. Content used in third-party sample plugins and sample libraries (Kontakt, MachFive, Ivory, etc.) will not be copied to the concert file for obvious reasons.
Consolidating & Cleaning Up a Concert
If you find yourself working on the same concert on multiple computers, you’ll want to get familiar with MainStage’s consolidation feature. Consolidation is similar to “Save As,” except for one defining difference — it skips over data that is already saved in the concert.
Imagine this scenario… You’re working on a concert on Computer A. After saving the concert, you decide to move the concert to Computer B. You work for a while on Computer B and decide to save the file. Instead of doing another “Save As” to re-copy all the important data, simply do a quick consolidation followed by a simple Cmd+S save. The consolidation feature can be found under File/Concert/Consolidate.
MainStage also offers a handy clean up feature, which scans a concert and deletes any unused instruments and samples. Before finalizing a concert file, you should perform the clean up function to get rid of any unnecessary data. The clean up feature can be found under File/Concert/Clean Up.
Transferring a Concert
A little known fact about MainStage concert files is that they are actually folders in disguise. A typical MainStage concert can contain hundreds if not thousands of files. Transferring such a large number of separate files is not a good idea for two big reasons.
- Moving or uploading many files is much slower than moving one file.
- Indexing and uploading many files at once can lead to corruption.
The best thing to do before uploading a MainStage concert is to compress it into one ZIP file. You can easily do this in OS X by right clicking on the concert file and selecting Compress “filename”.
Before uploading the file, decompress it to make sure nothing got corrupted during the compression process. This is a win-win situation. You don’t have to risk uploading tons of files at once, and the resulting ZIP file is also smaller in size.
Exporting & Importing Patches & Sets
If you want to update an existing concert without transferring the whole file, you can easily do so by exporting a specific patch or set. Before we go on, here are a few things to consider…
- Exporting an aliased patch or set will only work if the referenced channel strip(s) is present in the new file. This is why it’s a good idea to create a dedicated Sounds folder. If the referenced channel strip is not present, the imported channel strips will automatically be un-aliased.
- If you’re exporting channel strips containing an EXS24 instrument, the sampler instrument and corresponding samples must be present in the new file.
A patch or set can be exported by highlighting it in Edit Mode’s Set List, and pressing Cmd+E. Similarly, a patch or set can be imported by highlighting the Set List and pressing Cmd+I.