MainStage is one of the most powerful applications available for live musicians. It allows you to turn ideas into sounds, which you can then organize into patches and sets. With so many features and tools at your disposal, it’s easy to go overboard with resource usage in MainStage. In this post, you’ll learn about six ways to reduce your CPU usage in MainStage, so you can spend more time performing and less time worrying.
1. Use Auxiliary Buses for Global Effects
Configuring auxiliary buses for global effects can reduce your MainStage concert’s CPU usage dramatically. A global effect is a catch-all term for any effect that you consistently use across your concert, and isn’t tailored towards a single sound. Reverbs and delays are two examples of global effects. It’s better to use a single reverb instance for your entire concert rather than a unique instance for each instrument or channel strip.
To set up an auxiliary bus, create an auxiliary channel strip, add an effects plugin, and set the channel strip input to an unused bus. Next, create a send to the same bus on any channel strip you want to send to the effect.
In the screenshot below, you can see an auxiliary channel strip with the AU Matrix Reverb plugin. The input of the auxiliary channel strip is set to “Aux 1”. On the electric piano’s channel strip, there is a send routing audio to the Aux 1 channel strip with the reverb plugin.

Use auxiliary buses in MainStage to create global effects.
When setting up an auxiliary bus for a global effect, be sure the effects plugin is set to 100% wet. Otherwise, you may find it difficult to get a wet signal due to low signal to noise ratio in terms of gain staging. In the screenshot of the AU Matrix Reverb plugin below, you can see the “Dry/Wet Mix” slider is set to 100%.
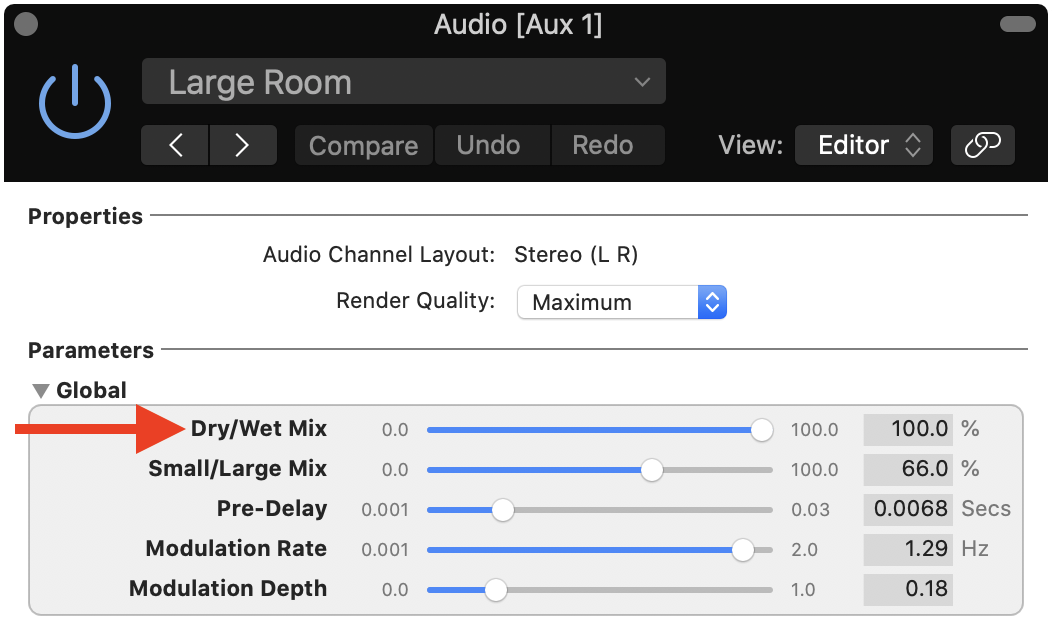
MainStage's AUMatrixReverb is an efficient reverb plugin.
2. Choose a Suitable I/O Buffer Size
Another way to reduce CPU usage in MainStage is to use a low I/O buffer size. This setting can be found in Preferences > Audio > Advanced Settings > I/O Buffer Size. Simply put, the buffer size refers to the number of audio samples that can accumulate in memory before being processed by CPU.

The I/O buffer size setting in MainStage.
In conjunction with your concert’s sample rate, the buffer size determine how often your CPU has to work. Increasing the buffer size puts less strain on the CPU, but increases latency. Conversely, decreasing the buffer size makes your CPU more prone to spiking uncontrollably.
Finding the correct buffer size that suits your concert, hardware, and latency sensitivity requires testing, so I recommend cycling through 128, 256, and 512 samples to see which one works best for you.
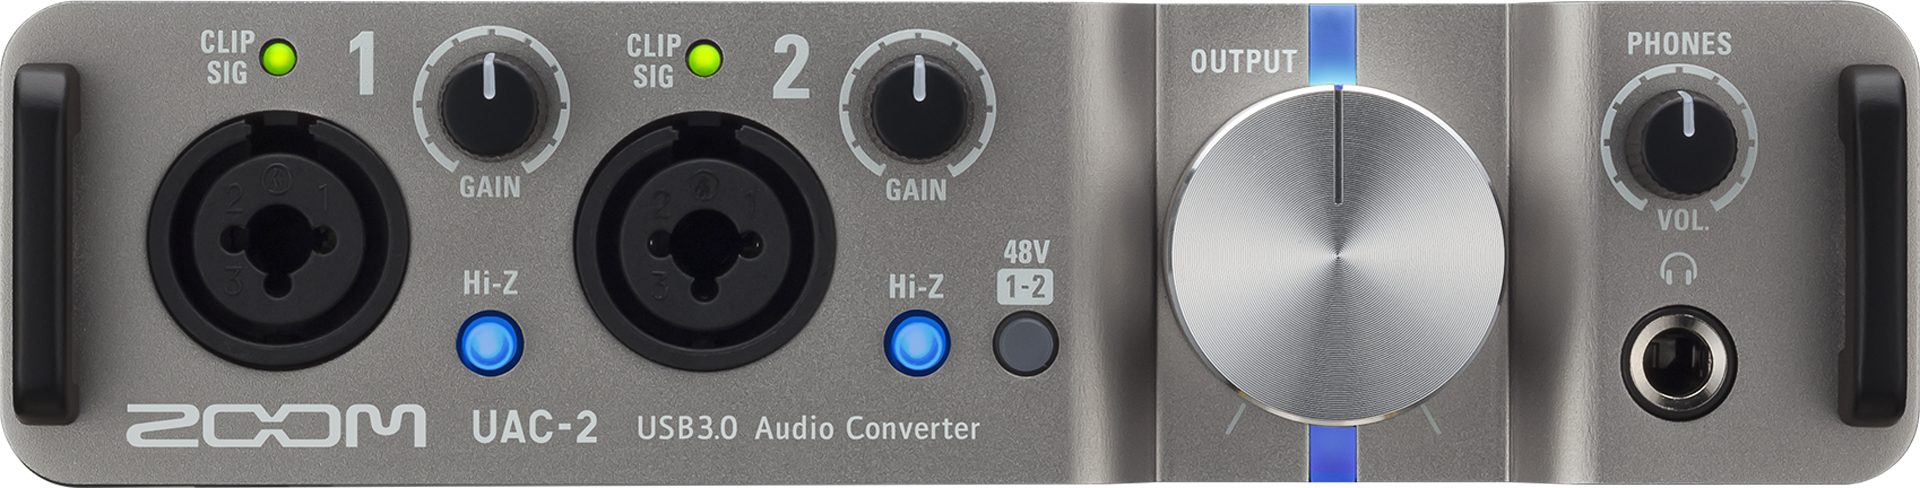
The <a href="/mainstage-audio-interface/">Zoom UAC-2</a> is an affordable low-latency audio interface for MainStage.
Lastly, keep in mind that the quality of your audio interface has a huge impact on latency. For example, a buffer size of 128 samples with a bad interface can have higher latency than a high quality interface with a buffer size of 512 samples. Luckily, low-latency audio interfaces for MainStage aren’t too expensive. If you want to learn more about the best audio interfaces for performing live with MainStage, check out this post.
3. Use Lightweight and Efficient Plugins
When it comes to performing live with MainStage, “doing more with less” is the name of the game. Practically speaking, the best way to do more with less is to use efficient and lightweight plugins instead of immediately jumping to heavier plugins. Here are a few examples of how you can accomplish this.
Use MainStage’s Included Sounds
MainStage ships with a huge library of sounds, and many of the included virtual instruments sound really good – especially in a live environment where it’s difficult to hear details. For example, instead of reaching for a Rhodes sound from Keyscape, you can pull up MainStage’s “Vintage Electric Piano” plugin with a few additional effects plugins instead. Next time you’re designing patches in MainStage, be sure to check out the built-in sounds before reaching out for Kontakt, Omnisphere, and other relatively heavier virtual instruments.
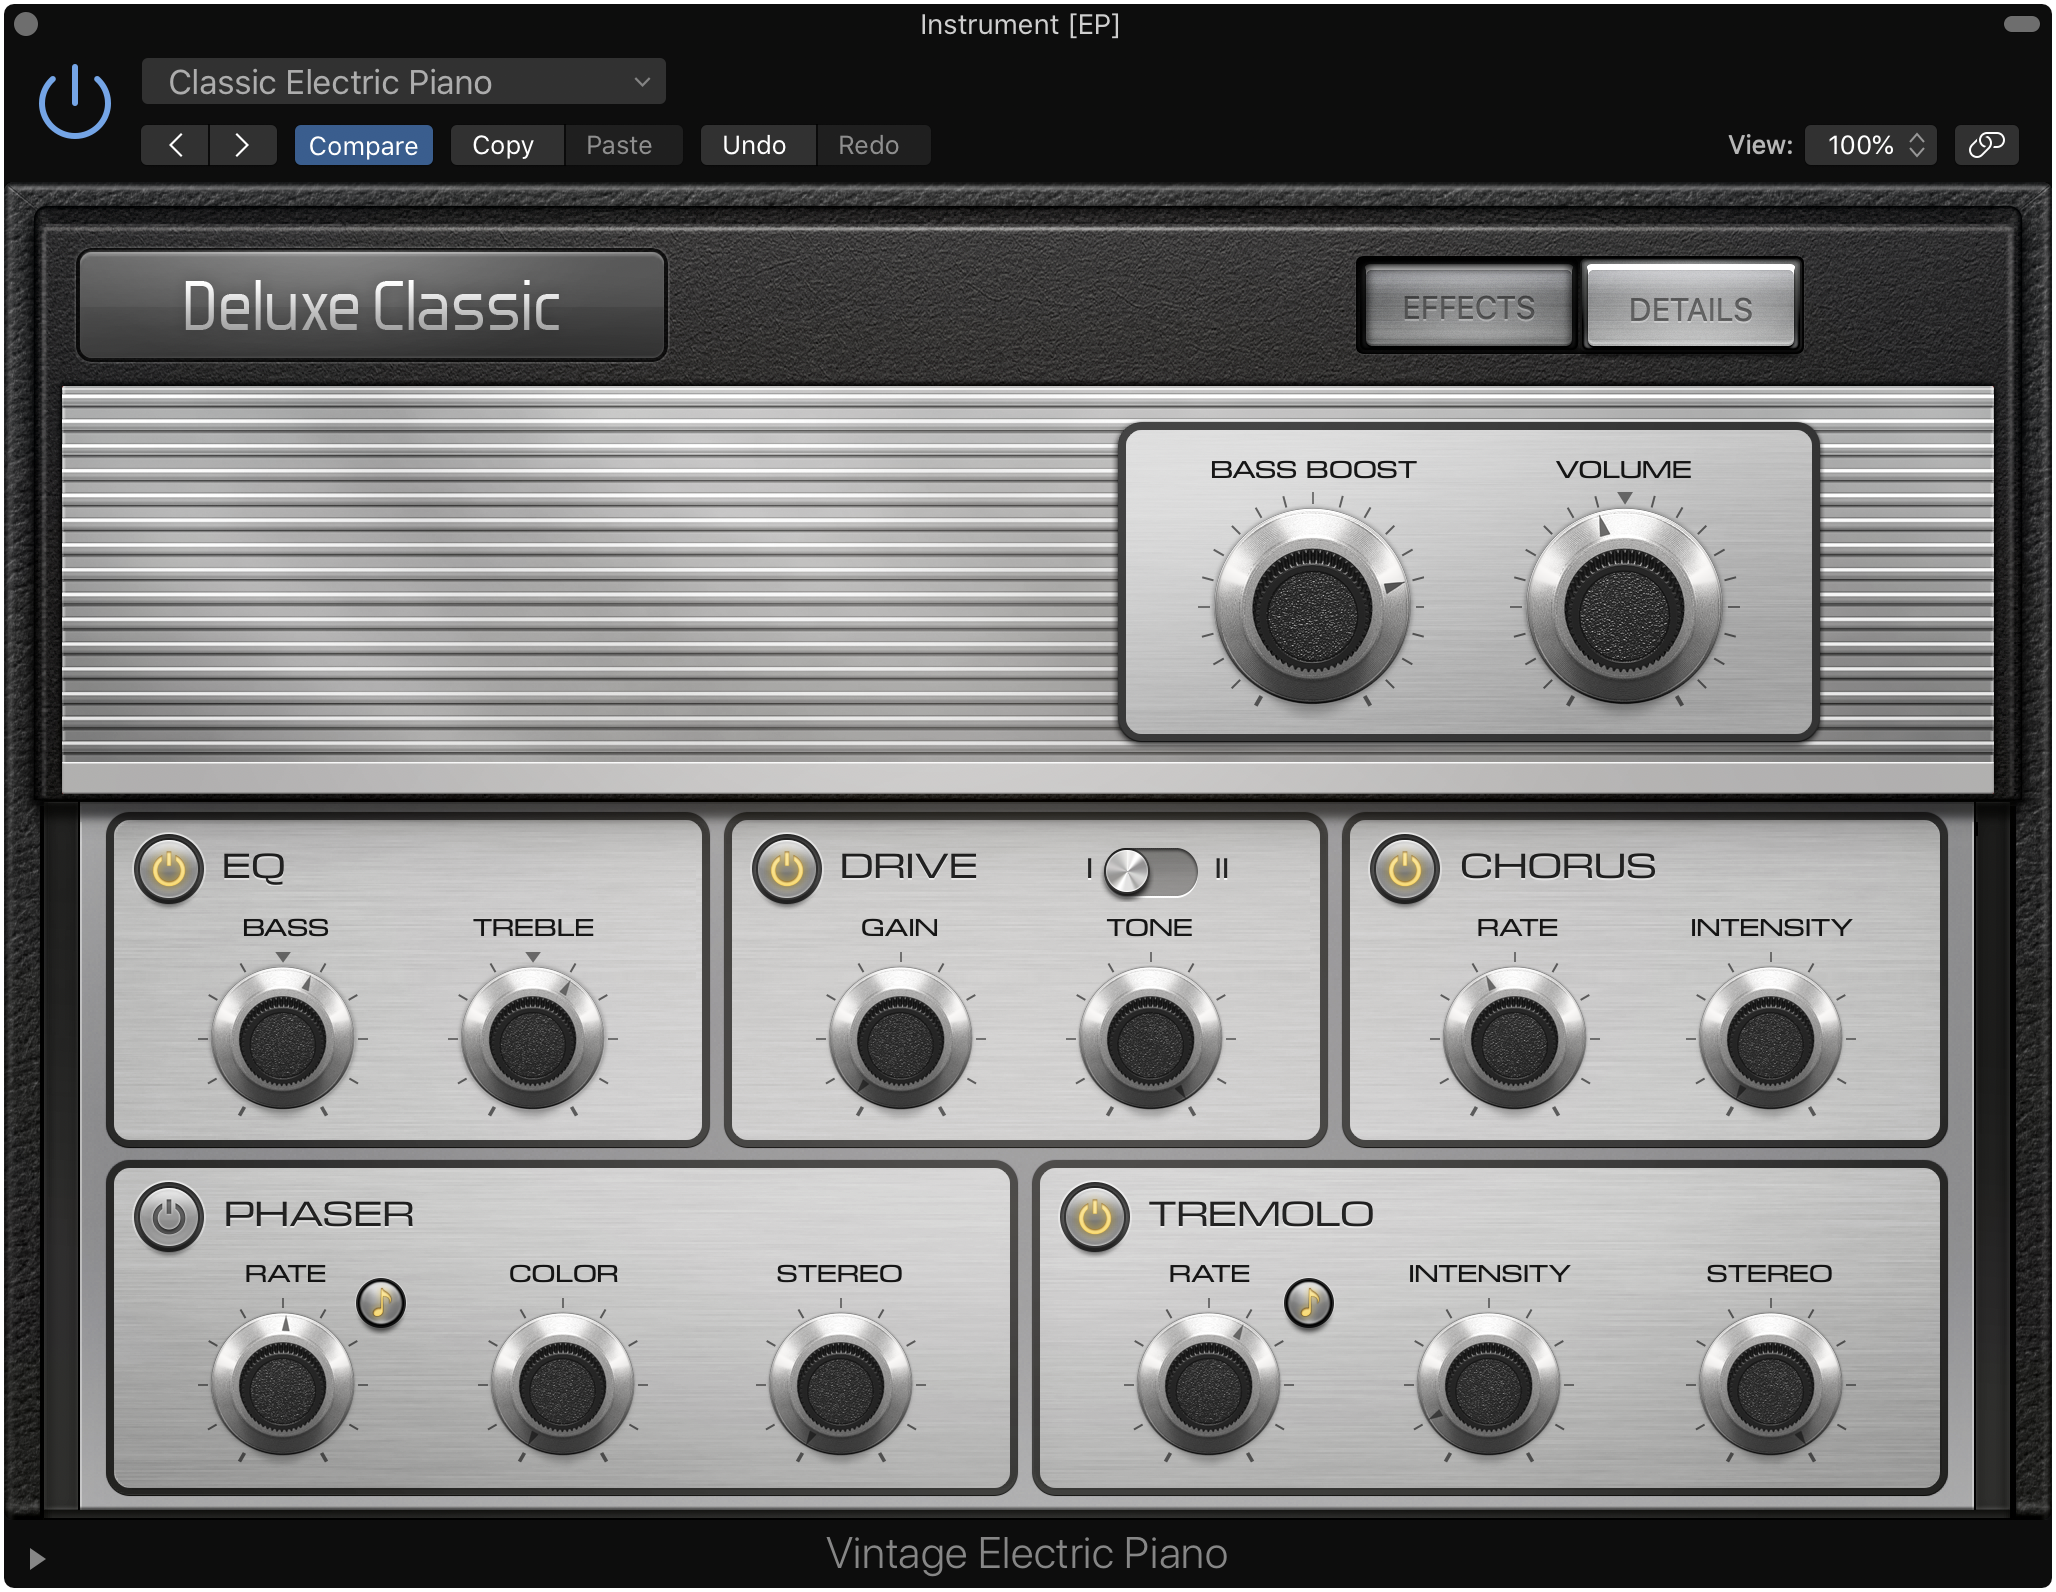
MainStage ships with decent VST plugins like "Vintage Electric Piano".
Know Which Effects Plugins to Use
In addition to a large library of sounds, MainStage also ships with a number of high quality EQs, compressors, reverbs, and other effects plugins. In terms of CPU usage, some plugins are noticeably heavier than others, so it’s important to know which are the best plugins for live performance.
- Instead of using the popular “Space Designer” reverb, opt for “AU Matrix Reverb” with render quality set to “high” instead. It’s much lighter on the CPU, and sounds good enough for live performances. You can find AU Matrix Reverb in Audio Units > Apple > AUMatrixReverb.
- Don’t use MainStage’s “Vintage EQ” series plugin. It sounds good, but it’s heavy on CPU usage and also adds noticeable latency. Instead, use the “Channel EQ” plugin, which only adds 0.3 ms of latency.
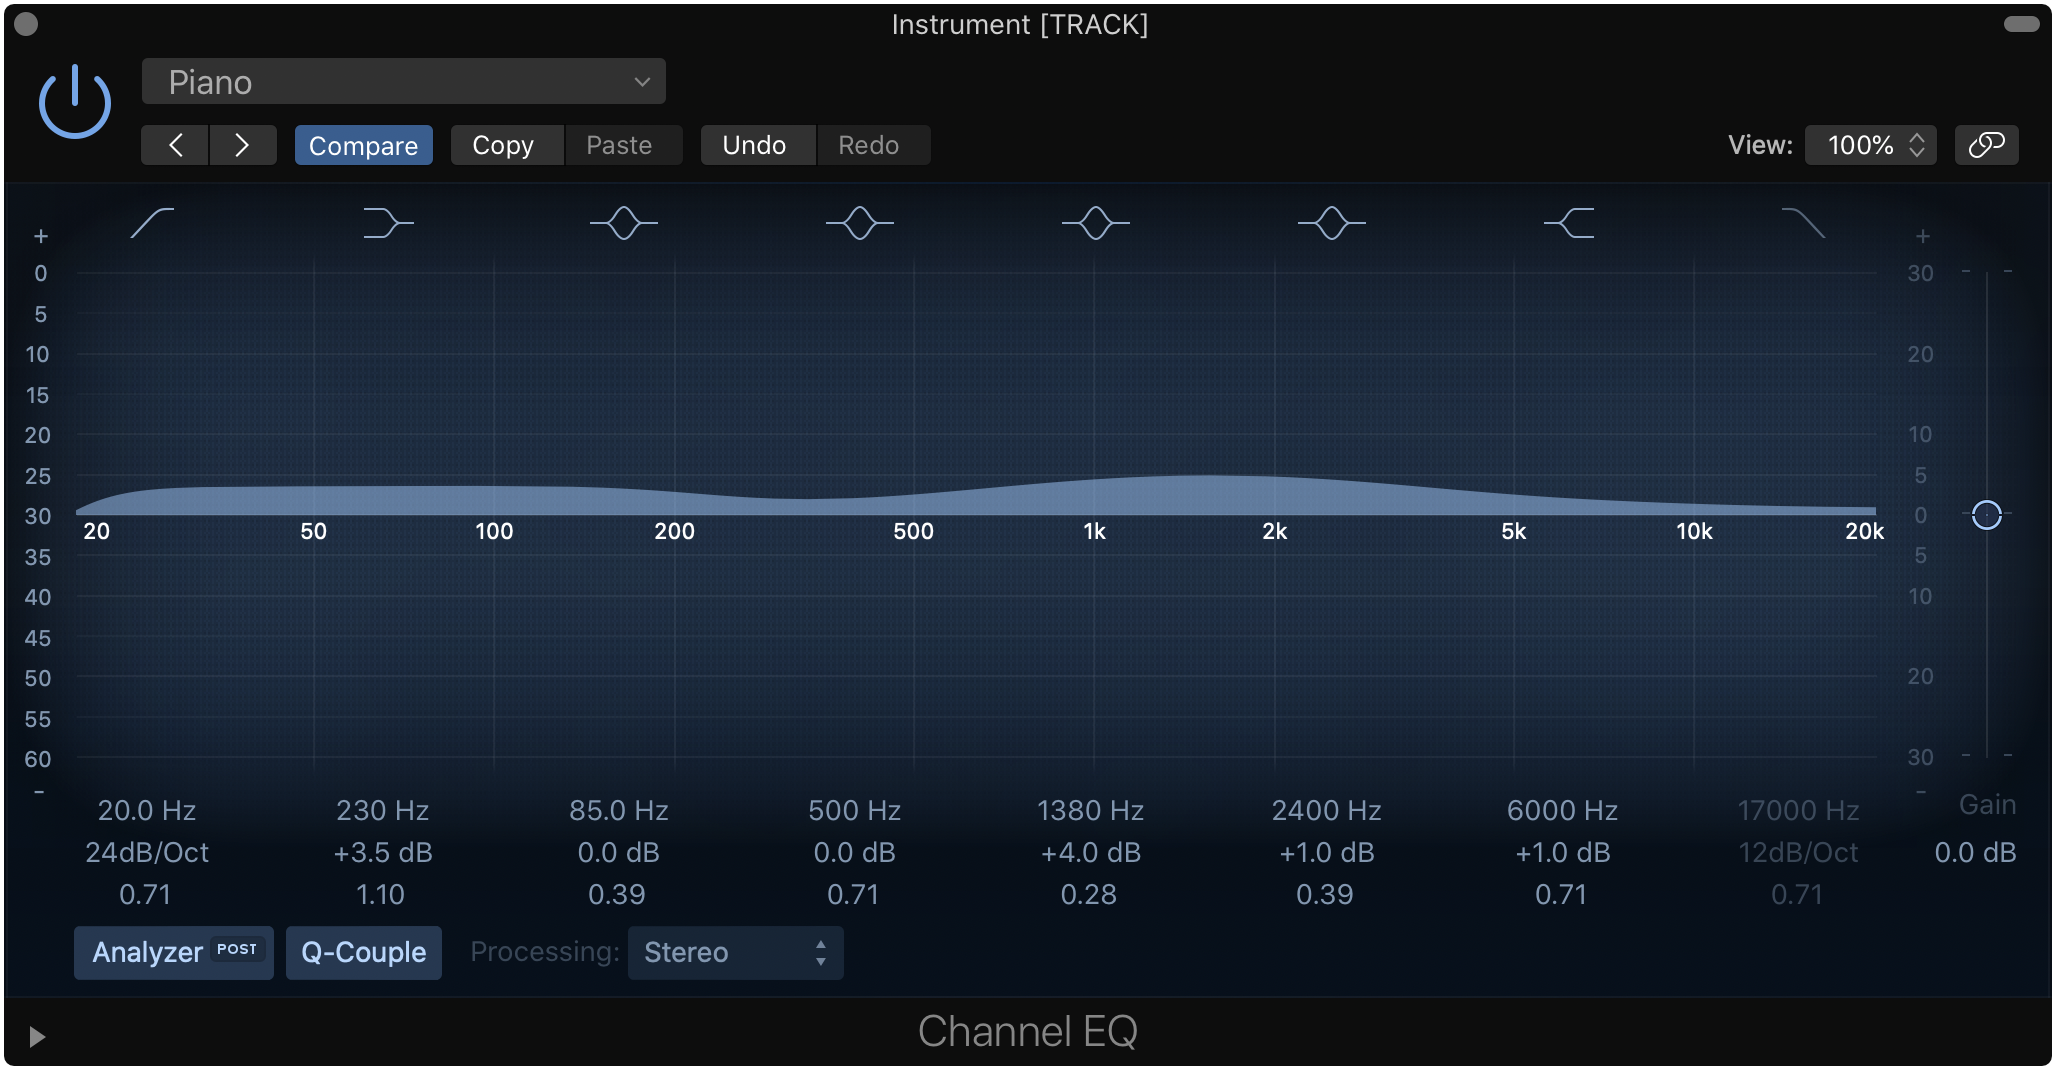
MainStage's "Channel EQ" is a solid low-latency EQ plugin.
If possible, always use MainStage’s built-in plugins unless you have DSP hardware like Universal Audio’s satellite units, which offload effects processing to a dedicated hardware box. If you need some compression, give the built-in “Compressor” plugin first before reaching for a third-party plugin.
4. Use Aliases Instead of New Plugin Instances
In MainStage, you can alias “parent” channel strips to multiple “child” channel strips. An alias inherits most of the parent’s settings, but they can have unique volume, pan, and a few other parameters. For example, if you’re using Keyscape for your piano sound, there’s no reason to create a new instance for every patch in your concert. Instead, it’s better to set up aliases from a single parent instance.
To create an alias of a parent channel strip, simply copy the parent channel strip and use Cmd+Option+V instead of Cmd+V to paste the channel strip. Aliased channel strips display a green arrow above the expression dial.
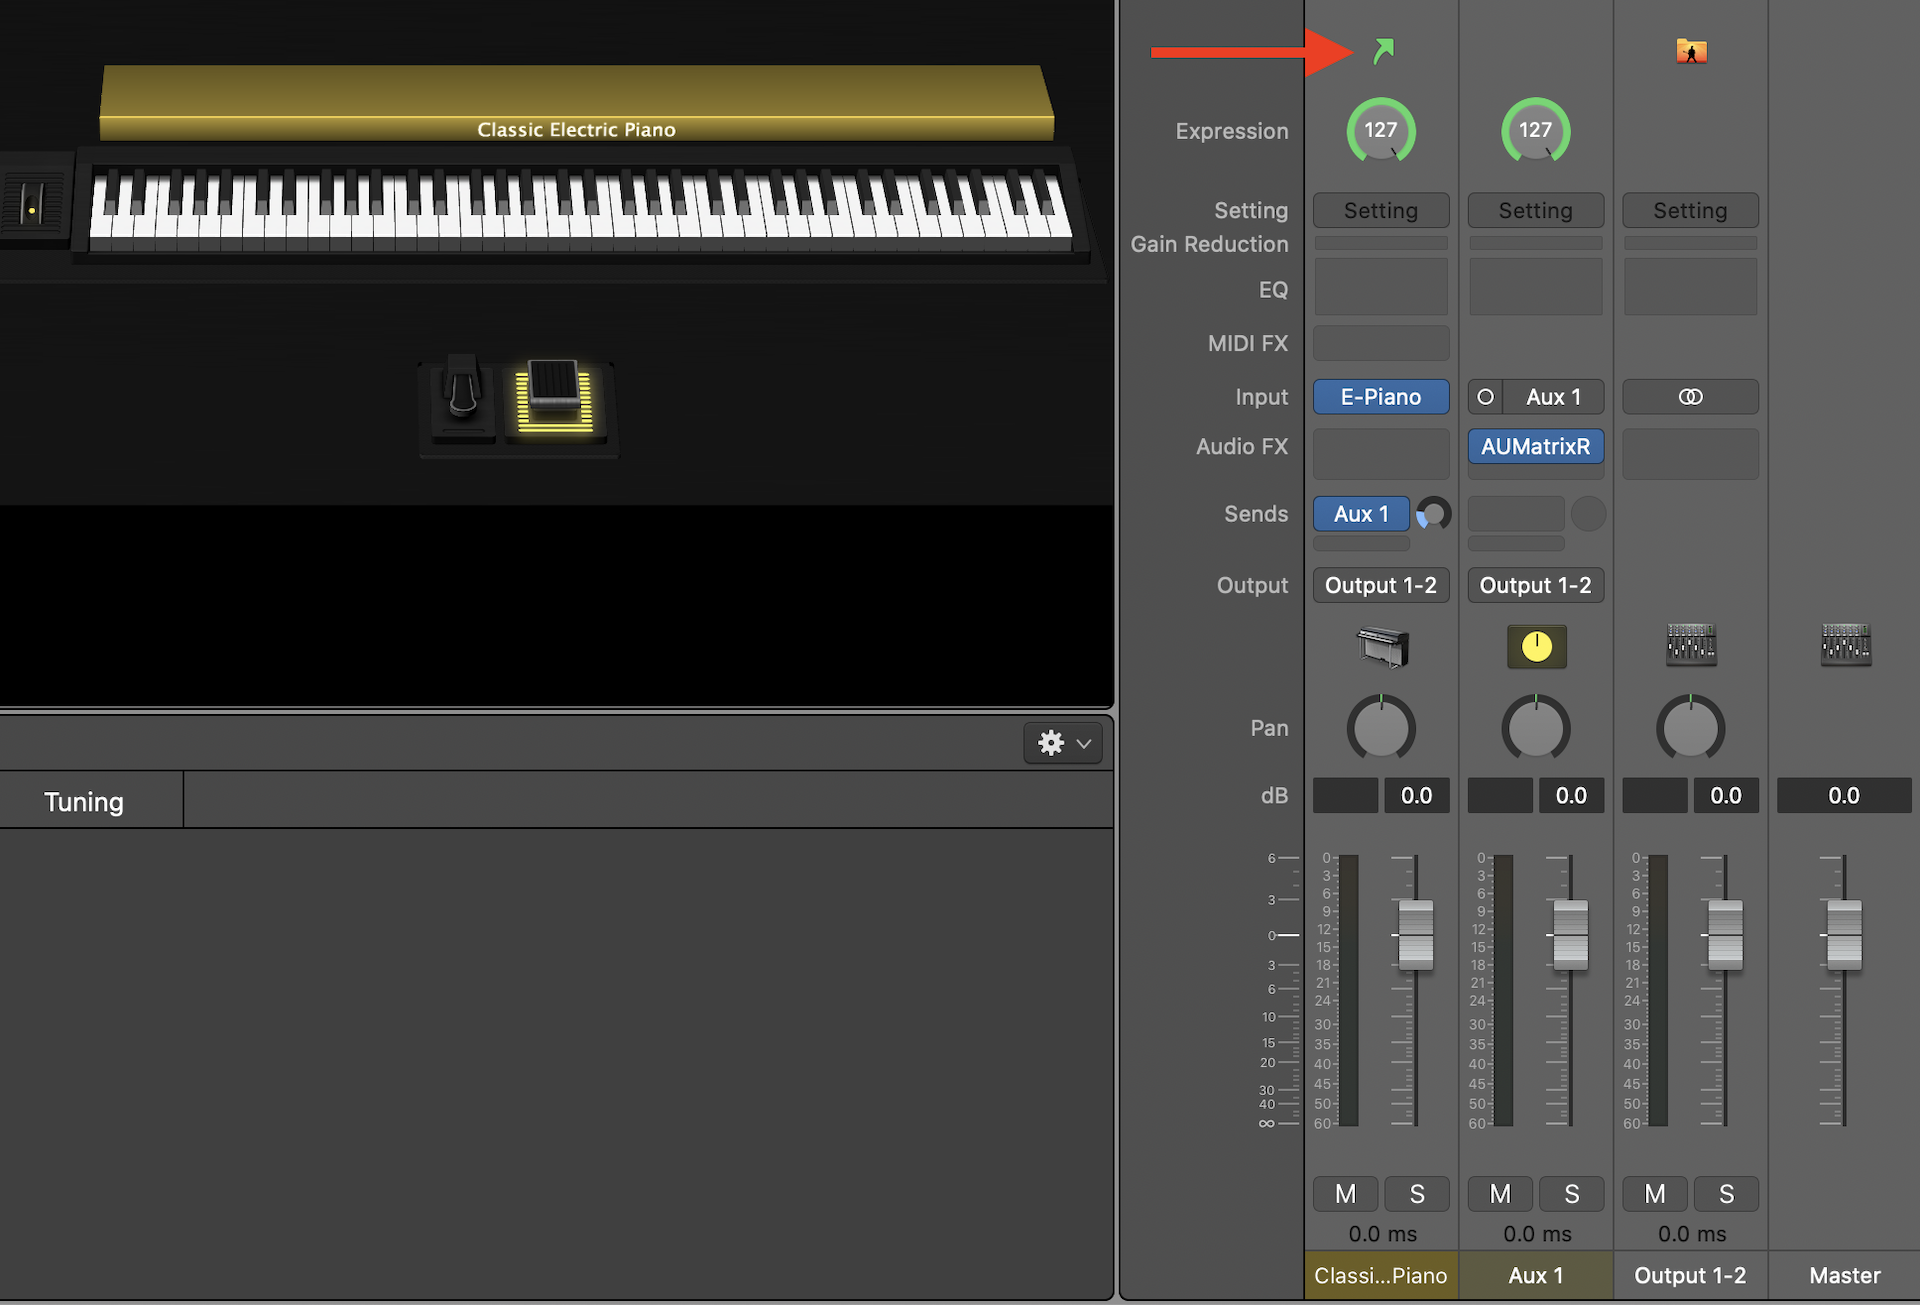
Aliased channel strips in MainStage are notated with a green arrow.
To unalias a channel strip and turn it into a new parent instance, click on the gear icon in the upper right corner of the channel strips window and select the “Convert Alias to Original” option.
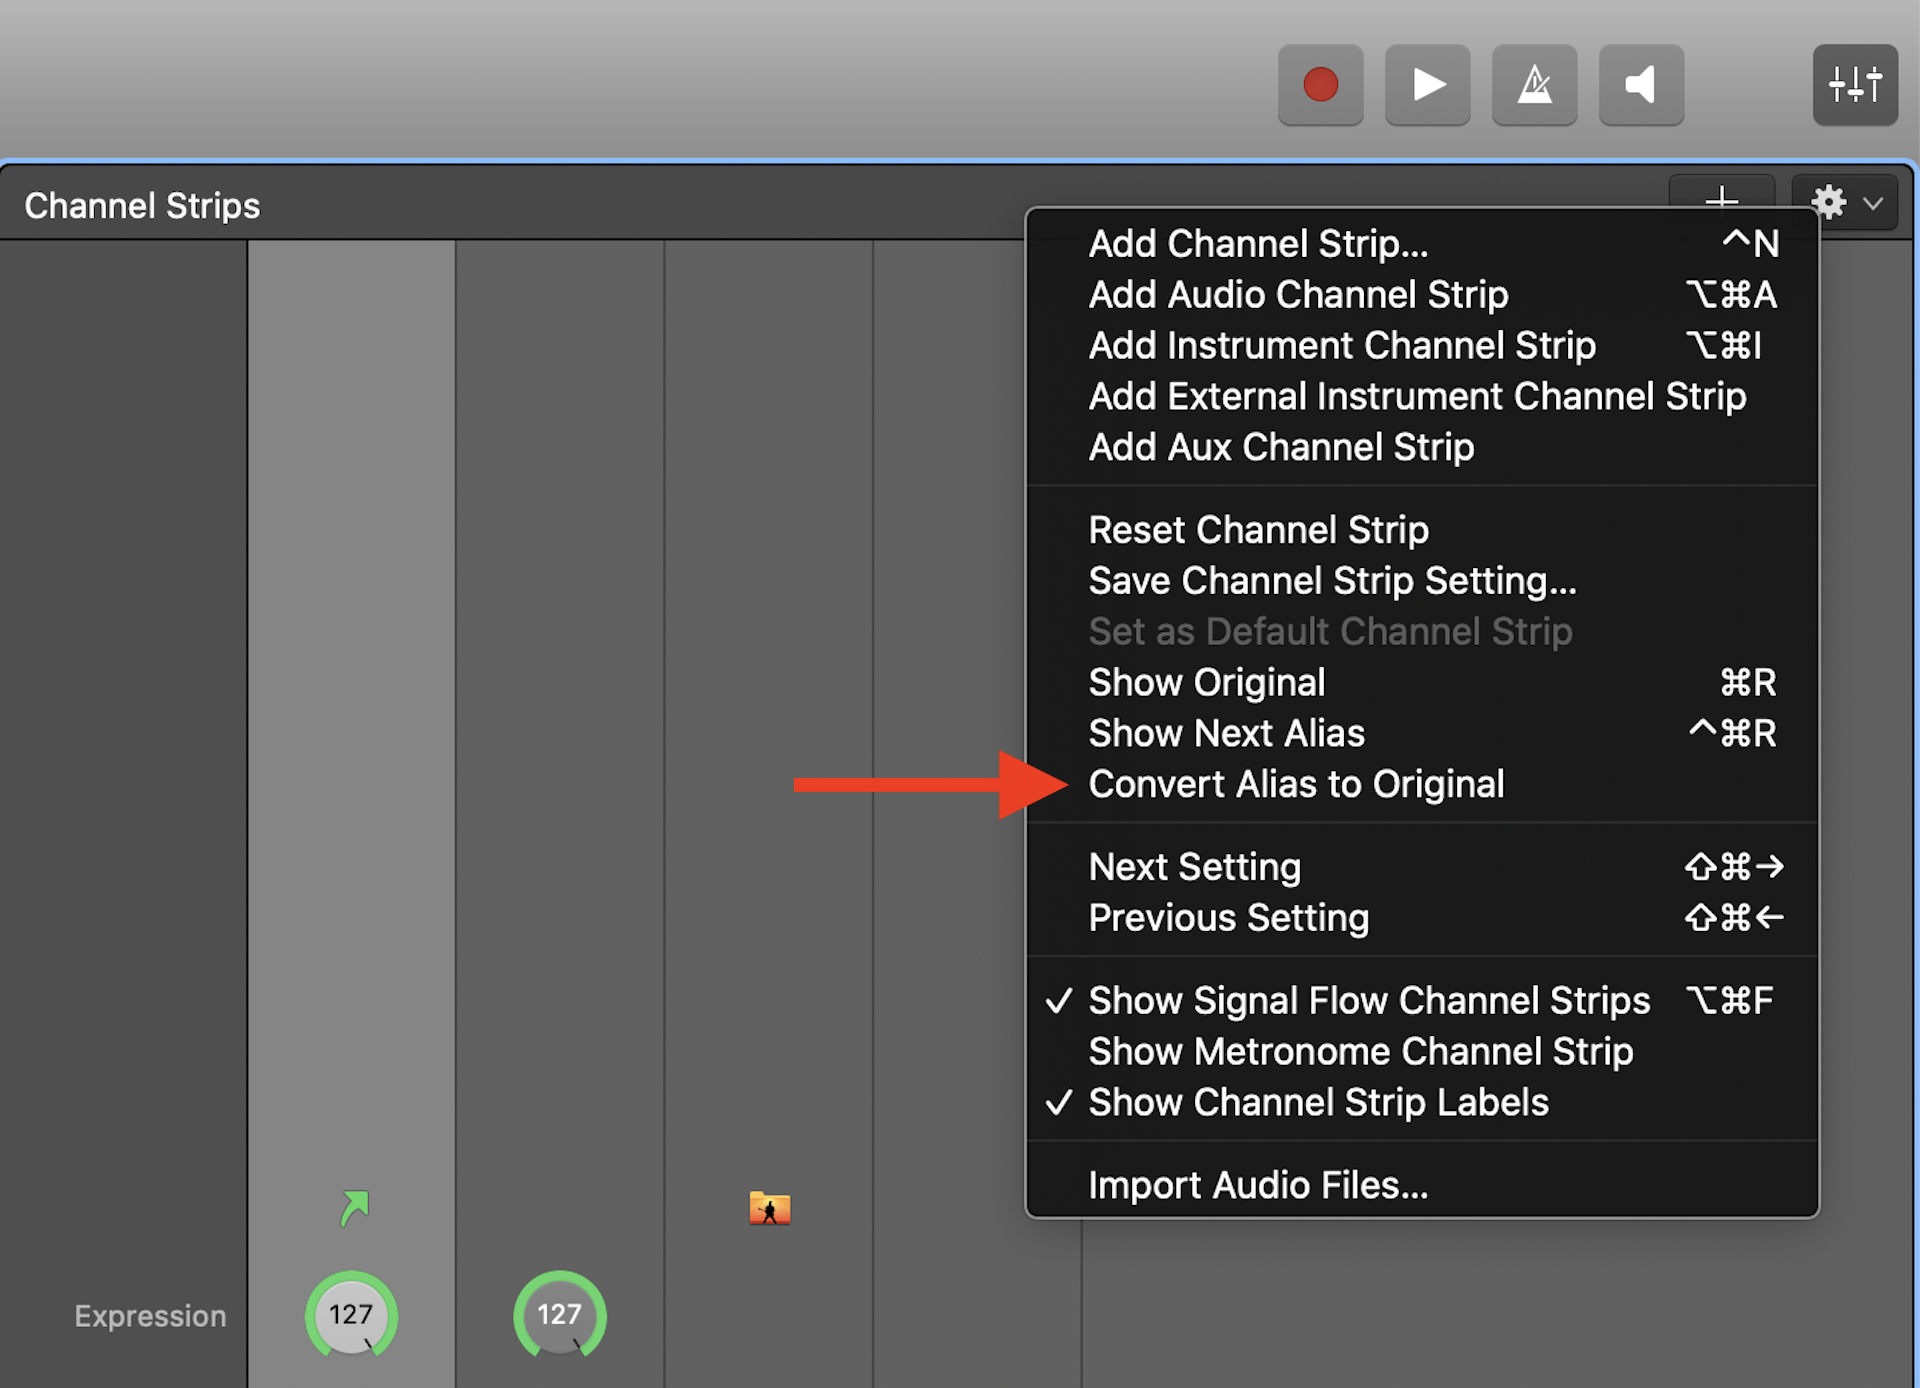
Use the "Convert Alias" to Original function to unalias a channel strip.
Using aliases in MainStage can help you reduce CPU and RAM usage dramatically, especially for concerts that have a high number of patches with repetitive sounds. Organizationally speaking, aliases also help you keep your channel strips uniform across your entire concert. For example, if you’re halfway through programming a show with Keyscape as your piano sound, and decide you want to tweak some plugin parameters, using aliases will effectively change the parameter for all child instances of the parent channel strip in your concert.
5. Use WAV or AIFF for Tracks and Samples
If you’re using MainStage’s Playback plugin to trigger backing tracks or EXS24 sampler to trigger sound effects, always make sure your source files are in either WAV or AIFF format. These two audio formats are uncompressed, and don’t require as much CPU as encoded formats like MP3 and AAC.
If you’ve compared WAV and MP3 files before, you probably know that the latter are much smaller in size. This is due to MP3’s encoding process which throws away some data and compresses the audio into a smaller file. Since MP3 files are encoded, playing them back requires a decoding process, which puts an additional burden on your CPU.
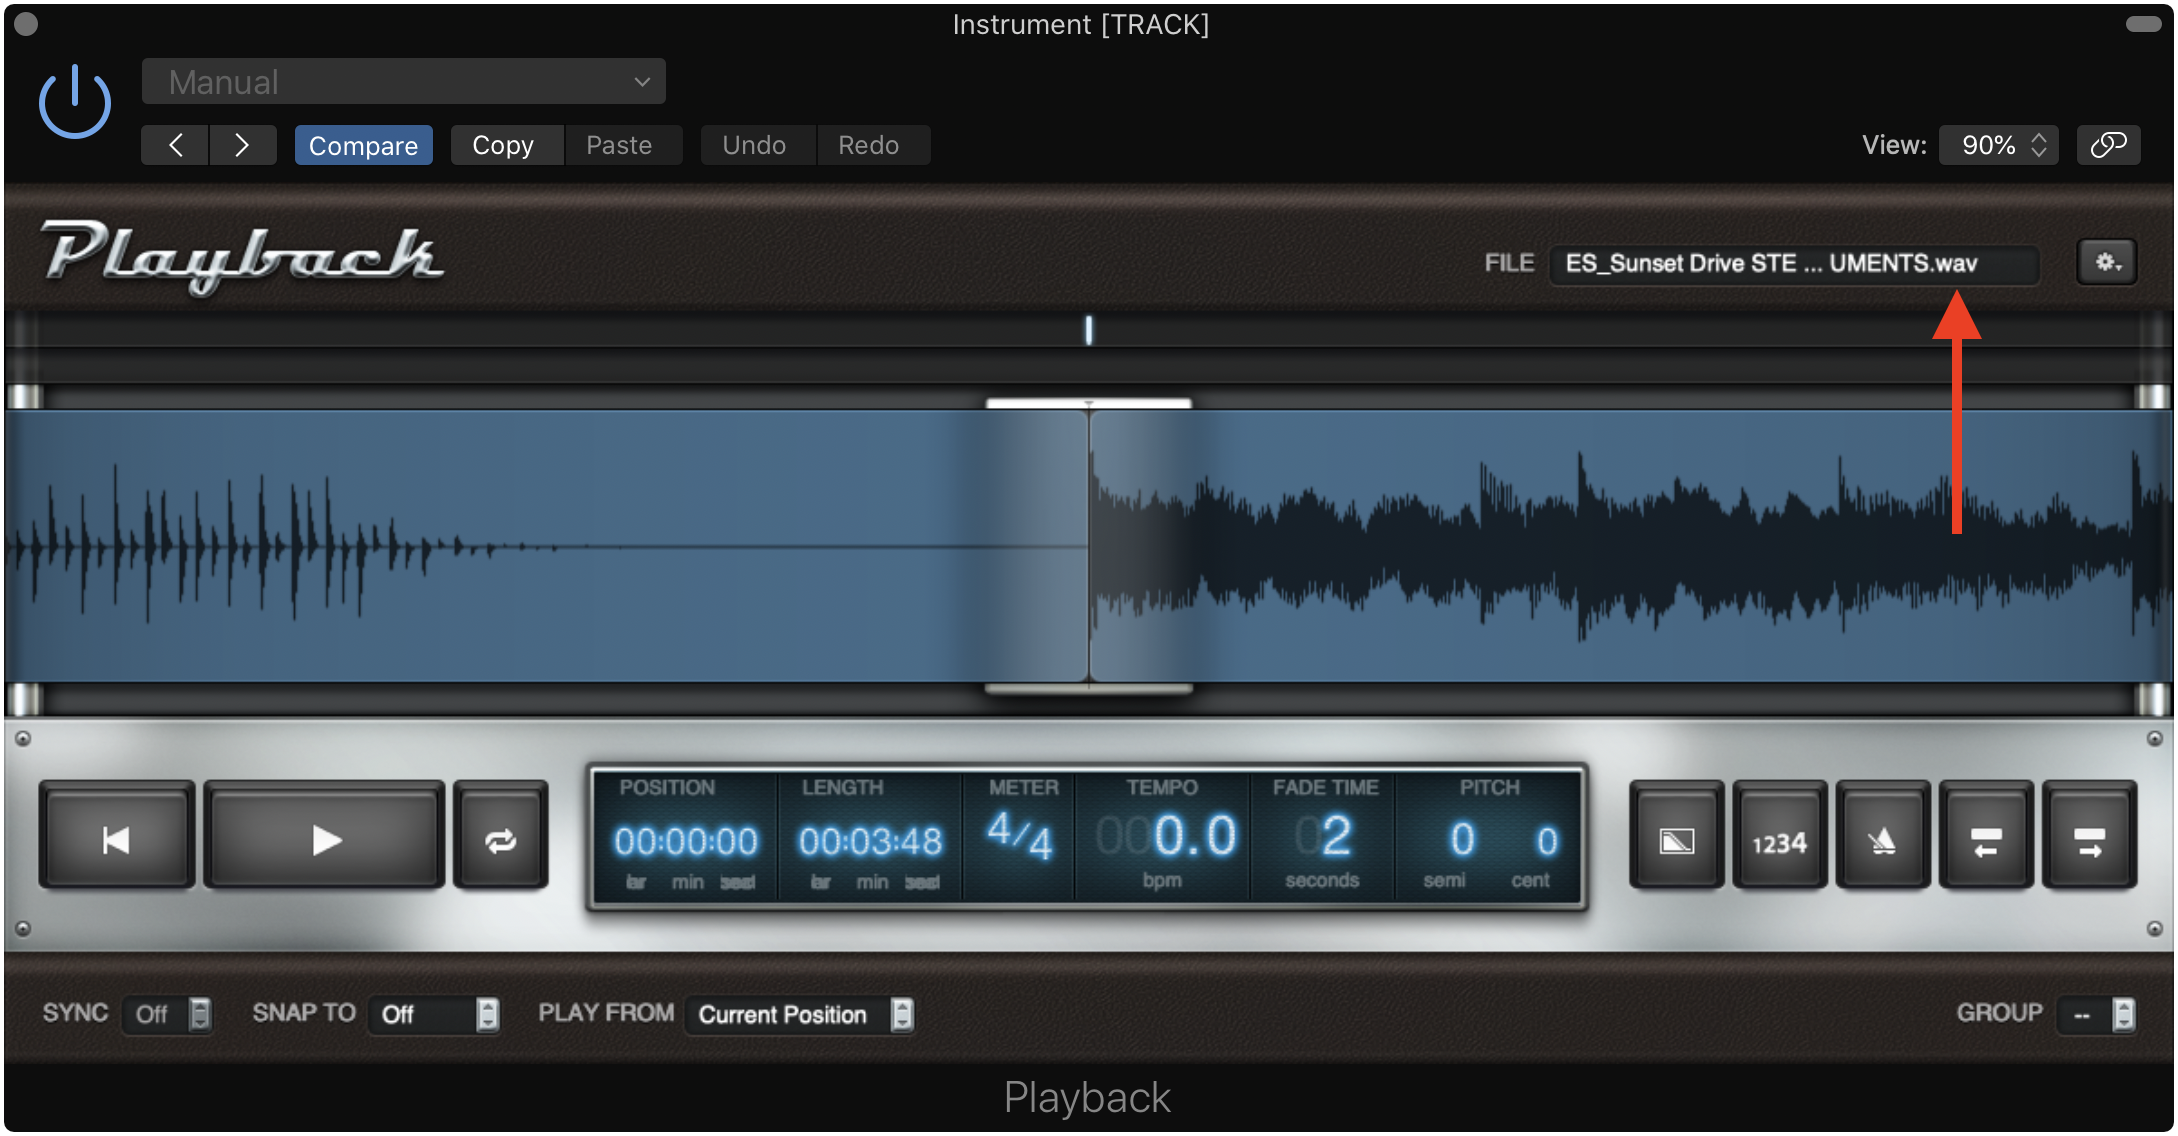
Always use WAV or AIFF files for playback tracks and sound effects.
The moral of the story is don’t pay attention to file size when it comes to playback tracks and sound effects. A 50 MB WAV file is better than a 5 MB MP3 file when it comes to optimizing MainStage for CPU usage.
6. Close Other Applications
Finally, before going on stage with MainStage, close all other applications on your computer that don’t need to be open. I can’t tell you how many times I’ve seen people run MainStage with Safari, Microsoft Word, and other unnecessary apps open in the background. Every open app on your Mac takes up CPU and RAM, so be sure to double check your dock or Activity Monitor to make sure you’re not unknowingly screwing yourself over with open apps.
Summary
In this post, we discussed six ways to keep CPU usage in MainStage in check. By using auxiliary buses for global effects, choosing the right buffer size, using lightweight plugins, aliasing channel strips, playing back uncompressed audio files, and closing unnecessary applications, you’ll be able to keep your MainStage rig performing at peak efficienty without scary CPU spikes. If you have any questions about reducing CPU usage in MainStage, feel free to reach out to me on Twitter or send me an email!