When producing music in Logic Pro X, there are times where you’ll need to equalize MIDI velocity. For example, if you’re manually playing a drum beat, you may want all the snare drum hits to sound at the same velocity. In this post, you’ll learn how to equalize MIDI velocity to a fixed number in Logic Pro X.
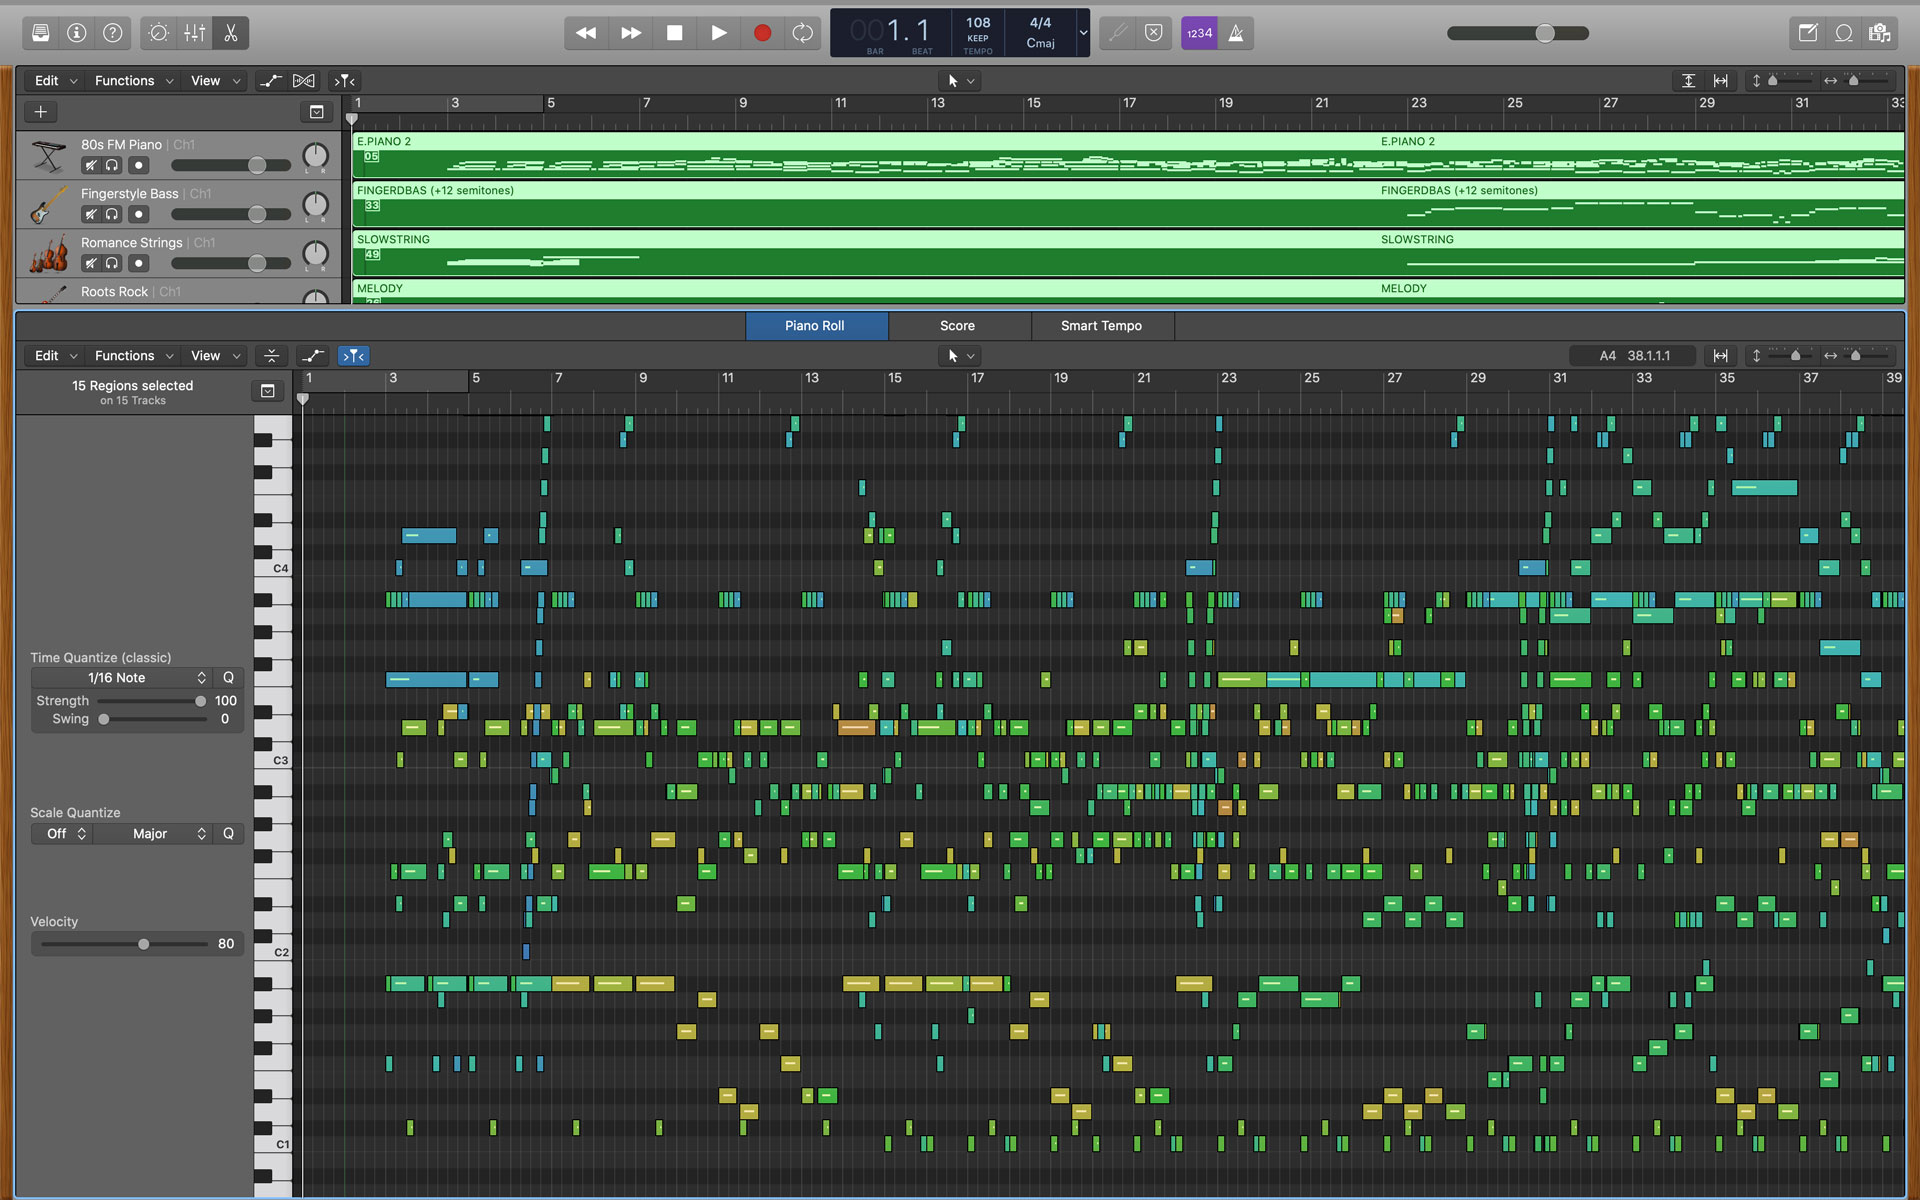
Select the MIDI Clips or Notes
The first step is to select the MIDI clips or notes you want to transform. In the screenshot below, I have selected all the MIDI clips in my session.
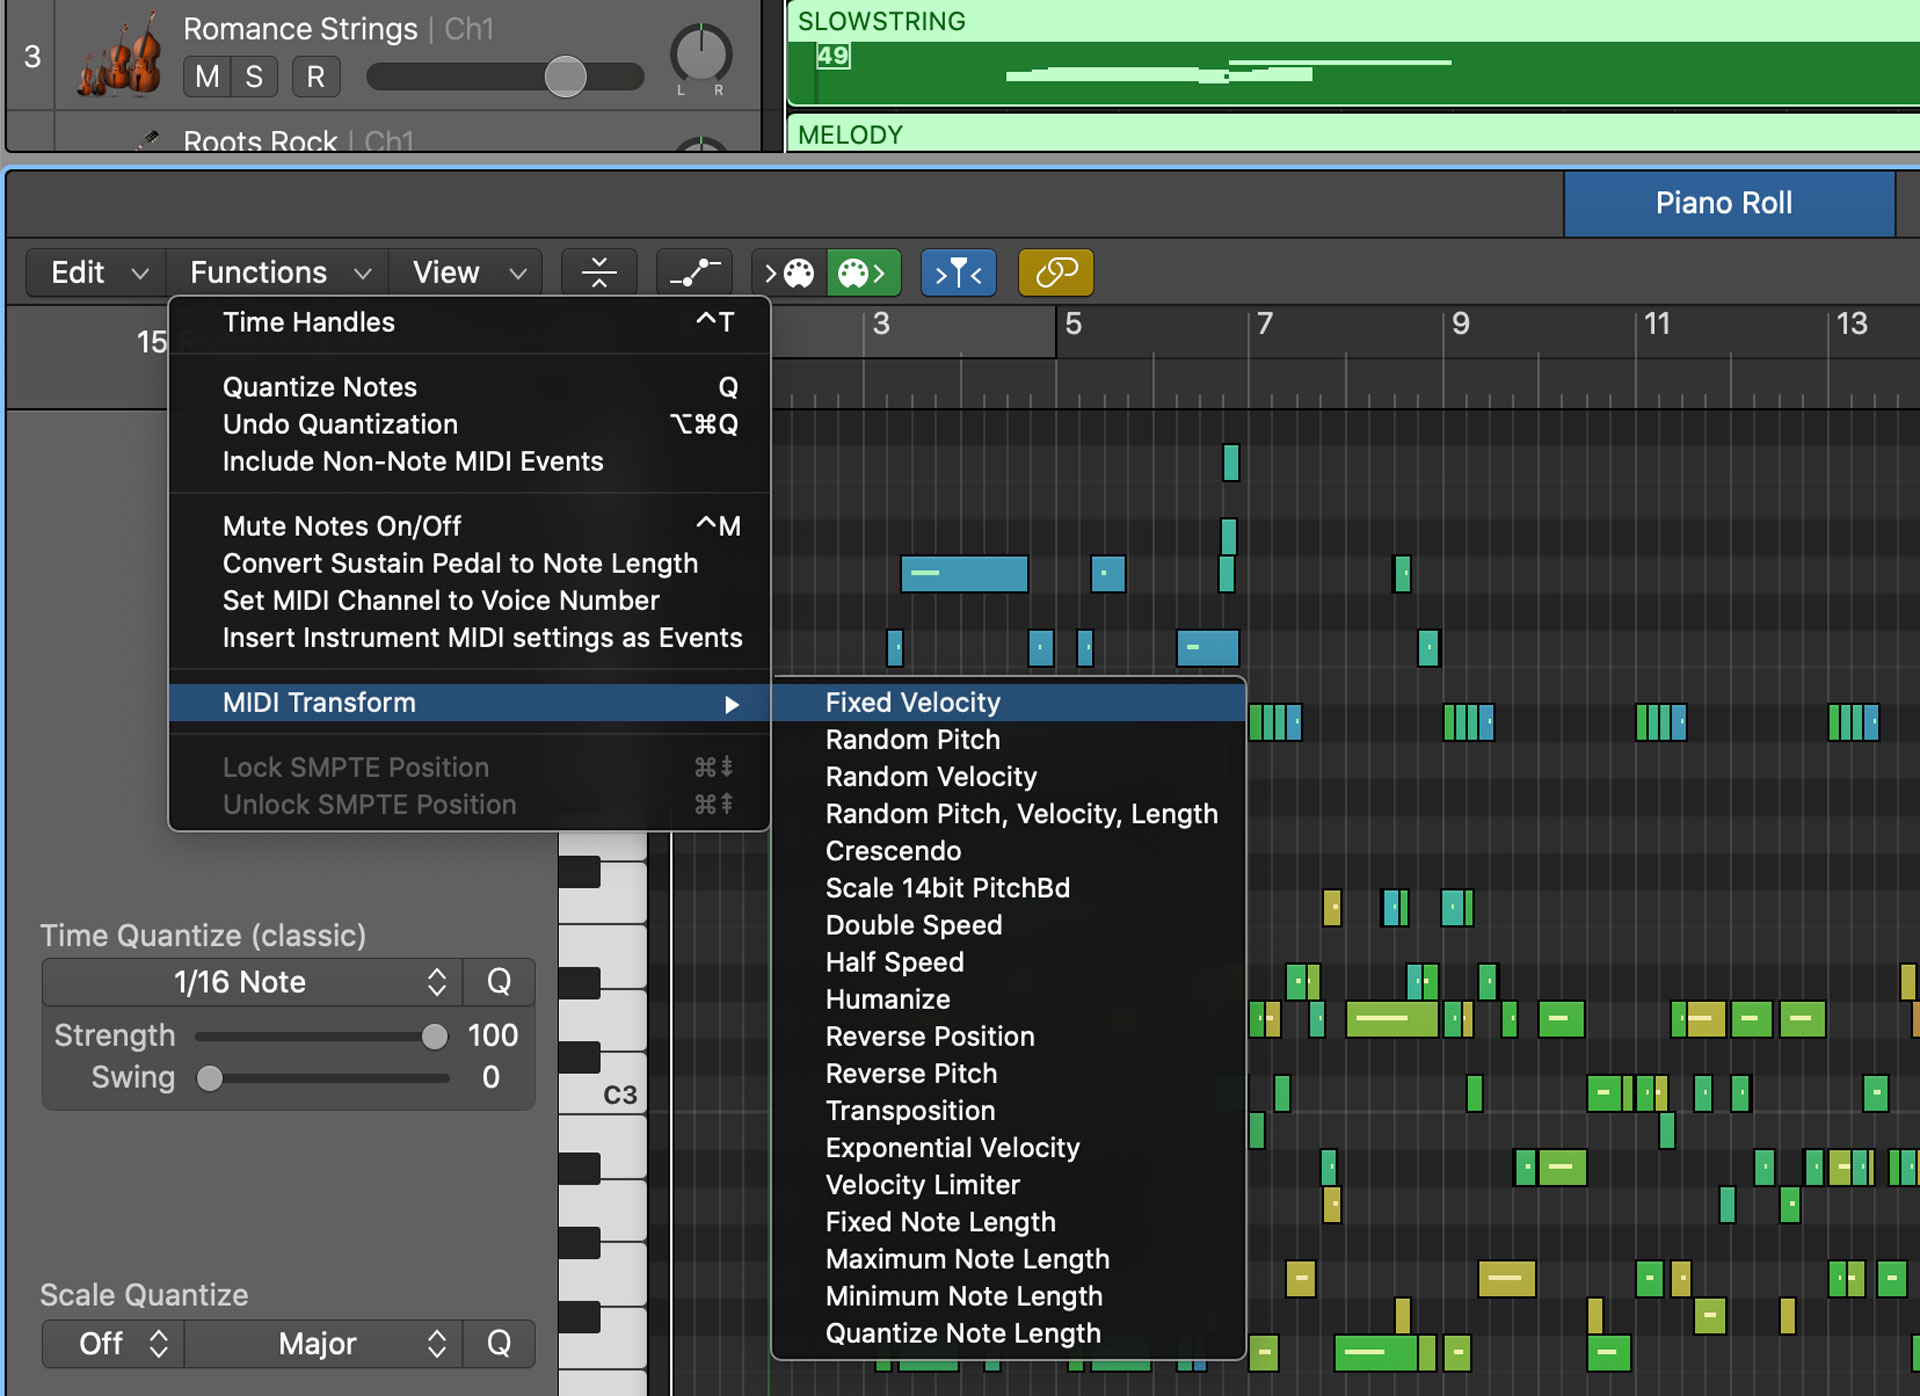
Transform the Selected MIDI
Next, navigate to the Editor window, click on the Functions dropdown menu, and select MIDI Transform -> Fixed Velocity.
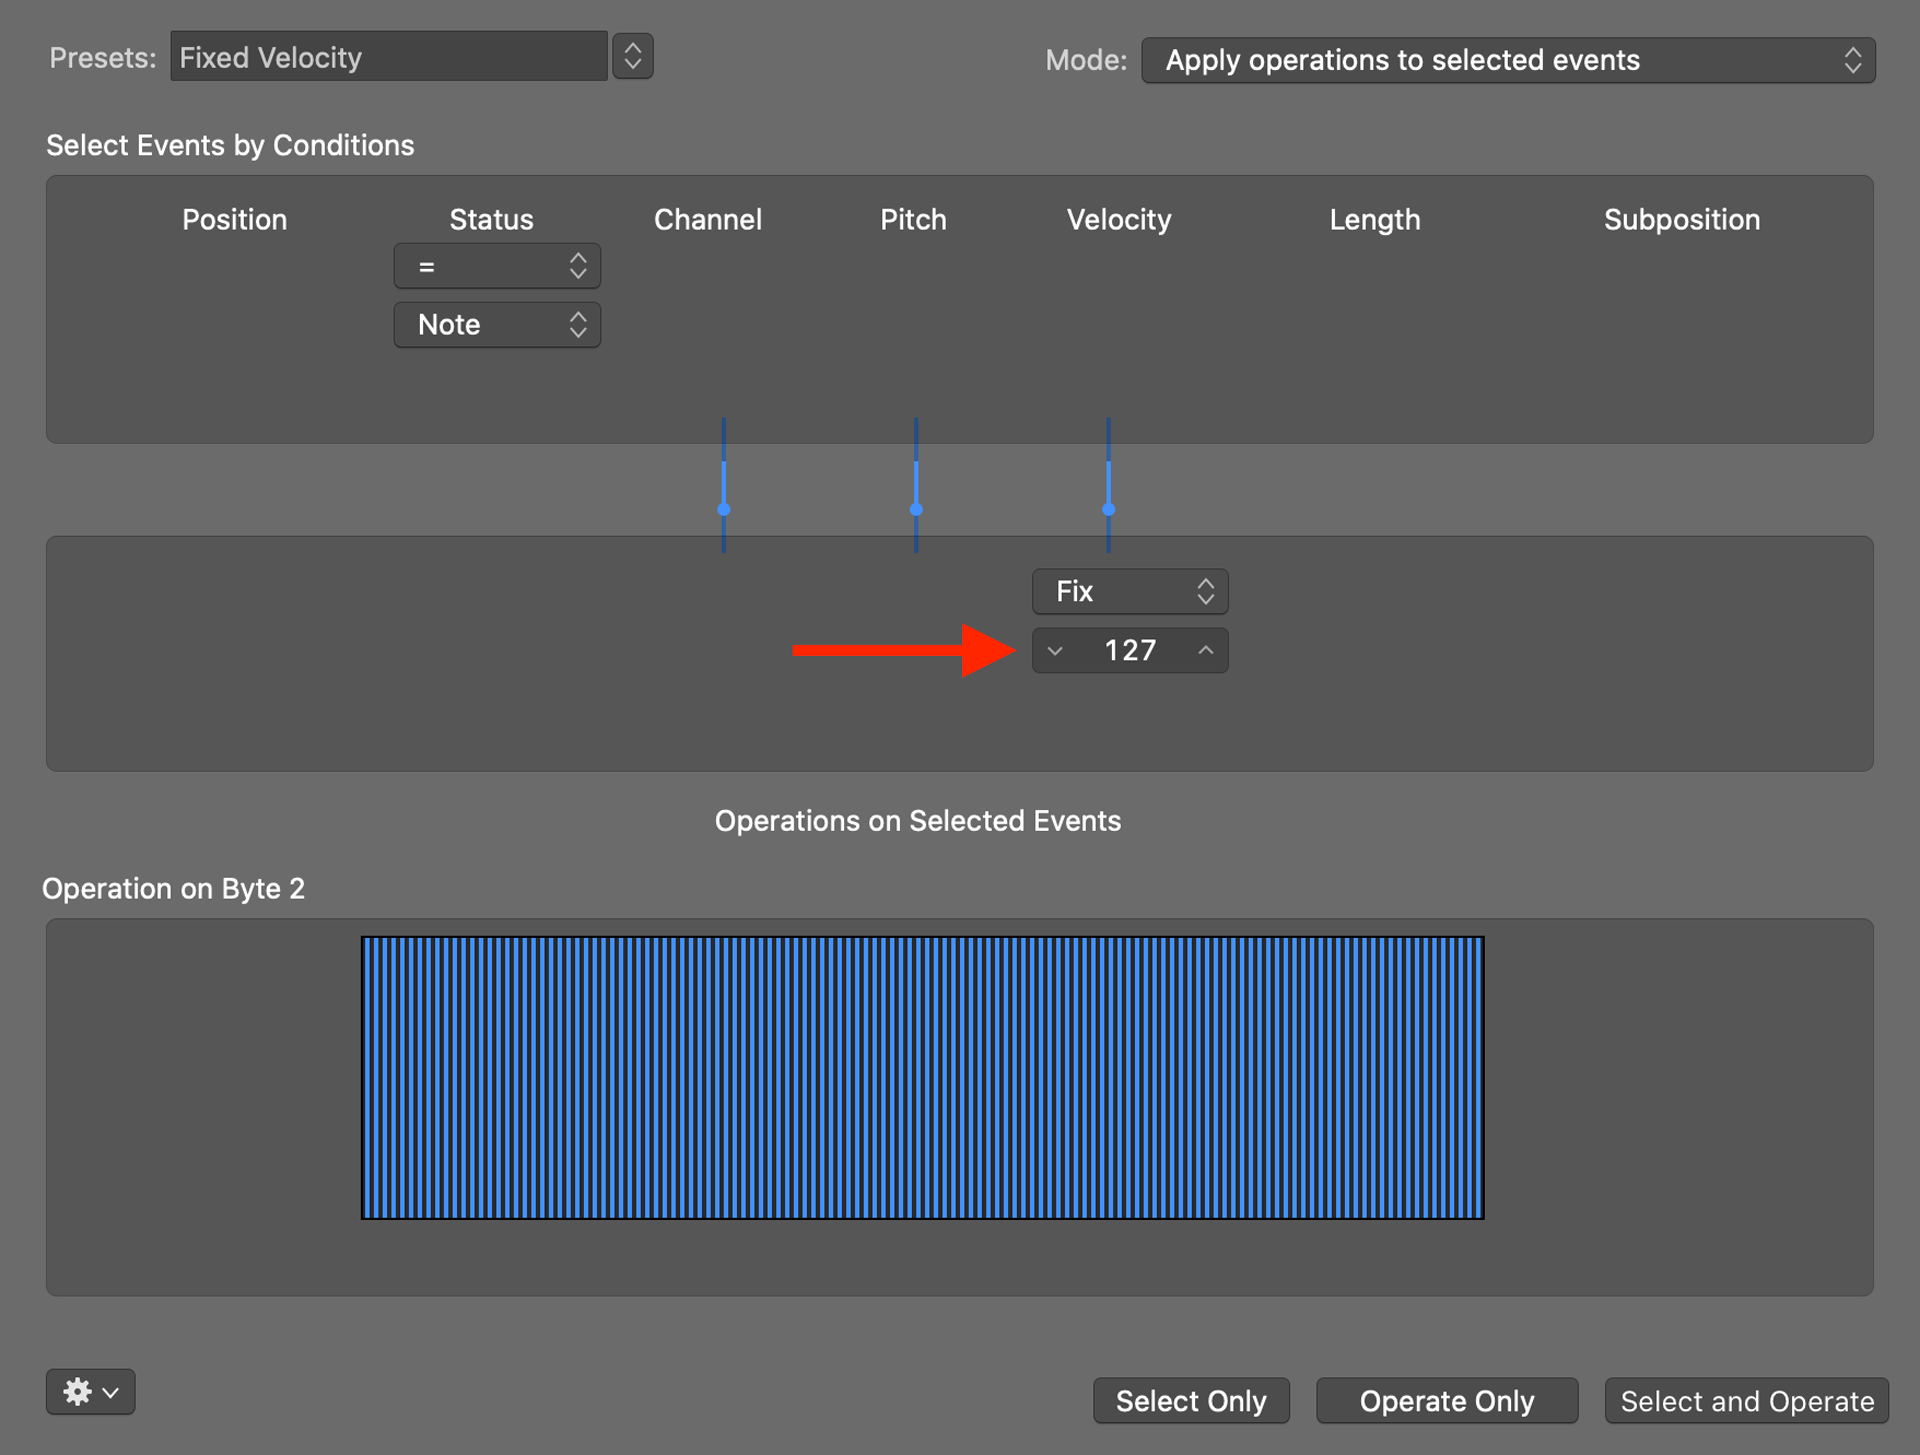
In the Fixed Velocity menu, specify the desired velocity, and press Select and Operate. In the screenshot below, I’ve set 127 for the MIDI velocity – this which will equalize my selected MIDI notes to a velocity of 127.
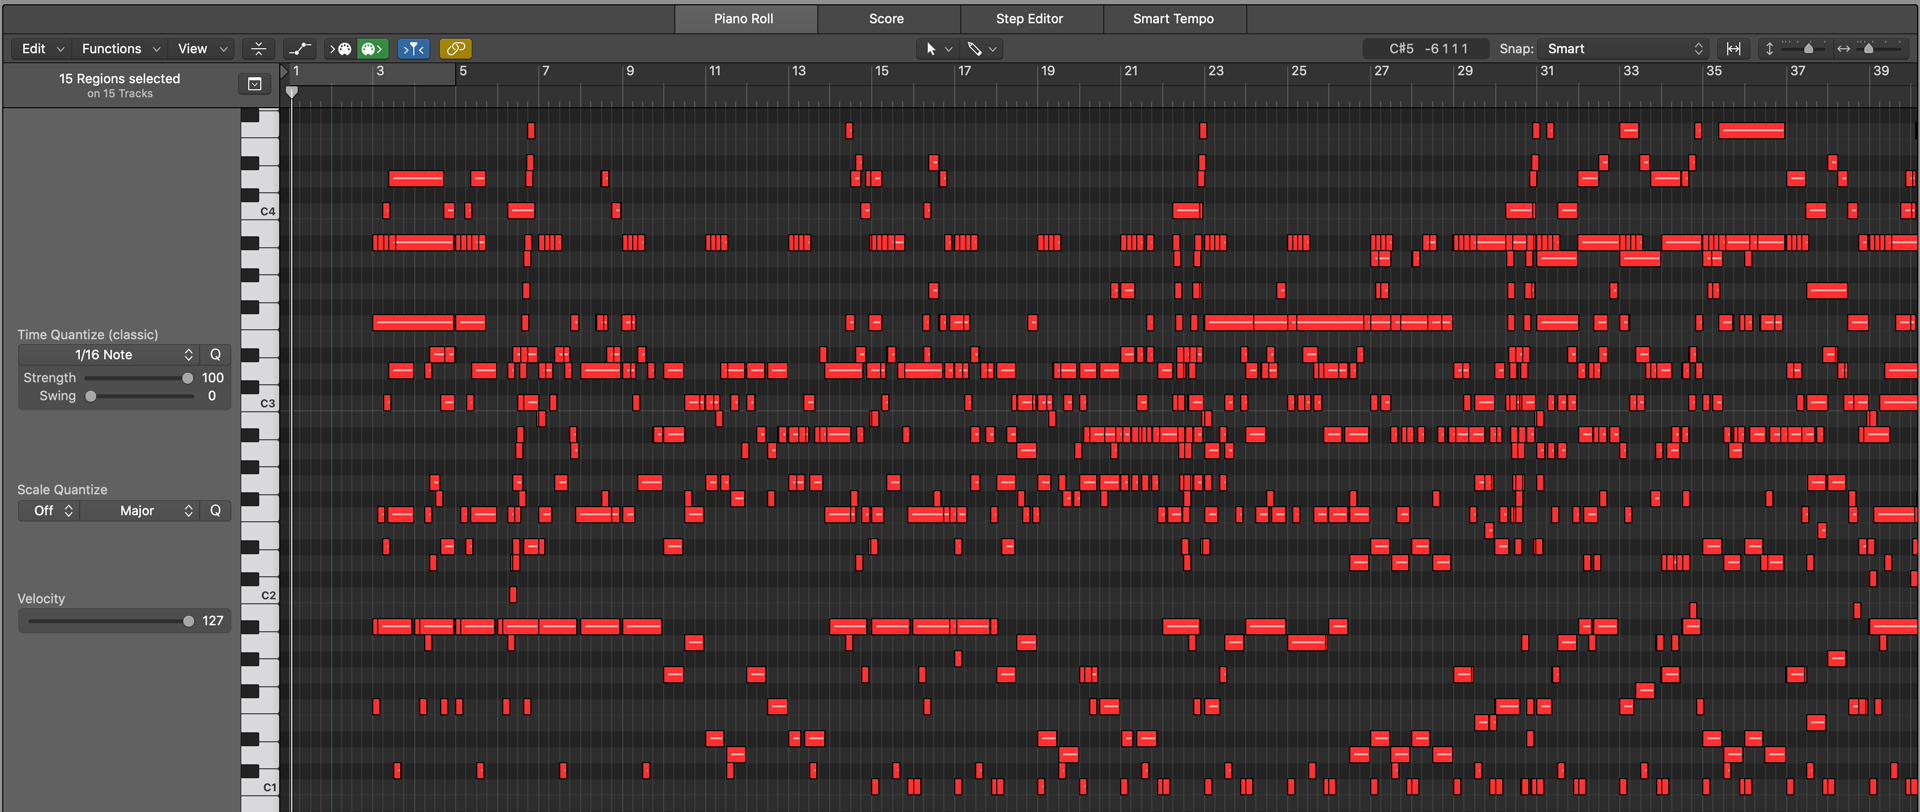
After running the Fixed Velocity process, the selected MIDI notes will have the same velocity. In the screenshot below, you can see all the MIDI notes have shifted to a red color, which indicates a velocity of 127.
Equalizing MIDI velocity is a quick and easy process in Logic Pro X. If you have any questions or comments about this post, feel free to reach out to me on Twitter, or send me an email.