In this tutorial, you'll learn how to set up a serverless function on Google Cloud Functions to automatically clear the Cloudflare cache after a successful deployment of your static site on Netlify.
I've been a Cloudflare user for a long time, and I enjoy the various optimization and security features it offers. Previously, my site was built with WordPress, and Cloudflare was configured to cache CSS, JS, and images only. Recently, I decided to jump on the static site generator bandwagon, and rebuilt my site with Hugo. For hosting, I chose Netlify because its continuous deployment integration with GitHub is super convenient.
While Netlify has a CDN, Cloudflare has more edge locations around the world, which also support image optimization and WEBP encoding – this is very important to me because I often write image-heavy posts. With this in mind, I decided to switch Cloudflare into "cache everything" mode, which also caches static HTML. Everything was great until I realized Cloudflare's caching system had no insight into my Netlify deploys. In other words, pushing a new post to Netlify did not clear Cloudflare's cache.
Cloudflare Settings
Before we discuss how to set up an auto-purge function, I just want to share the Cloudflare settings that I'm using to cache my Netlify-hosted site. The screenshot below shows the page rule that I'm using to cache both static assets and HTML.
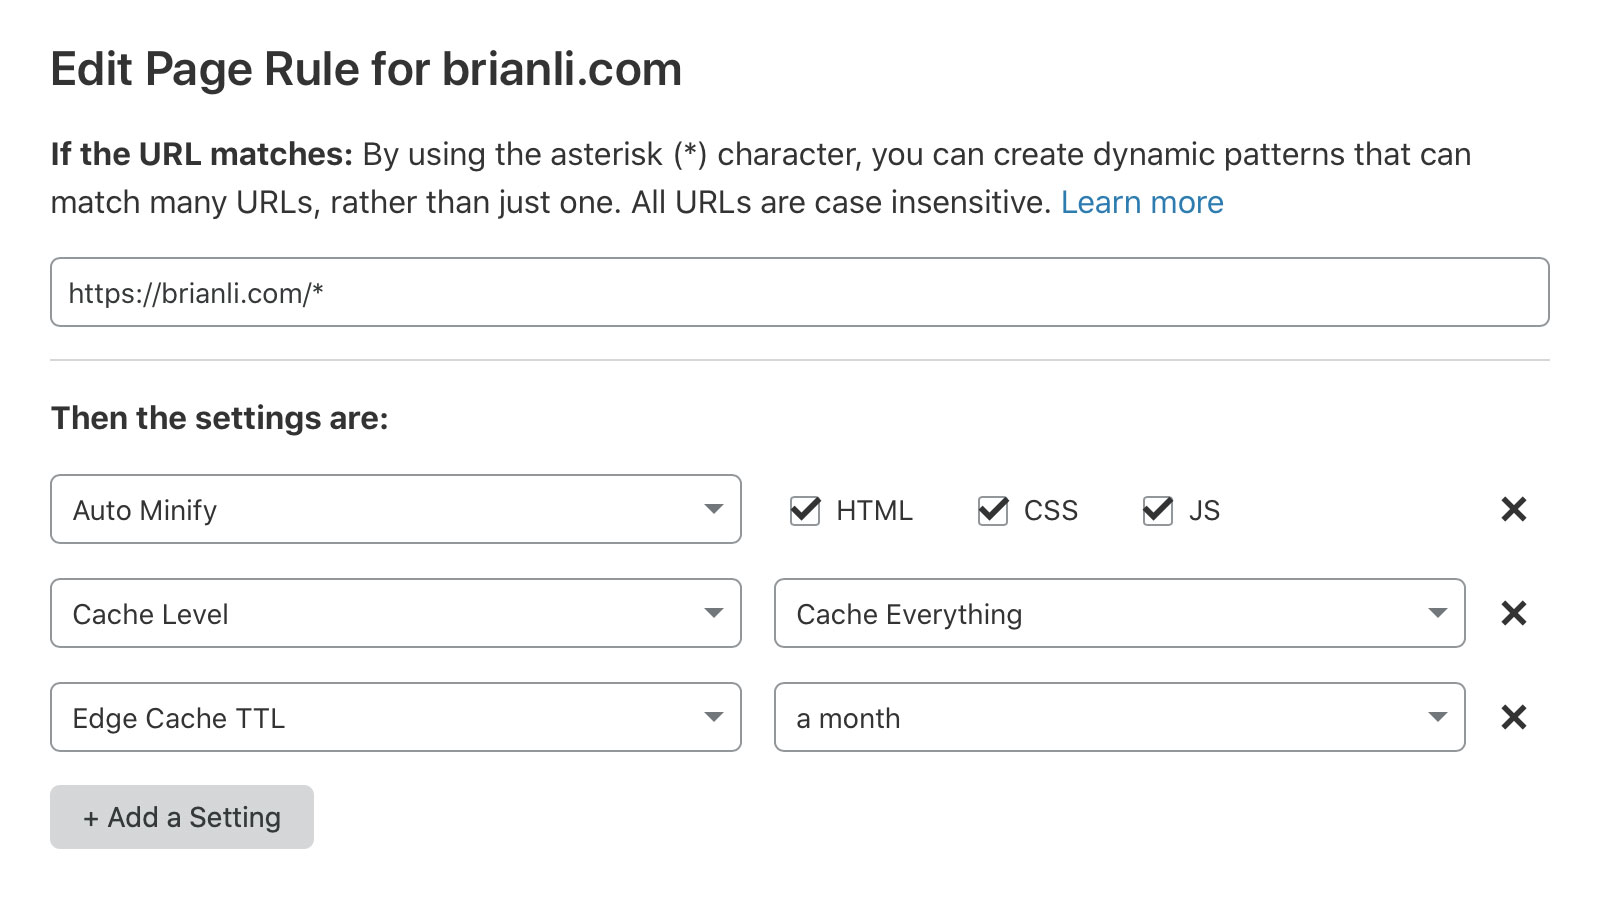
Before proceeding on with the rest of the tutorial, you'll need to grab a few pieces of information from your Cloudflare account.
- Zone ID - this is the unique ID for your domain.
- Account Email - this is the email address you use to log in to your Cloudflare account.
- API Key - this is the Global API Key on the API Tokens page.
Purge Cloudflare Cache with a Serverless Function
The next step is to create an HTTP endpoint that triggers a serverless function to purge Cloudflare's cache. For this step, you can use a traditional server setup (e.g. NGINX and Flask) as well, but I prefer the lightweight and low-maintenance characteristics of a serverless function for this particular task. In this example, we'll be using Google Cloud Functions and Python 3.7.
In Google Cloud Functions, create a function with the following settings.
- Name - clear-cloudflare-cache
- Memory allocated - 128MB
- Trigger - HTTP
- Source Code - Inline Editor
- Runtime - Python 3.7
- Function to execute - clear_cloudflare_cache
In the inline editor, paste the code block below in the main.py tab. Be sure to replace ZONE-ID, ACCOUNT-EMAIL, and API-KEY with your own settings.
import requests

def clear_cloudflare_cache(request):
	url = "https://api.cloudflare.com/client/v4/zones/ZONE-ID/purge_cache"
	headers = {
    	"X-Auth-Email": "ACCOUNT-EMAIL",
    	"X-Auth-Key": "API-KEY",
    	"Content-Type": "application/json"
    	}
	payload = '{ "purge_everything": true }'
	r = requests.post(url, headers=headers, data=payload)
Next, paste the code block below in the requirements.txt tab to enable the requests library.
## Function dependencies, for example:
## package>=version
requests==2.21.0
Finally, press the Create button at the bottom of the page to deploy the serverless function. After the function has been deployed, click on the function in the dashboard to view its settings. Click on the Trigger Tab, and you should see a URL that can be used to trigger the function.
Set Up Netlify to Trigger the Cache Purge Function
Now that you have serverless function set up, the next step is to instruct Netlify to trigger the function after a successful deployment. To do this, navigate to your Netlify's settings, and click the Build & Deploy tab.
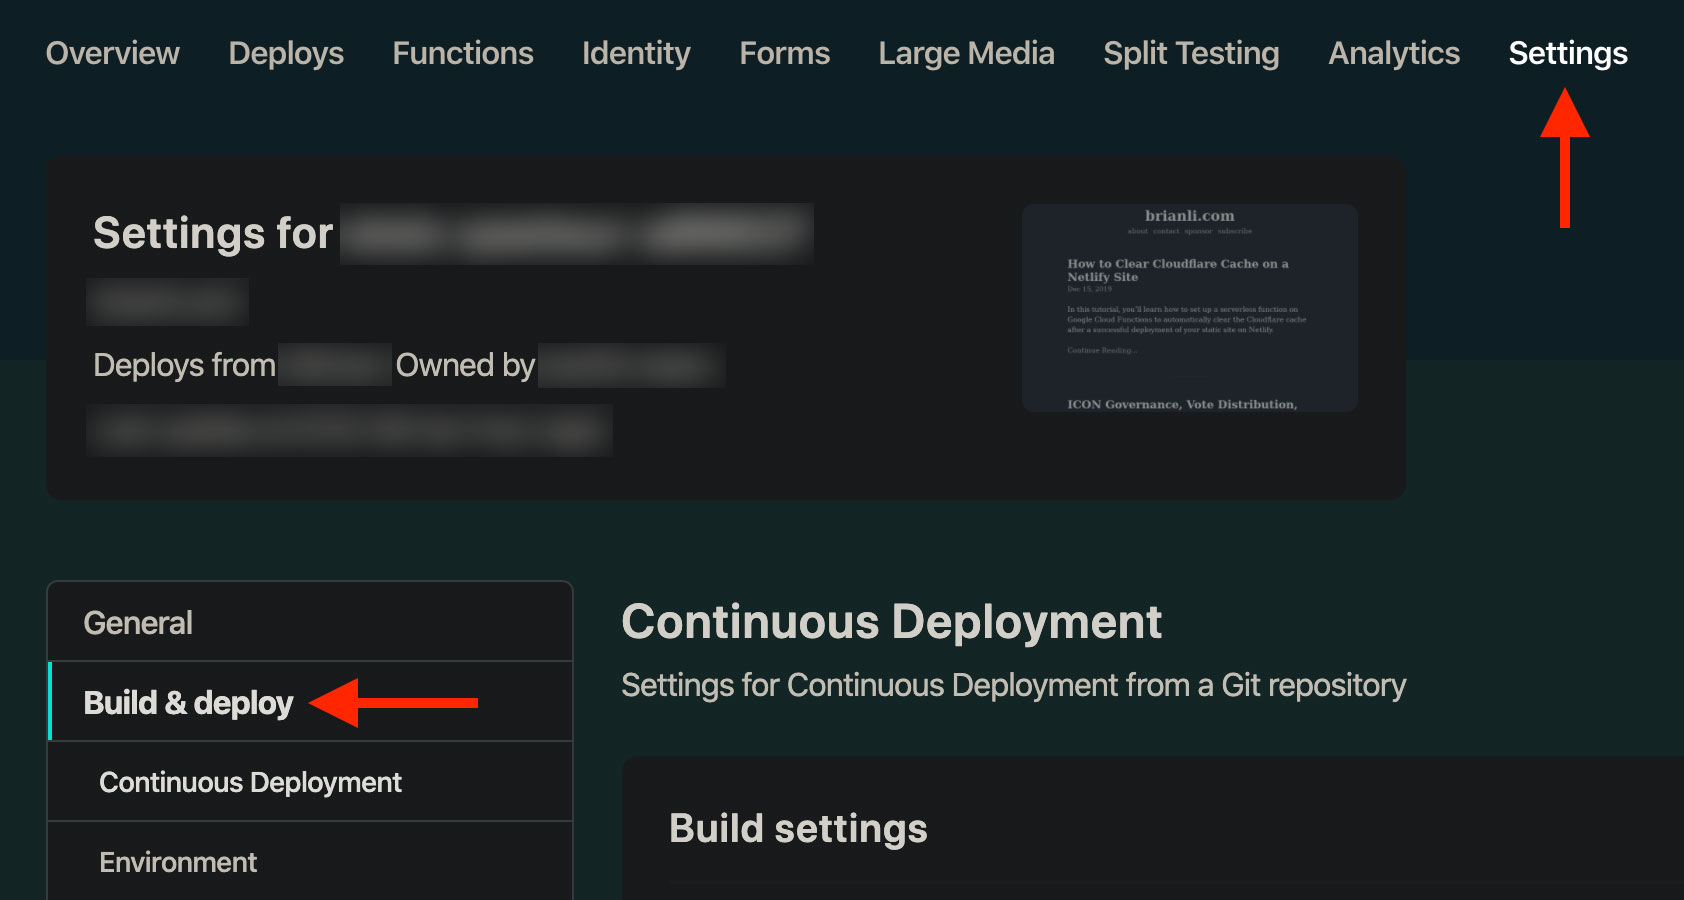
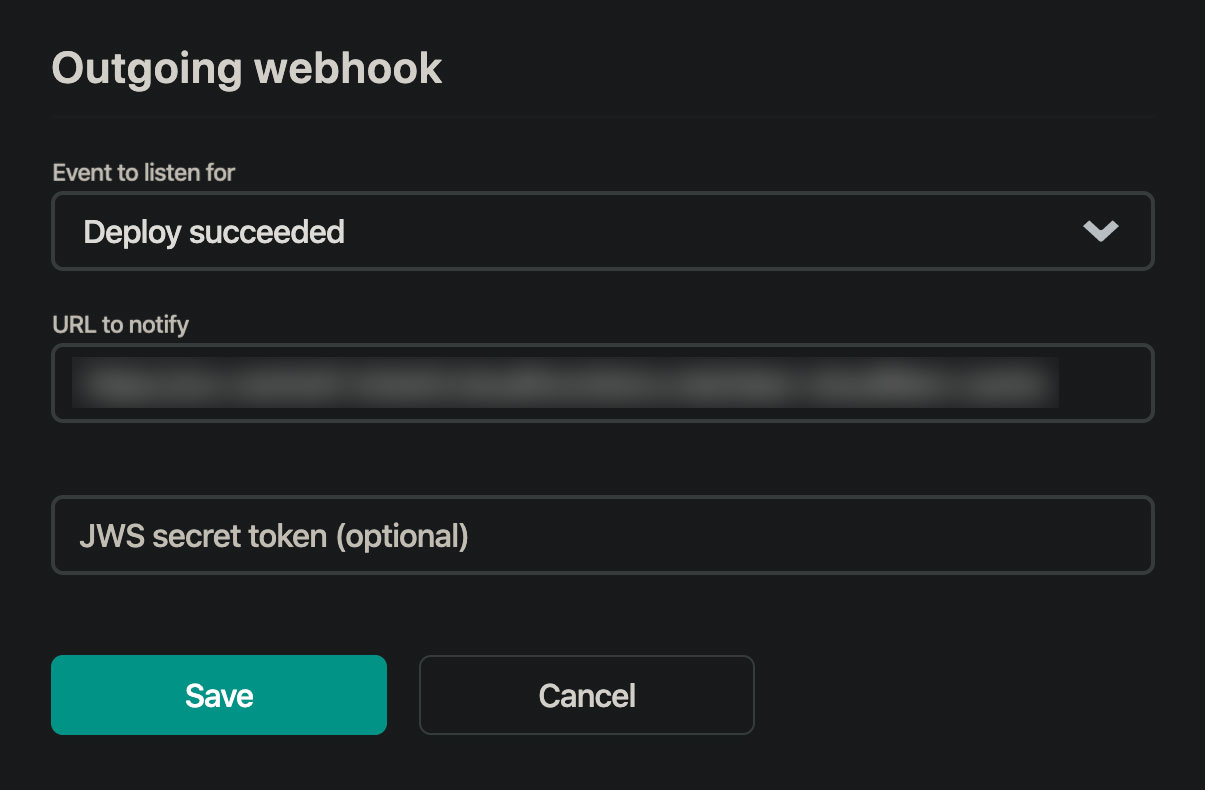
Next, scroll down to the bottom of the page to the Deploy Notifications section. Click on the Add Notification dropdown, and select Outgoing Webhook. Use the following settings to instruct Netlify to trigger your Cloudflare cache purge function after a successful deployment.
- Event to listen for - Deploy succeeded
- URL to notify - (Your Google Cloud Function URL)
Conclusion
You can use the following step to test the functionality of this setup.
- In Terminal, run
curl -Ilk yourdomain.com, and make sure the page is being cached by Cloudflare by checking for thecf-cache-status: HITheader and theageheader. If you seecf-cache-status: MISSorcf-cache-status: EXPIRED, run the command again to cache the page. - Trigger a deployment in Netlify.
- After the deployment is complete, run
curl -Ilk yourdomain.comagain. You should now see a much lower value for theageheader – this indicates the cache has been purged successfully.
In the future, it'd be nice to pass environment variables into the function, and secure the configuration with a JWT token. For now, this setup works fine, and is very useful for automating Cloudflare cache purges on a Netlify-hosted site. If you have any suggestions, feel free to get in touch with me on Twitter!