Normalizing audio is an important skill to know for music producers and sound engineers. For music producers, ensuring that a track is normalized correctly is a key step in the preparation process for distribution. Similarly, sound engineers may occasionally be called upon to normalize sound effects for a show. In this post, you'll learn how to normalize audio in Logic Pro X.
What is Audio Normalization?
Before we dive into how to normalize audio in Logic Pro X, let's quickly define what audio normalization is. Normalization is the process of applying equal gain to an audio file so that it peaks at a defined decibel level.
In other words, if you have a track with a peak amplitude of -6 dB and you normalize it to -0.2 dB, then the entire track will be boosted 5.8 dB (-6 dB to -0.2 dB). The most important thing to keep in mind is that audio normalization, unlike limiting, is a global manipulation process that affects every sample in the track equally. Thus, normalization does not affect relative volume of the audio file.
Audio normalization has many use cases, but the top two that come to mind for me are "mastering" and "sound effects". The final stage of mastering typically involves normalizing audio to -0.1 dB or -0.2 dB before the finished track is pushed to distribution channels like Spotify or Apple Music. In live entertainment, sound engineers often normalize sound effects to a certain decibel level (e.g. -6 dB) to set a baseline level for triggered effects.
How to Find Peak Amplitude in Logic Pro X
In some cases, you may want to find the peak amplitude of an audio file before normalizing it. This is a completely optional step, so feel free to skip this section if you just want to learn how to normalize an audio file with Logic Pro X.
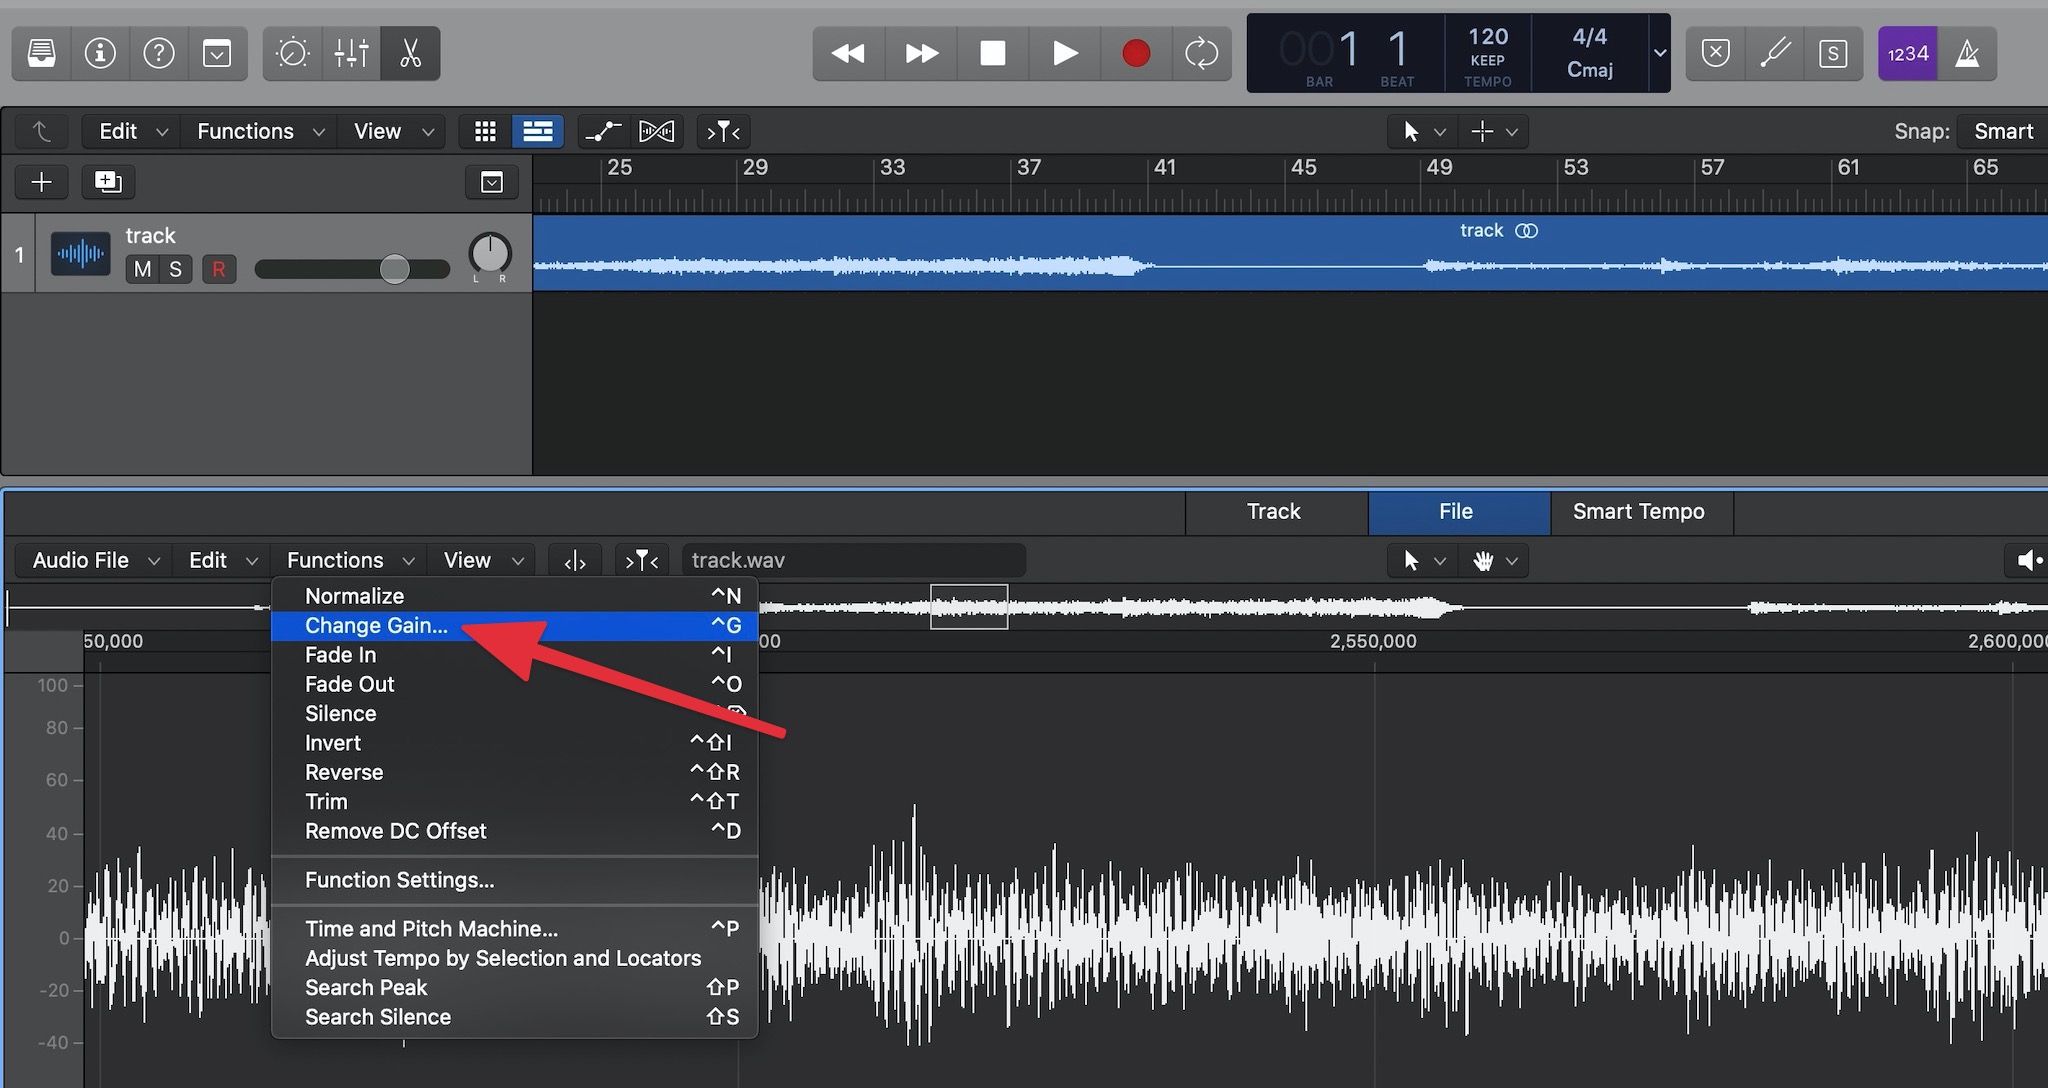
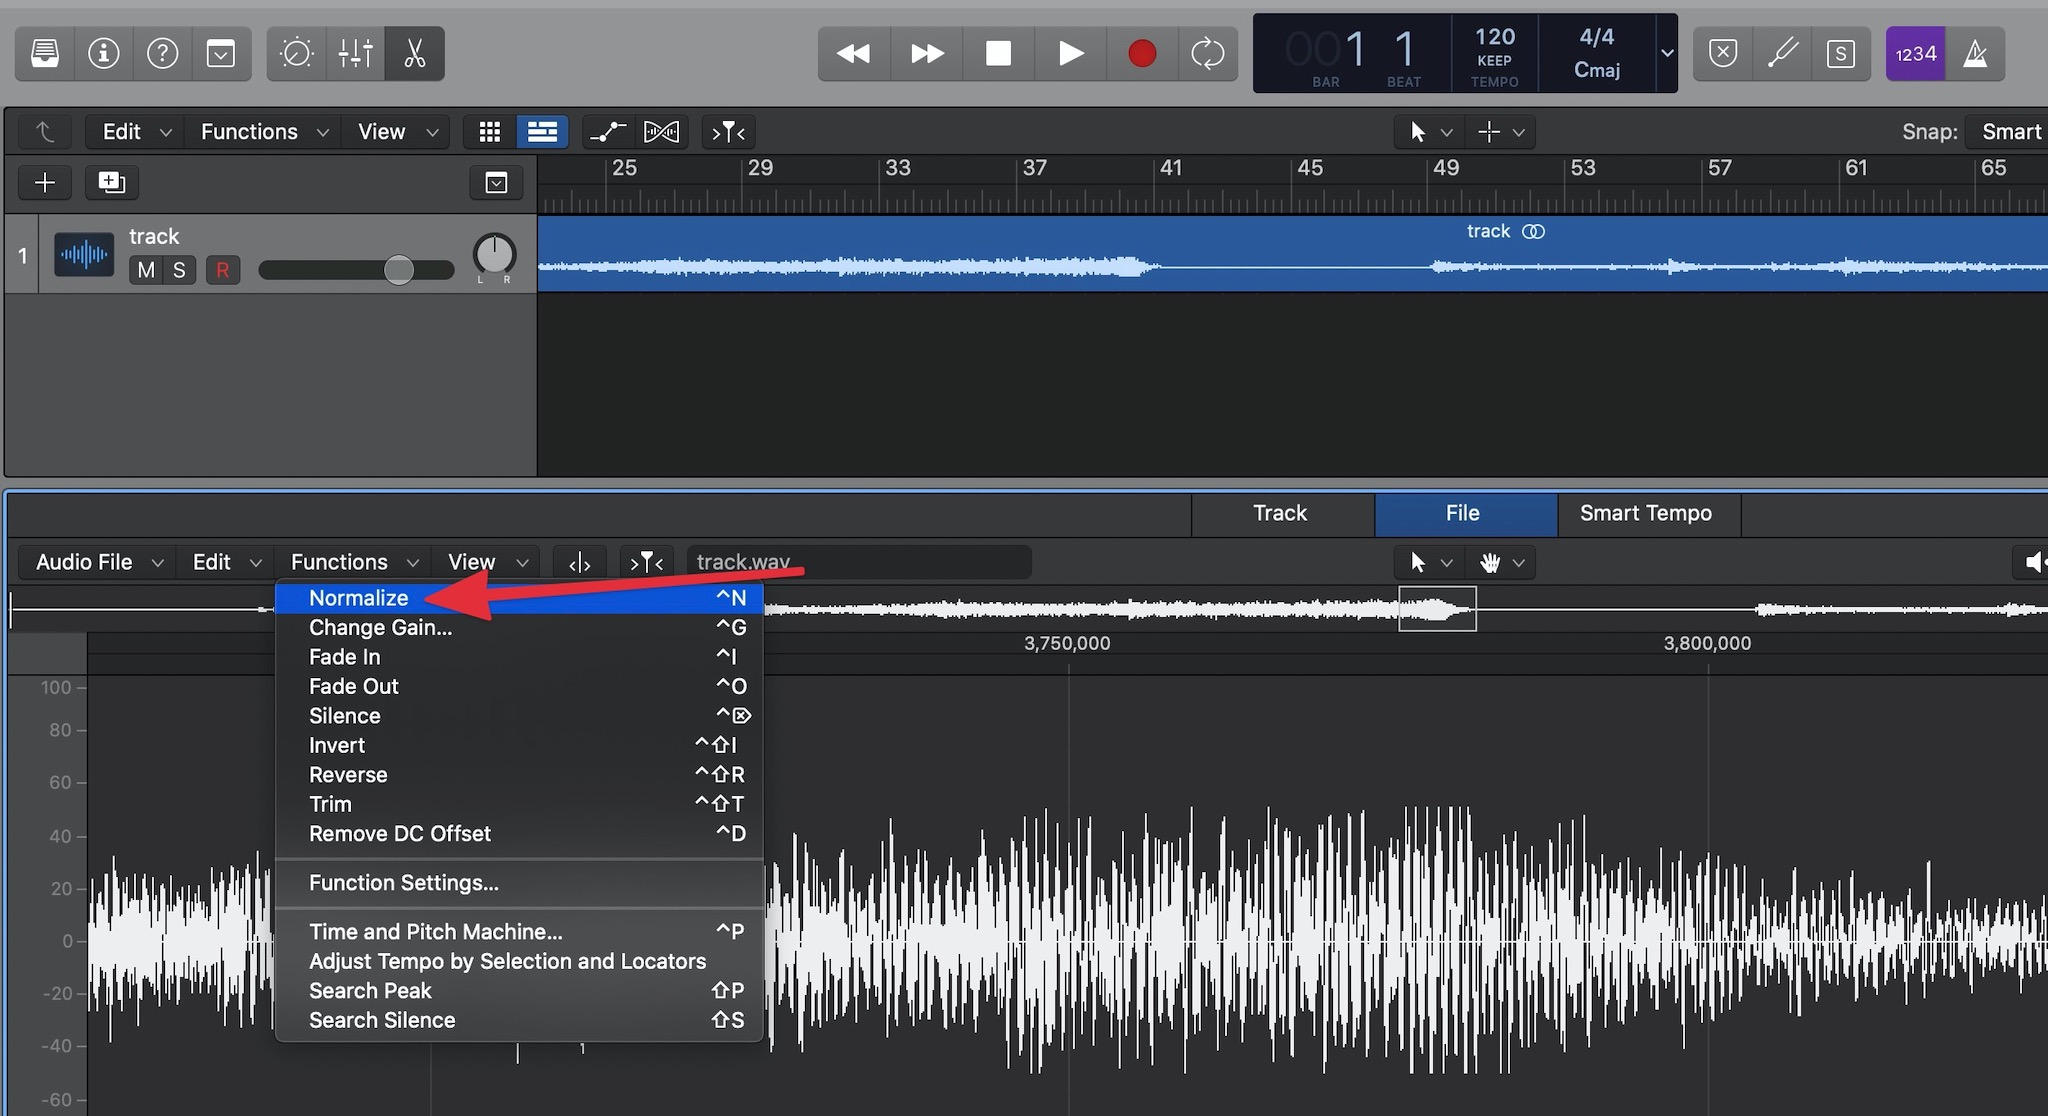
First, open up the Logic Pro X editor by pressing "E". In the editor, press Cmd+A to select the entire audio file, and click on the "File" tab. In the "Functions" dropdown menu, select the "Change Gain" option.
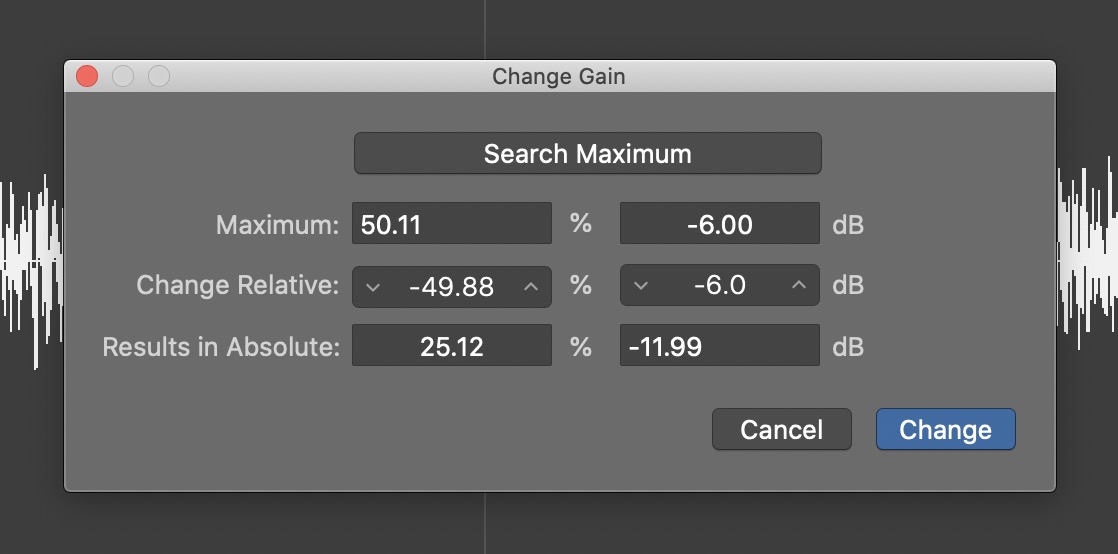
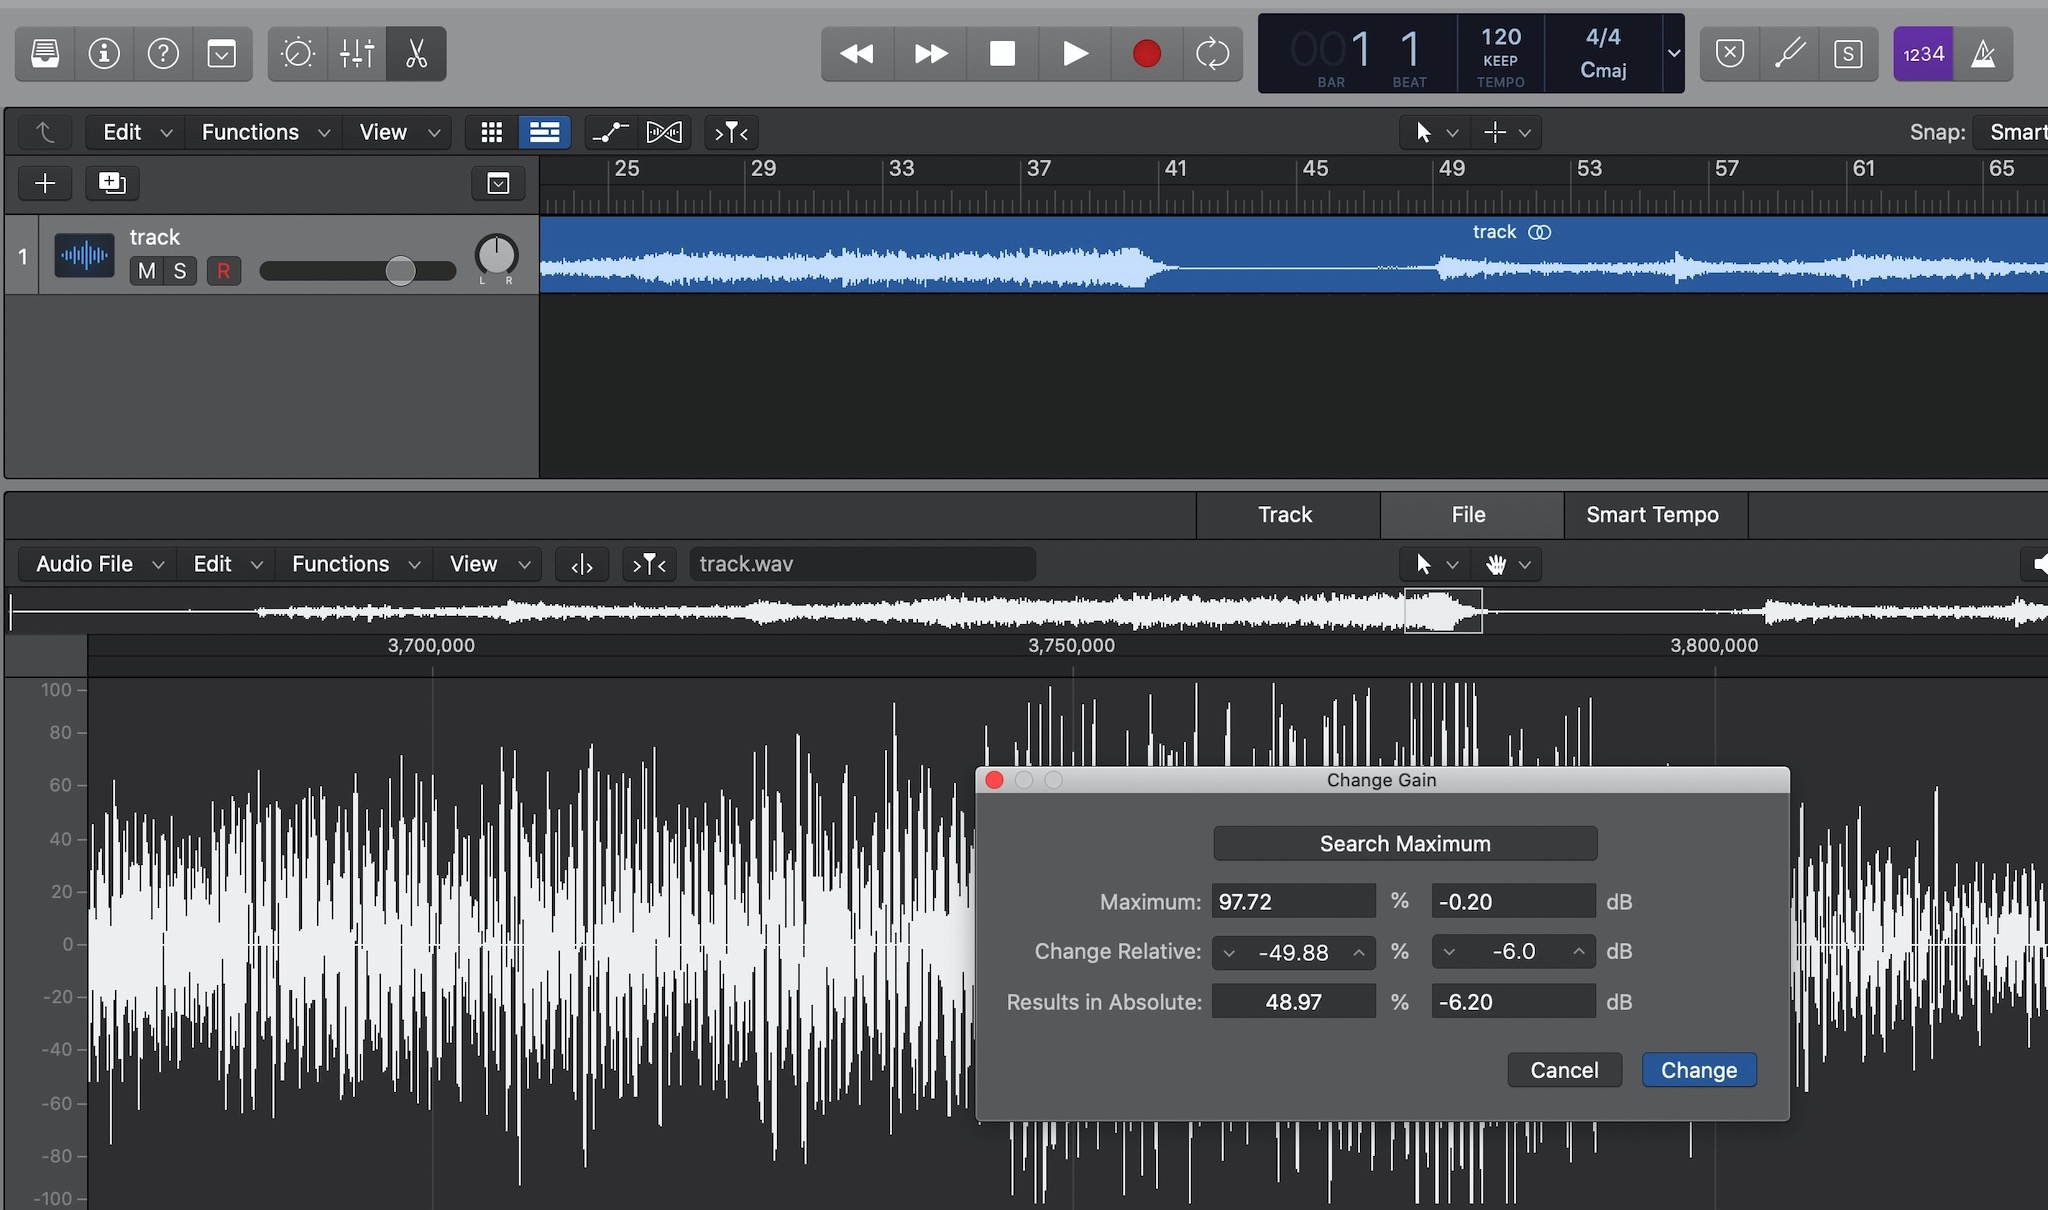
Next, you'll see a "Change Gain" modal. With the entire audio file selected, click "Search Maximum". Logic Pro X will then analyze your audio file and display the peak amplitude. In the screenshot below, the peak in my audio file is -6.00 dB.
As I mentioned earlier, finding the peak amplitude of an audio file is not a required step in the normalization process. However, it's good to know how to do this in case you ever need to verify the peak amplitude of a normalized file.
Normalize Audio with the Logic Pro X Editor
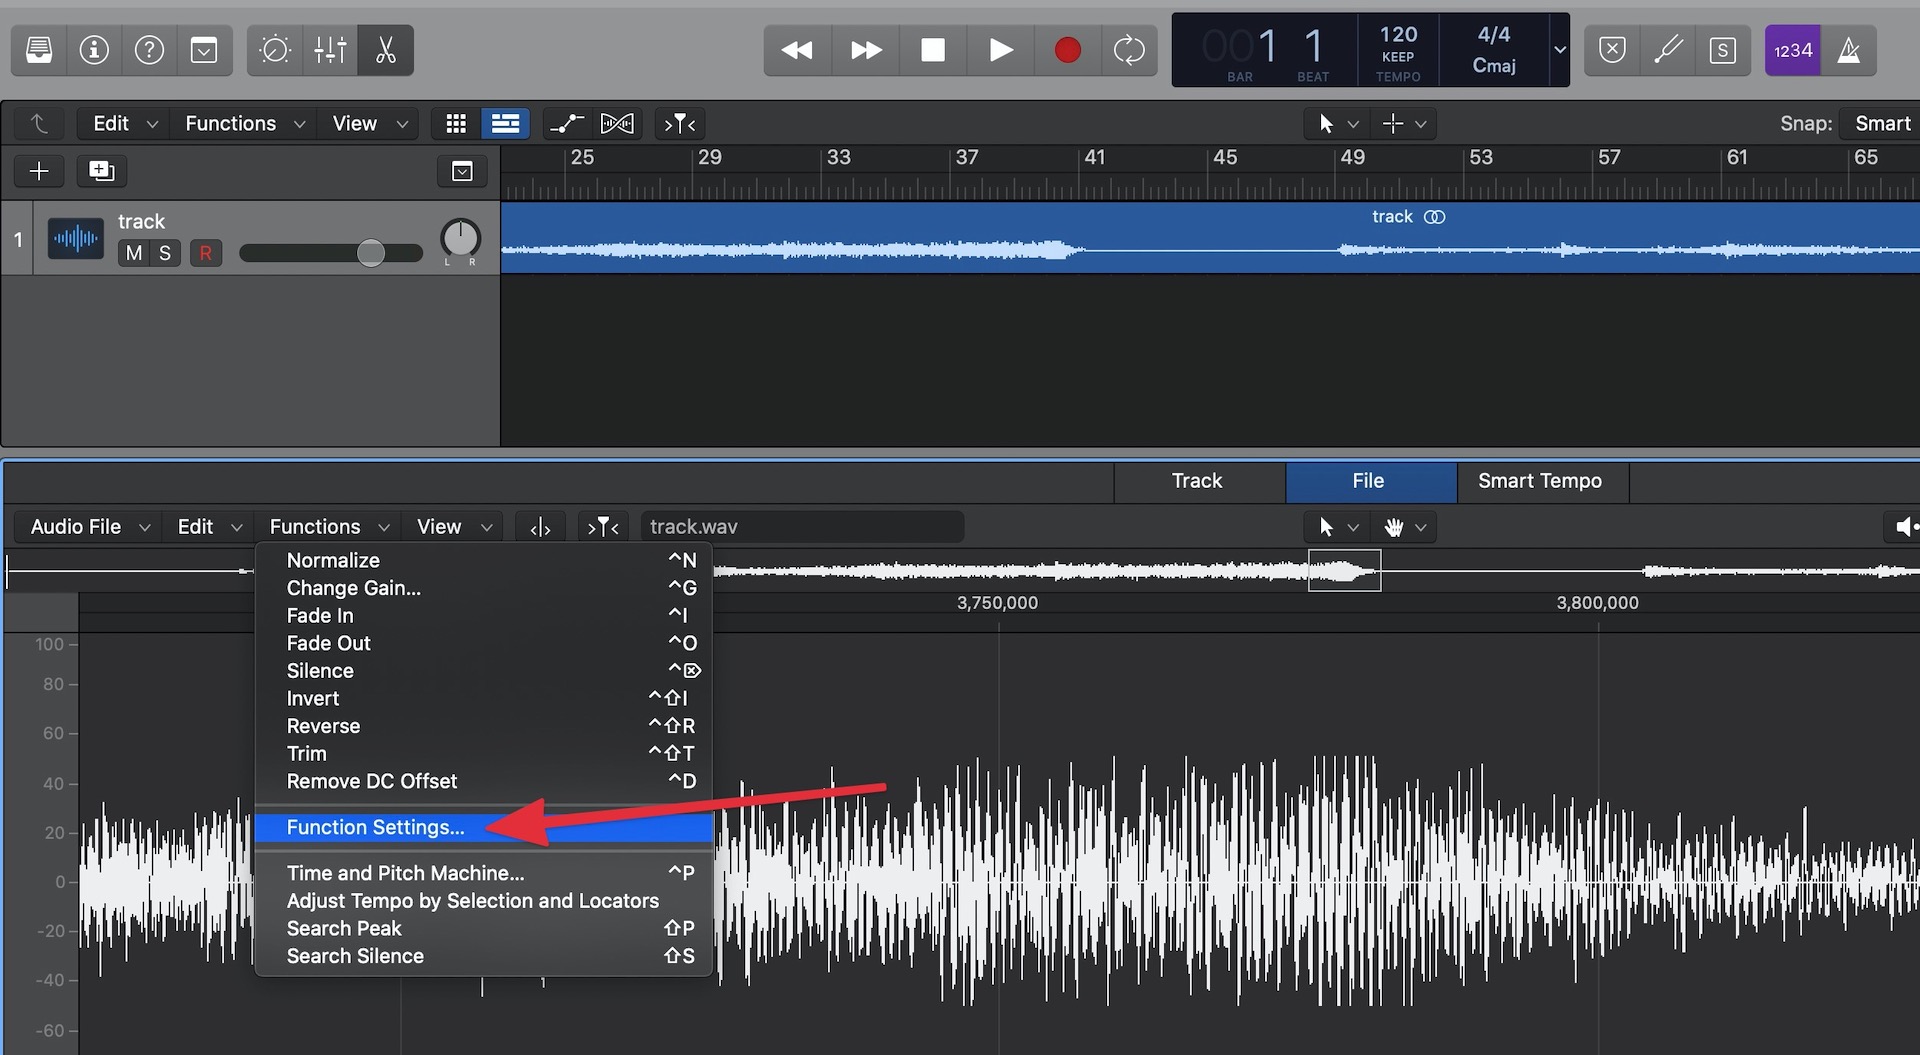
The first method of normalizing audio in Logic Pro X is via the editor. This method is "destructive" in nature, so it will directly manipulate the original audio file. First, click on "Function Settings" in the "Functions" dropdown menu.
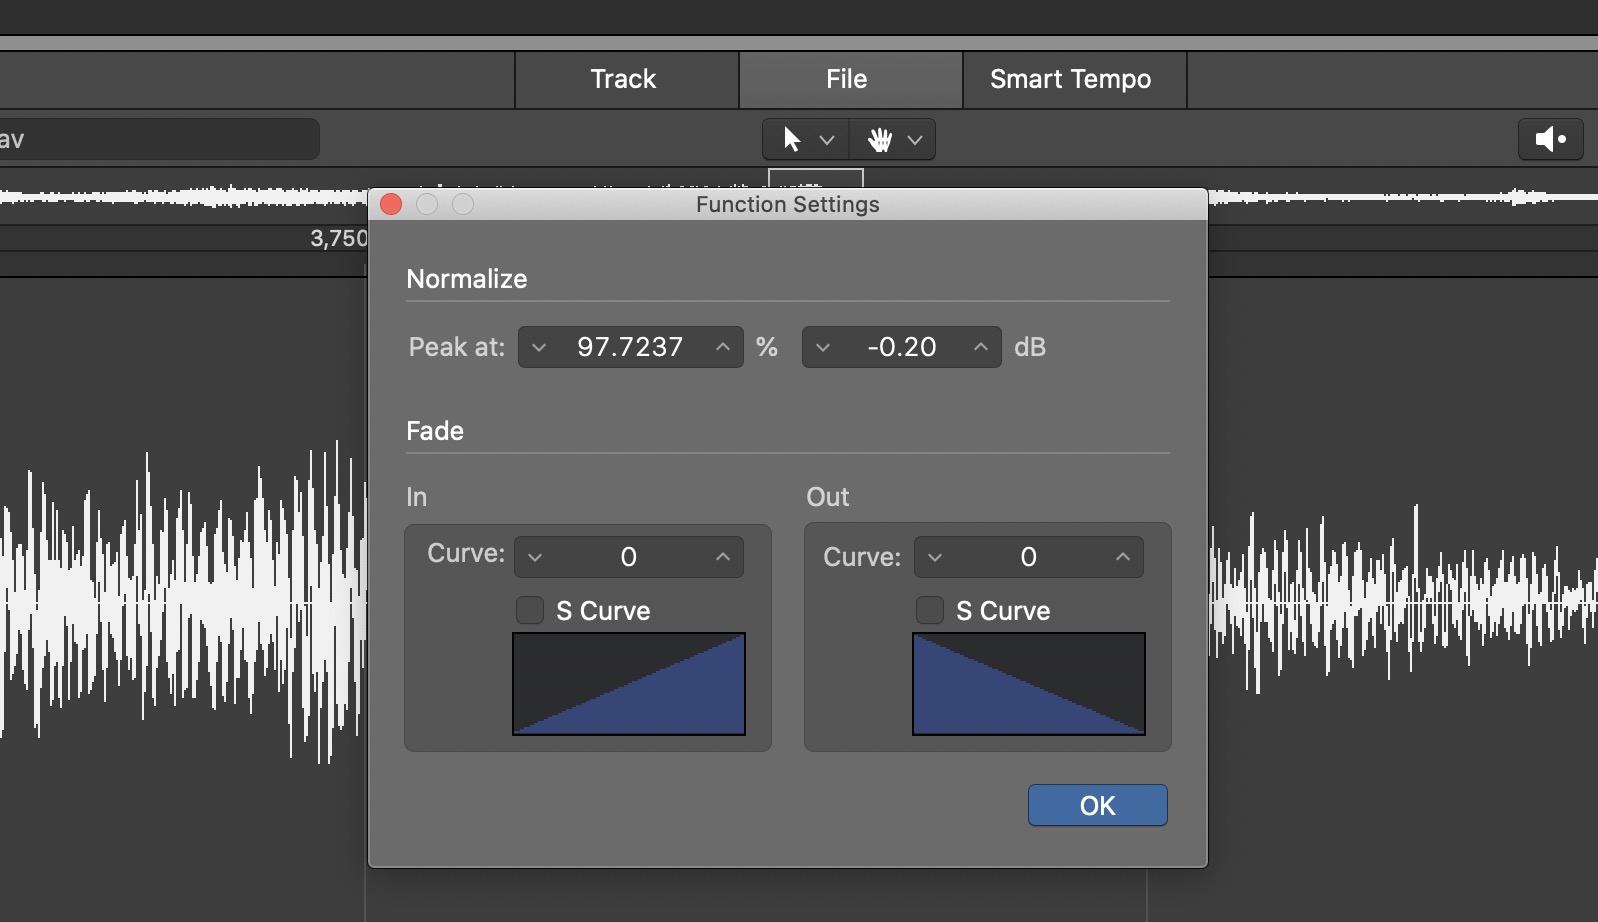
In the "Function Settings" modal, set the "Peak At" setting to the desired normalization level. If you're preparing a track for distribution, I'd recommend either -0.2 dB or -0.1 dB. There is no "correct" level here because everyone has their own opinion. Personally, I typically use -0.2 dB to give just a little buffer room for inaccurate digital-to-analog conversion on playback or inter-sample peaks. If you're a sound engineer who's preparing sound effects, feel free to change the normalization peak to whatever you need.
After specifying a peak setting, click "OK". Next, press Cmd+A to select the entire audio file in the editor, click on the "Functions" dropdown menu again, and select the "Normalize" option. This will normalize your audio file to the specified peak value in the function settings menu.
In the screenshot below, you can see my normalized audio file now peaks at -0.2 dB instead of the original peak value of -6 dB.
Normalize Audio While Bouncing a Project
In Logic Pro X, audio normalization can also be performed when bouncing a project. Even though this particular feature is often the center of controversy, it's still important to know about it because it can be very useful in certain situations.
Without getting into the technical details too much, there are basically two camps when it comes to Logic Pro X's bounce normalization feature. One side thinks it's a bad feature because the resulting normalized file won't be a 1:1 representation of a project. Meanwhile, the other side sees it as a convenient way to maximize the peak amplitude of a project.
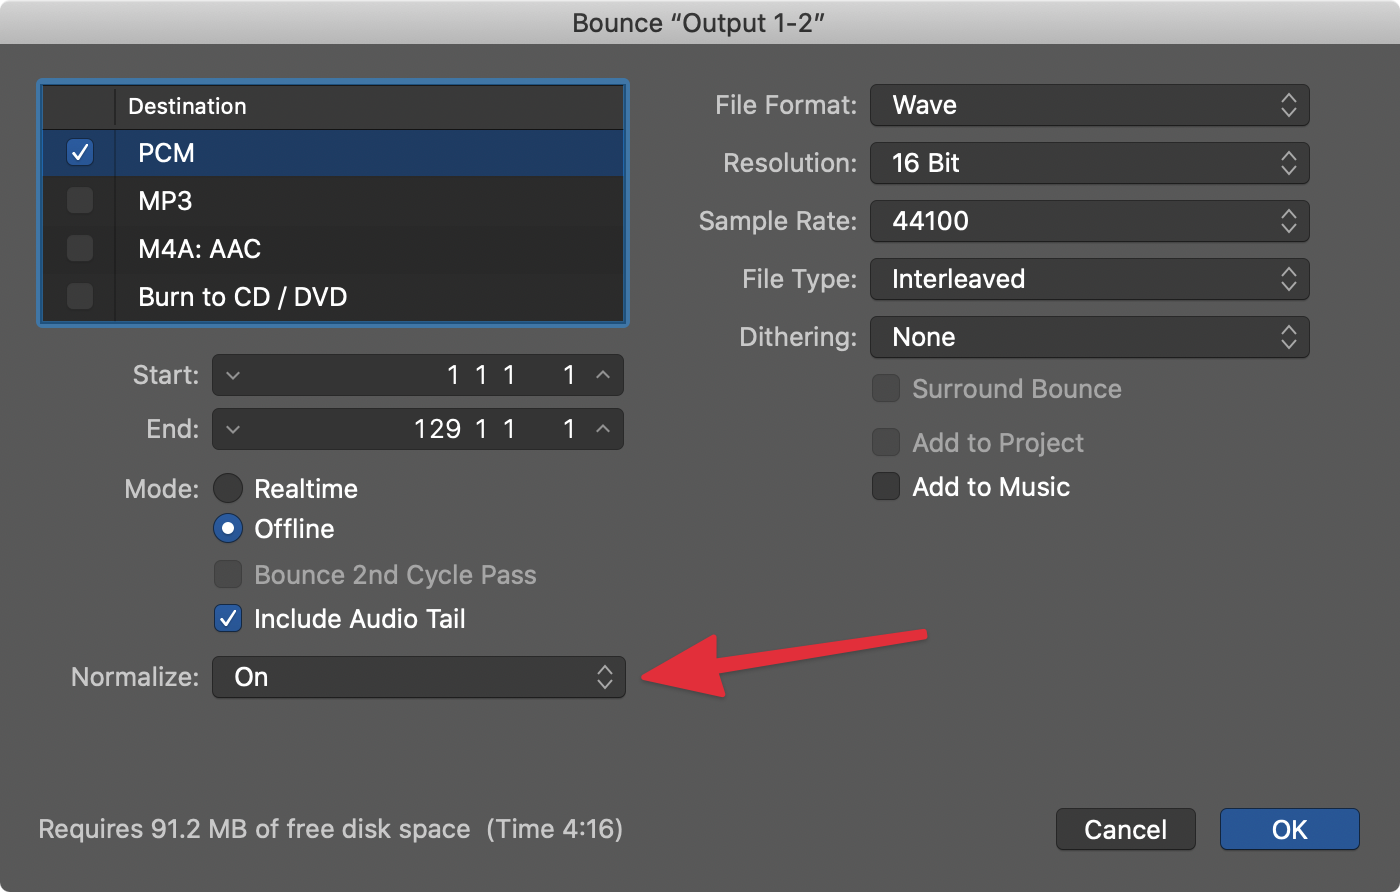
For my personal projects, I've left this bounce normalization in the "On" setting even when using a limiter on my master bus with no issues. When it comes down to it, I think bounce normalization is most useful for music producers because it's more of "global" or "final bounce" tool.
For sound engineers and other people who need to normalize individual files, I'd recommend the previous method because bounce normalization doesn't allow you to set an explicit maximum peak value.
Conclusion
As you can see, normalizing audio in Logic Pro X is quite simple. Between the editor and bounce dialog, you have two ways to maximize the peak amplitude of your project or audio file. If you have any questions about how to normalize volume in Logic Pro X, feel free to send me an email or reach out on Twitter!